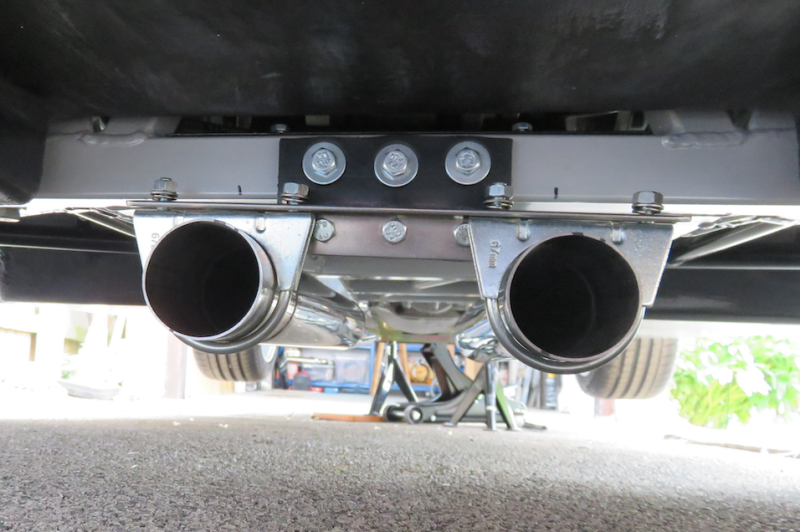
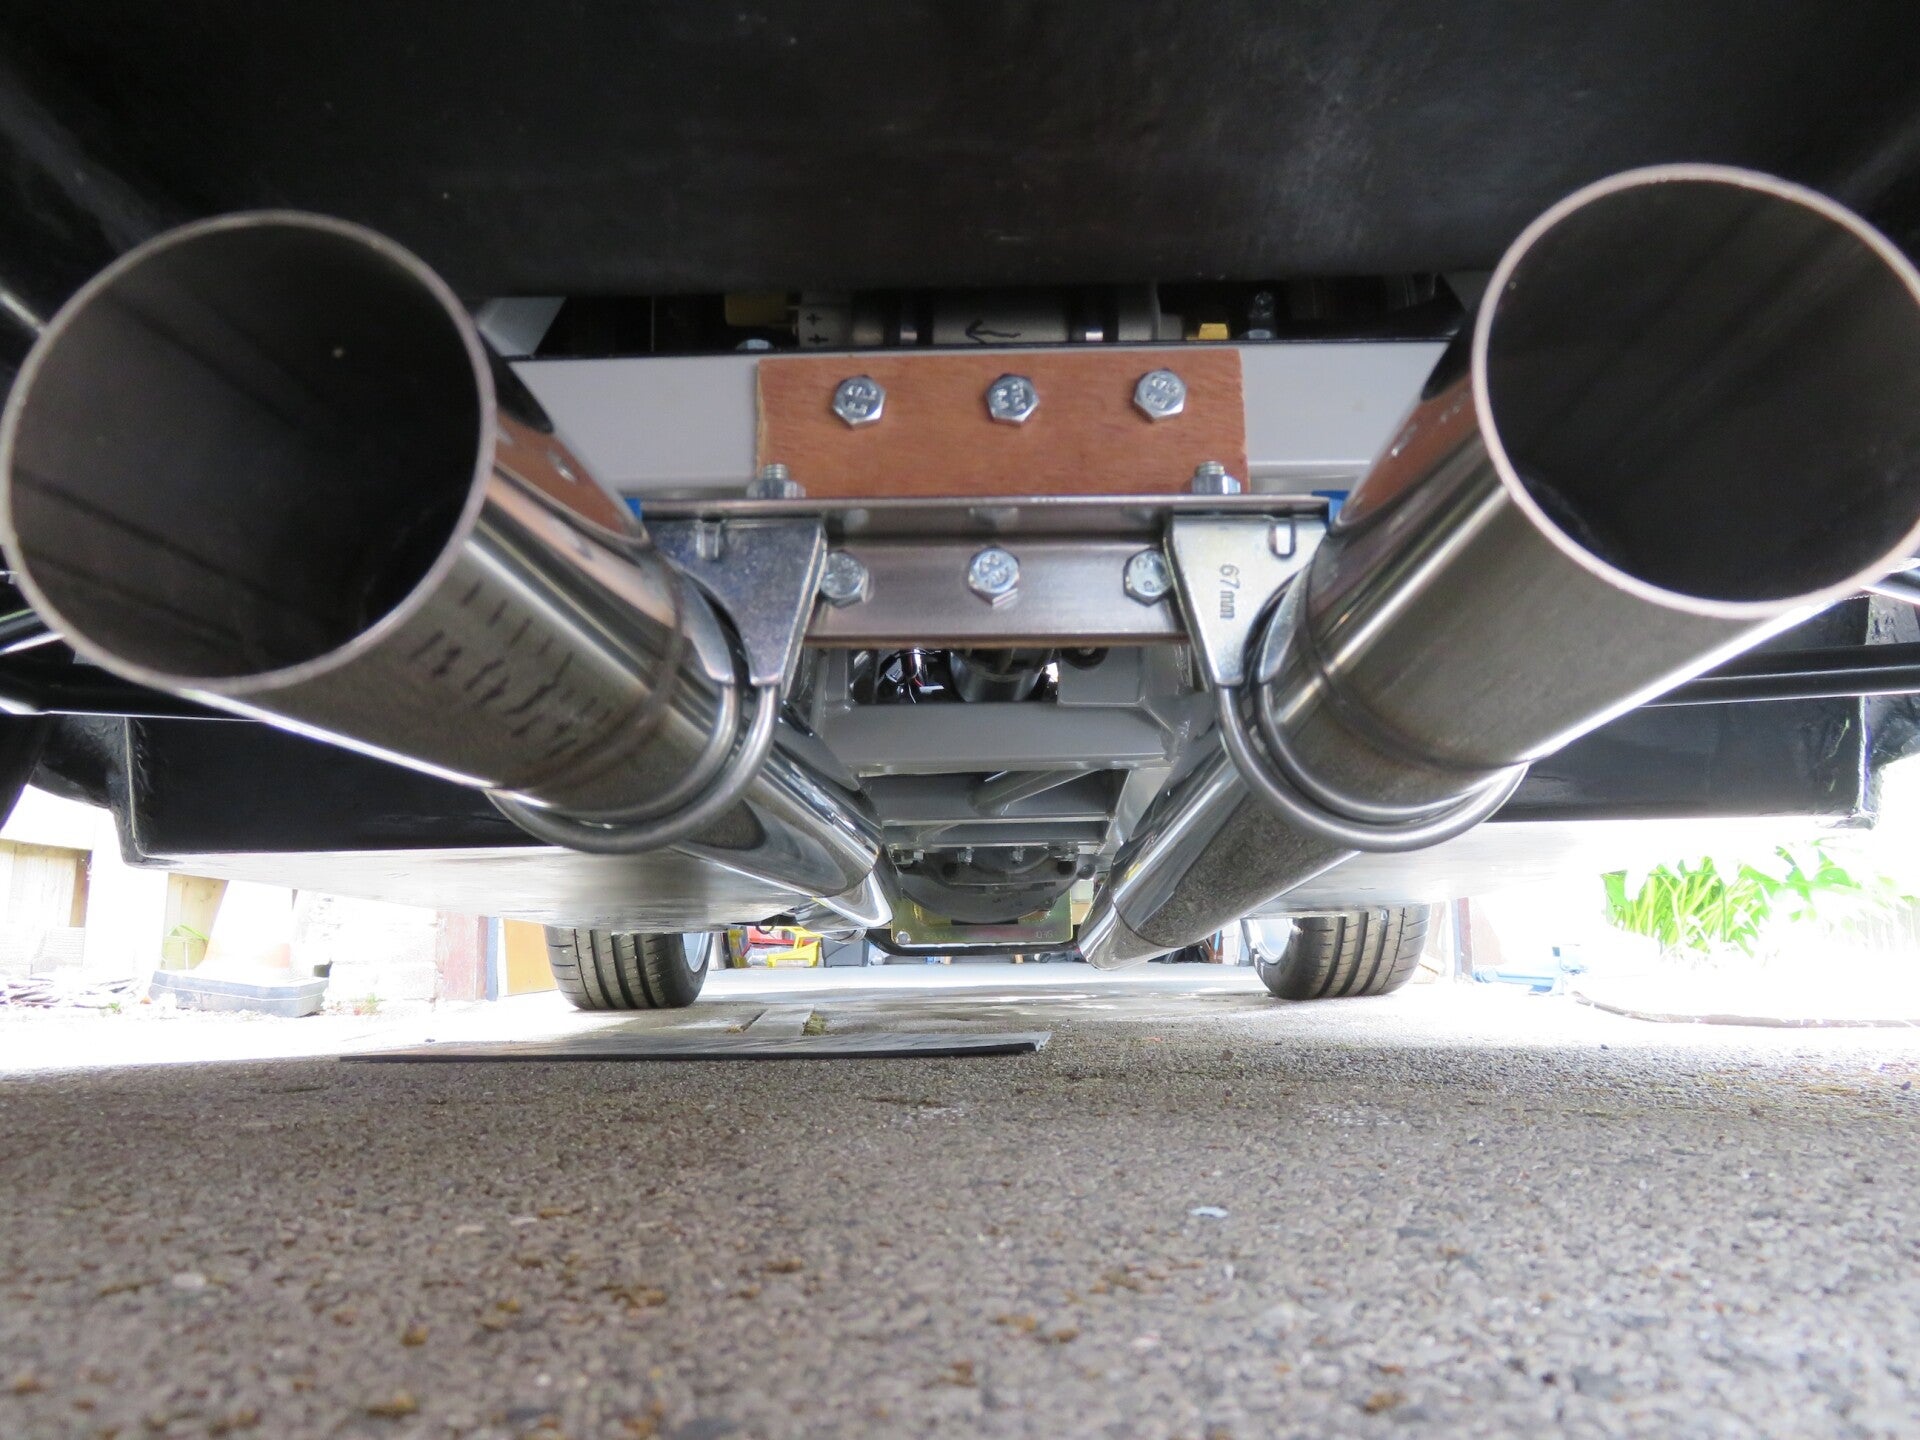
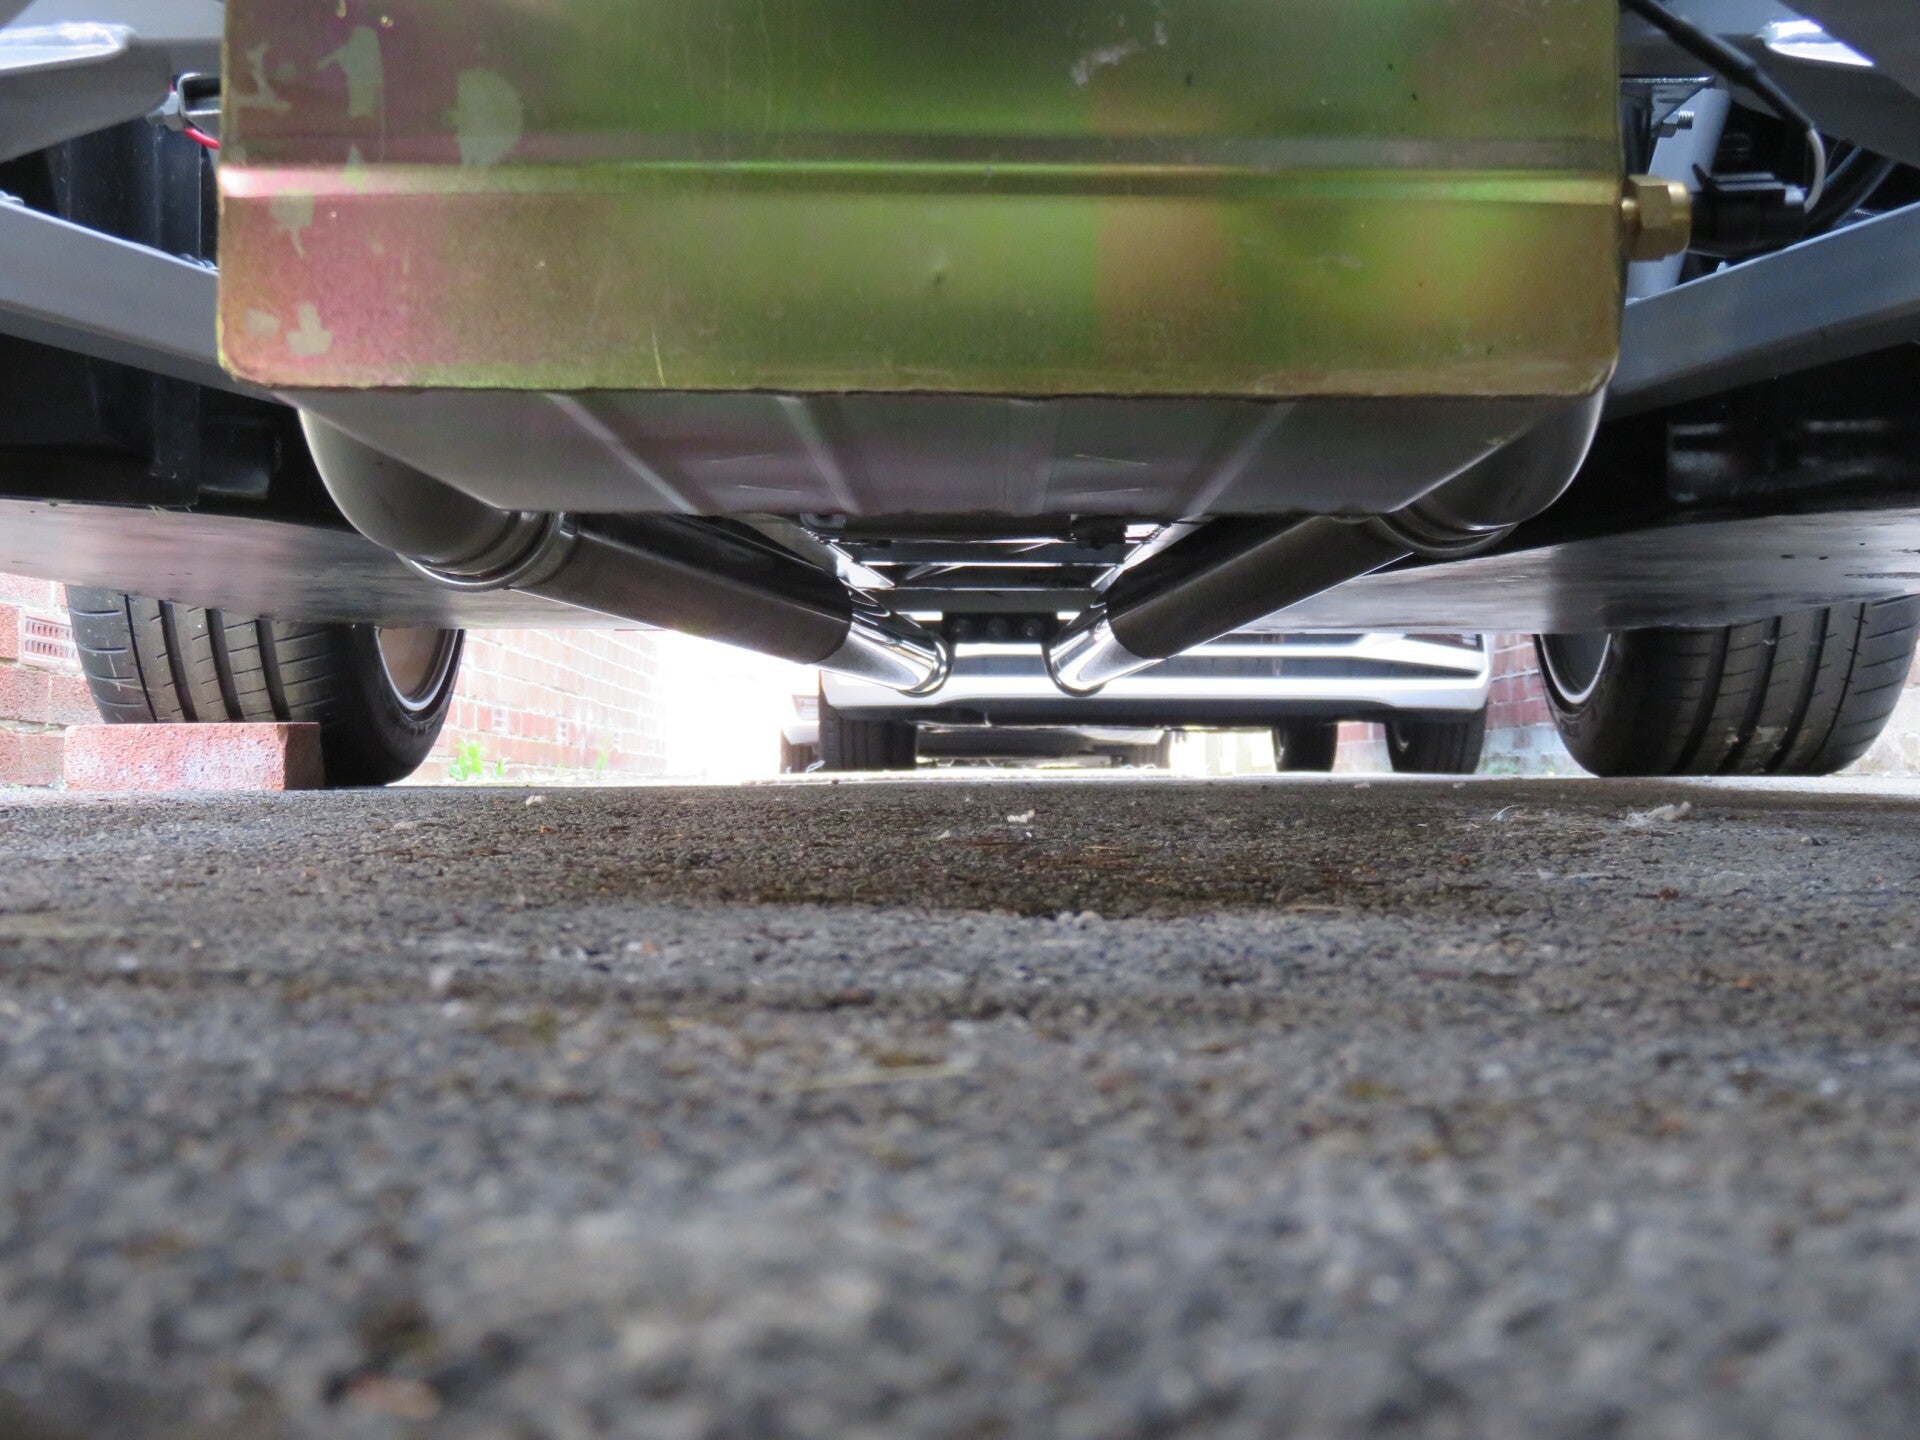
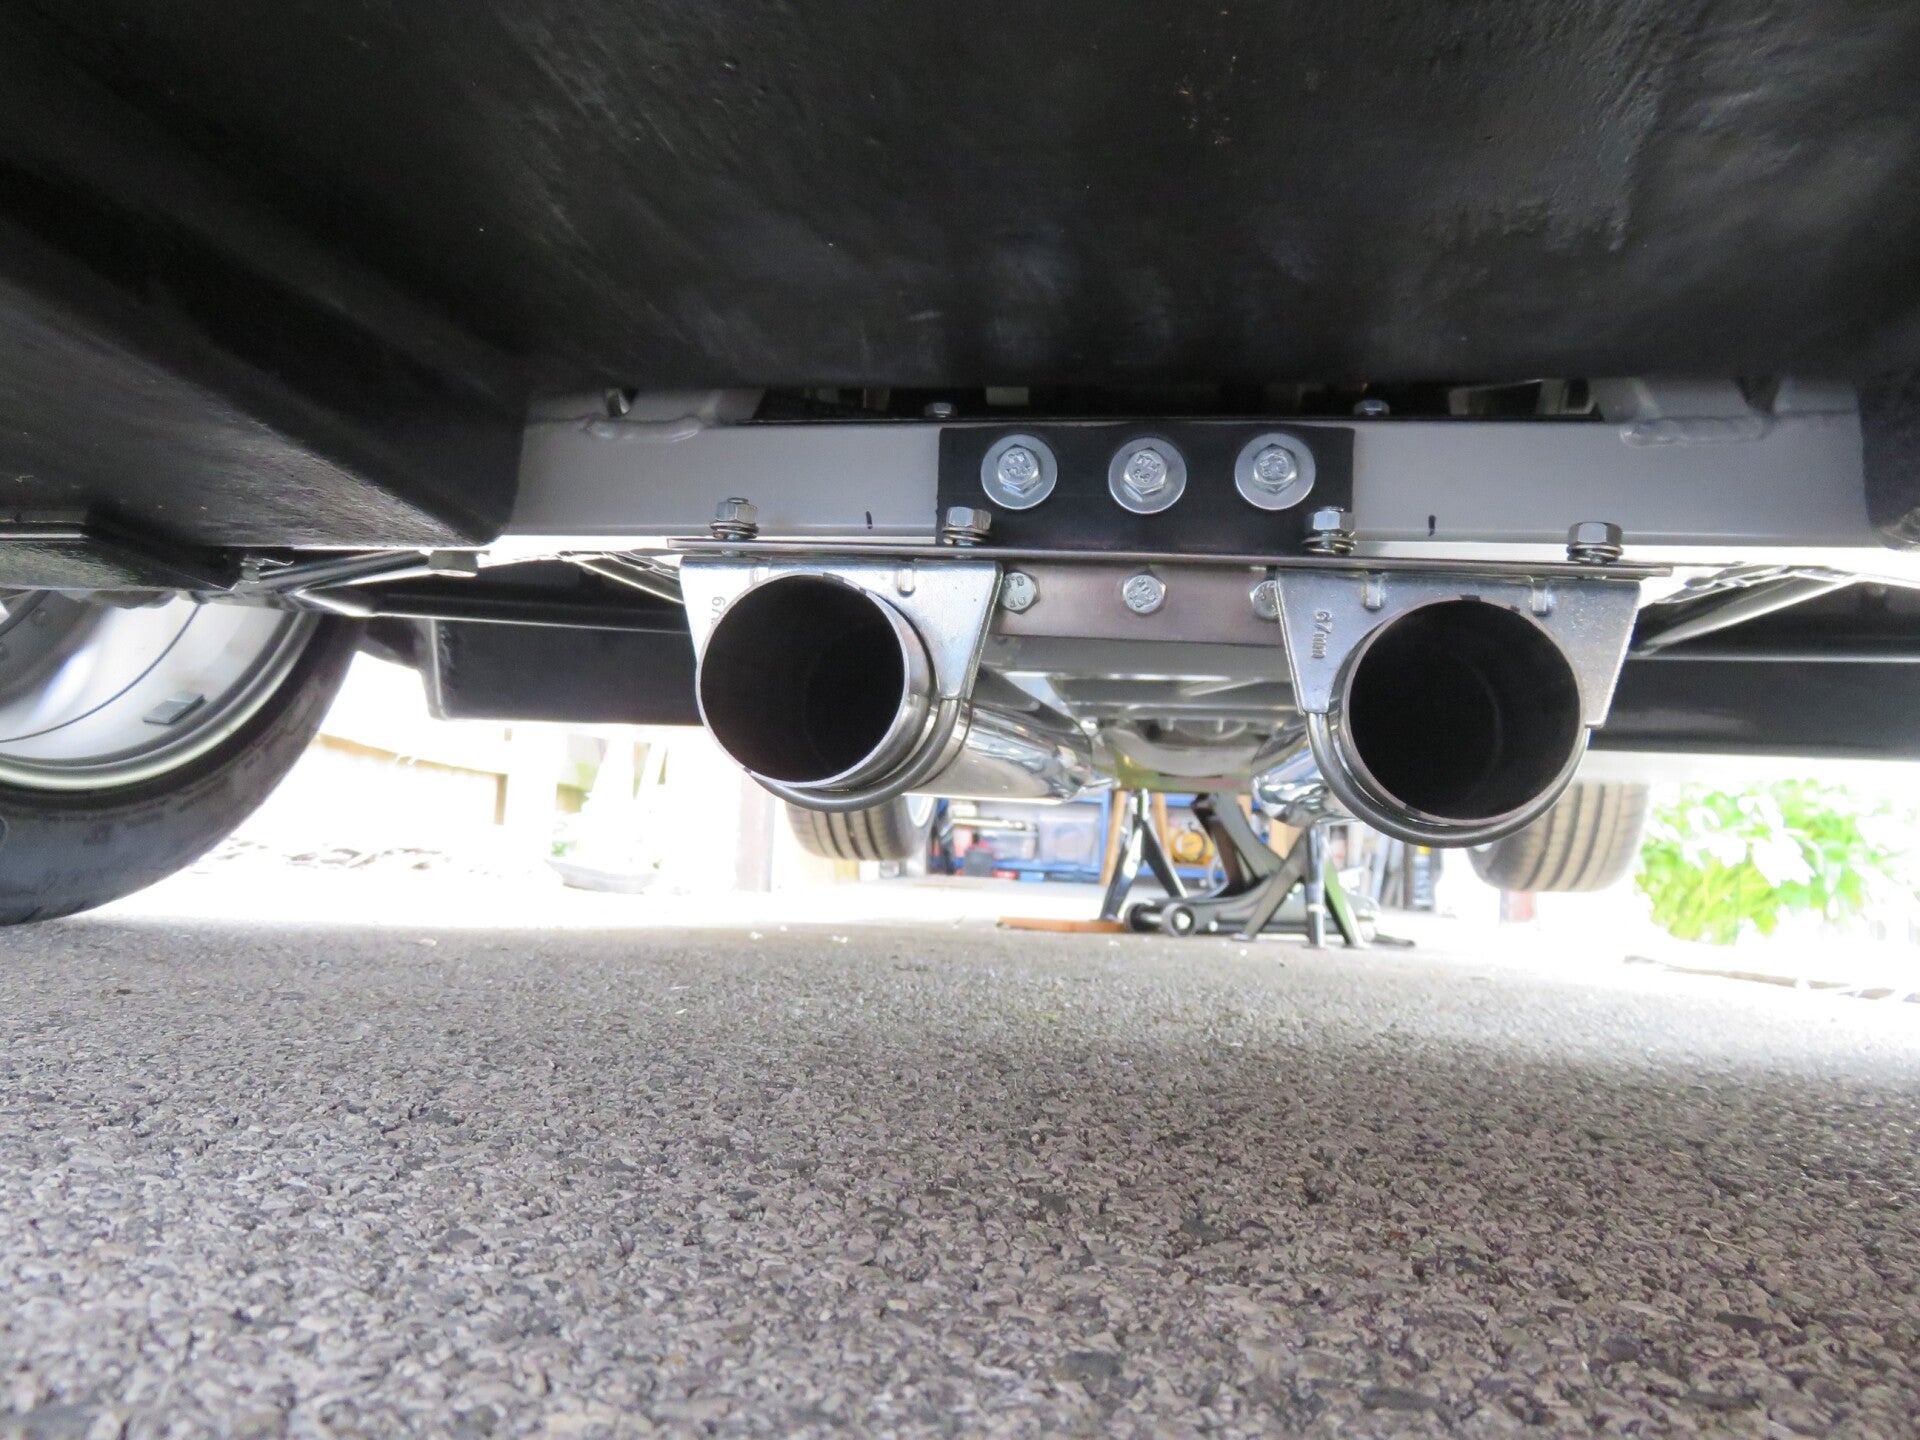
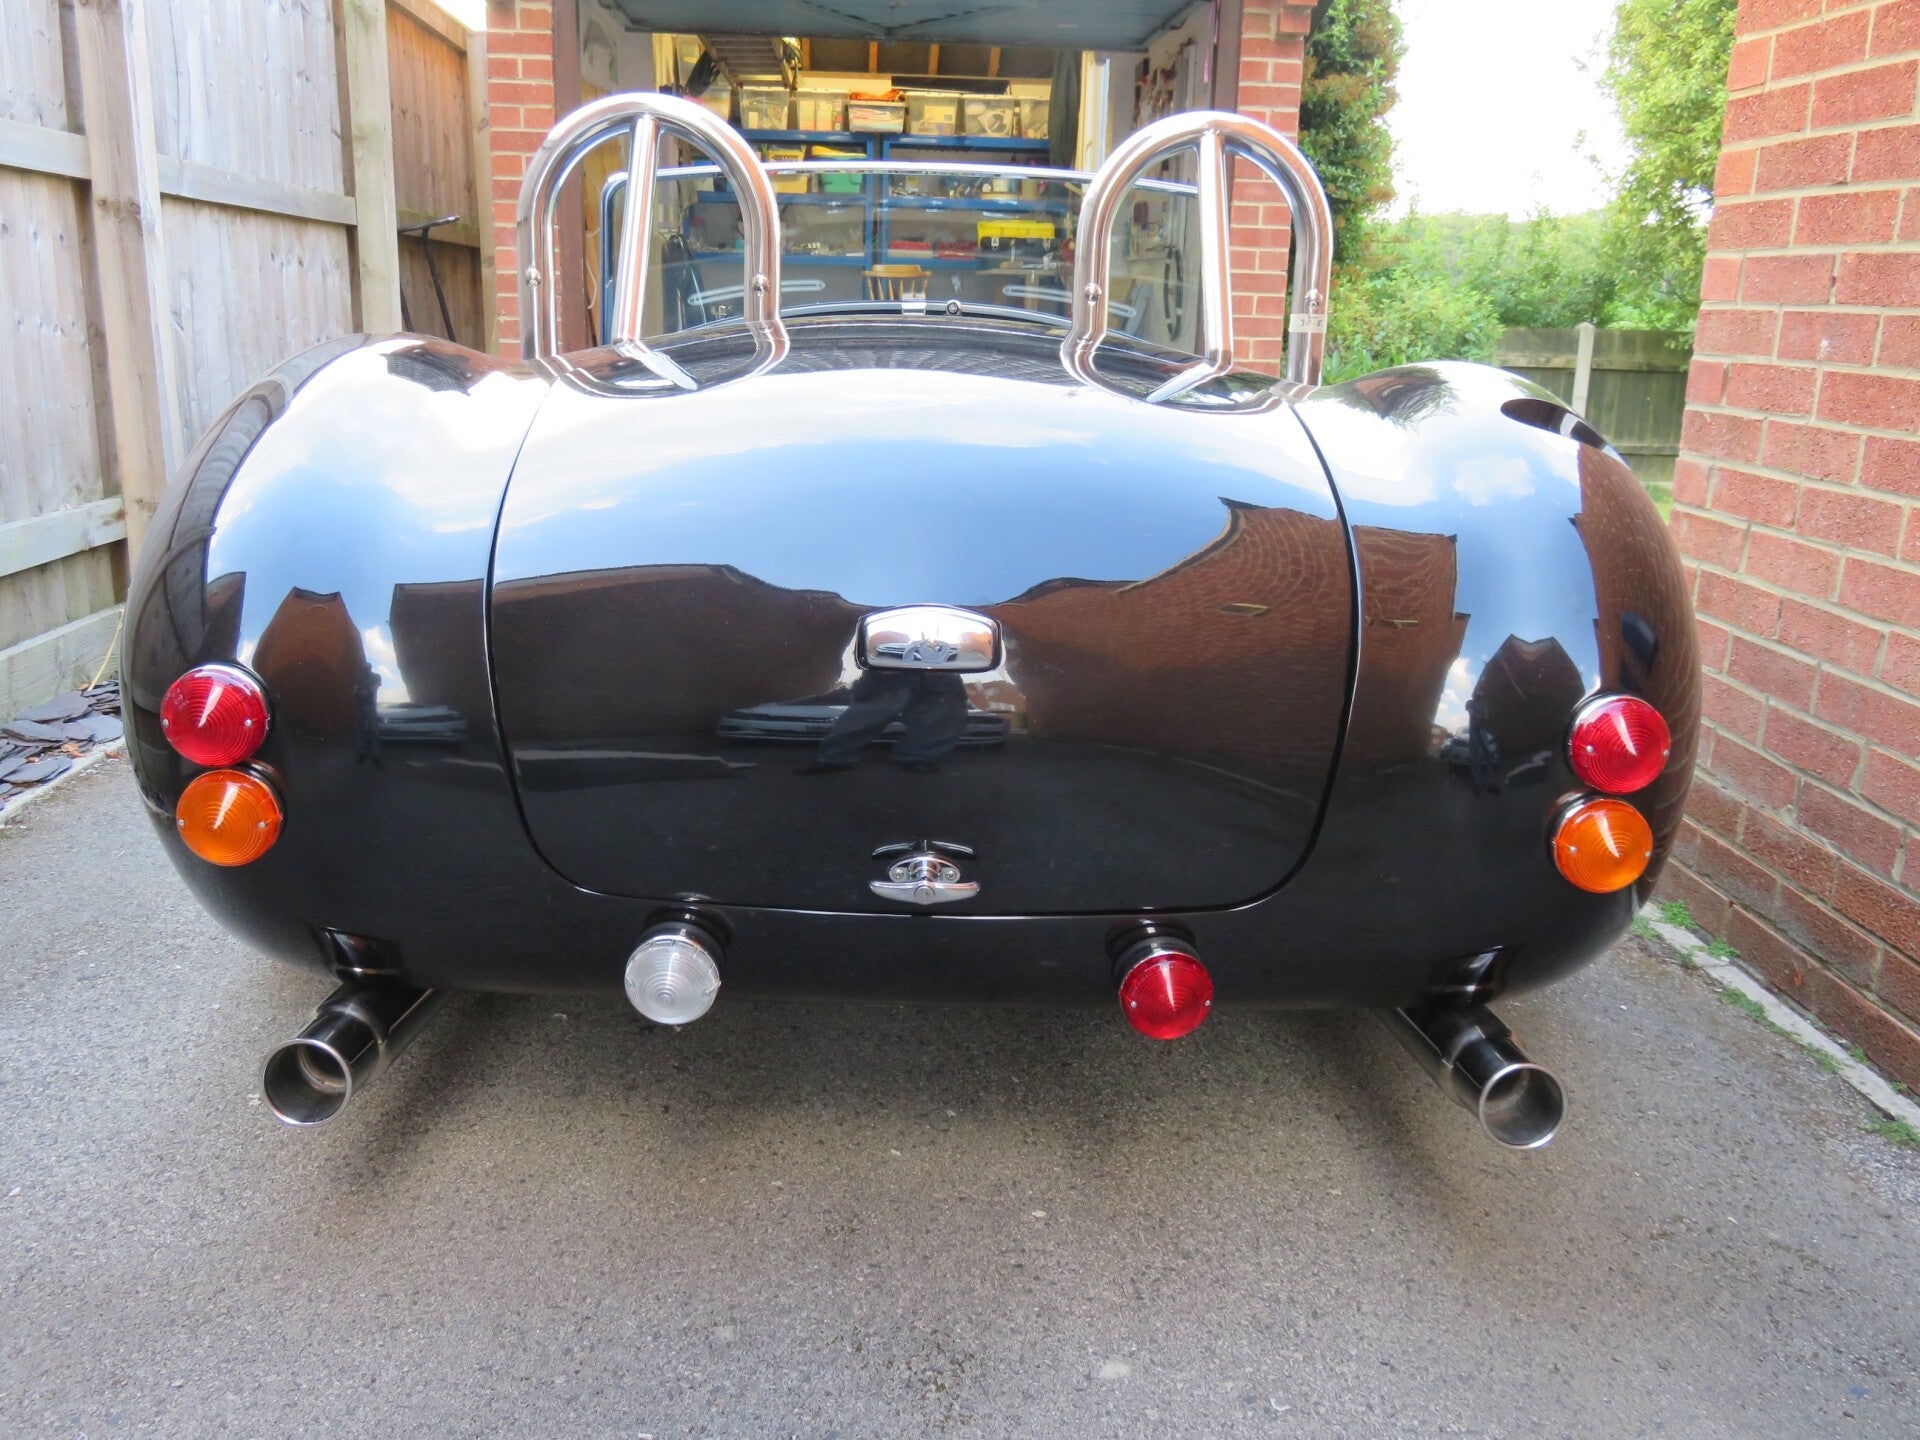
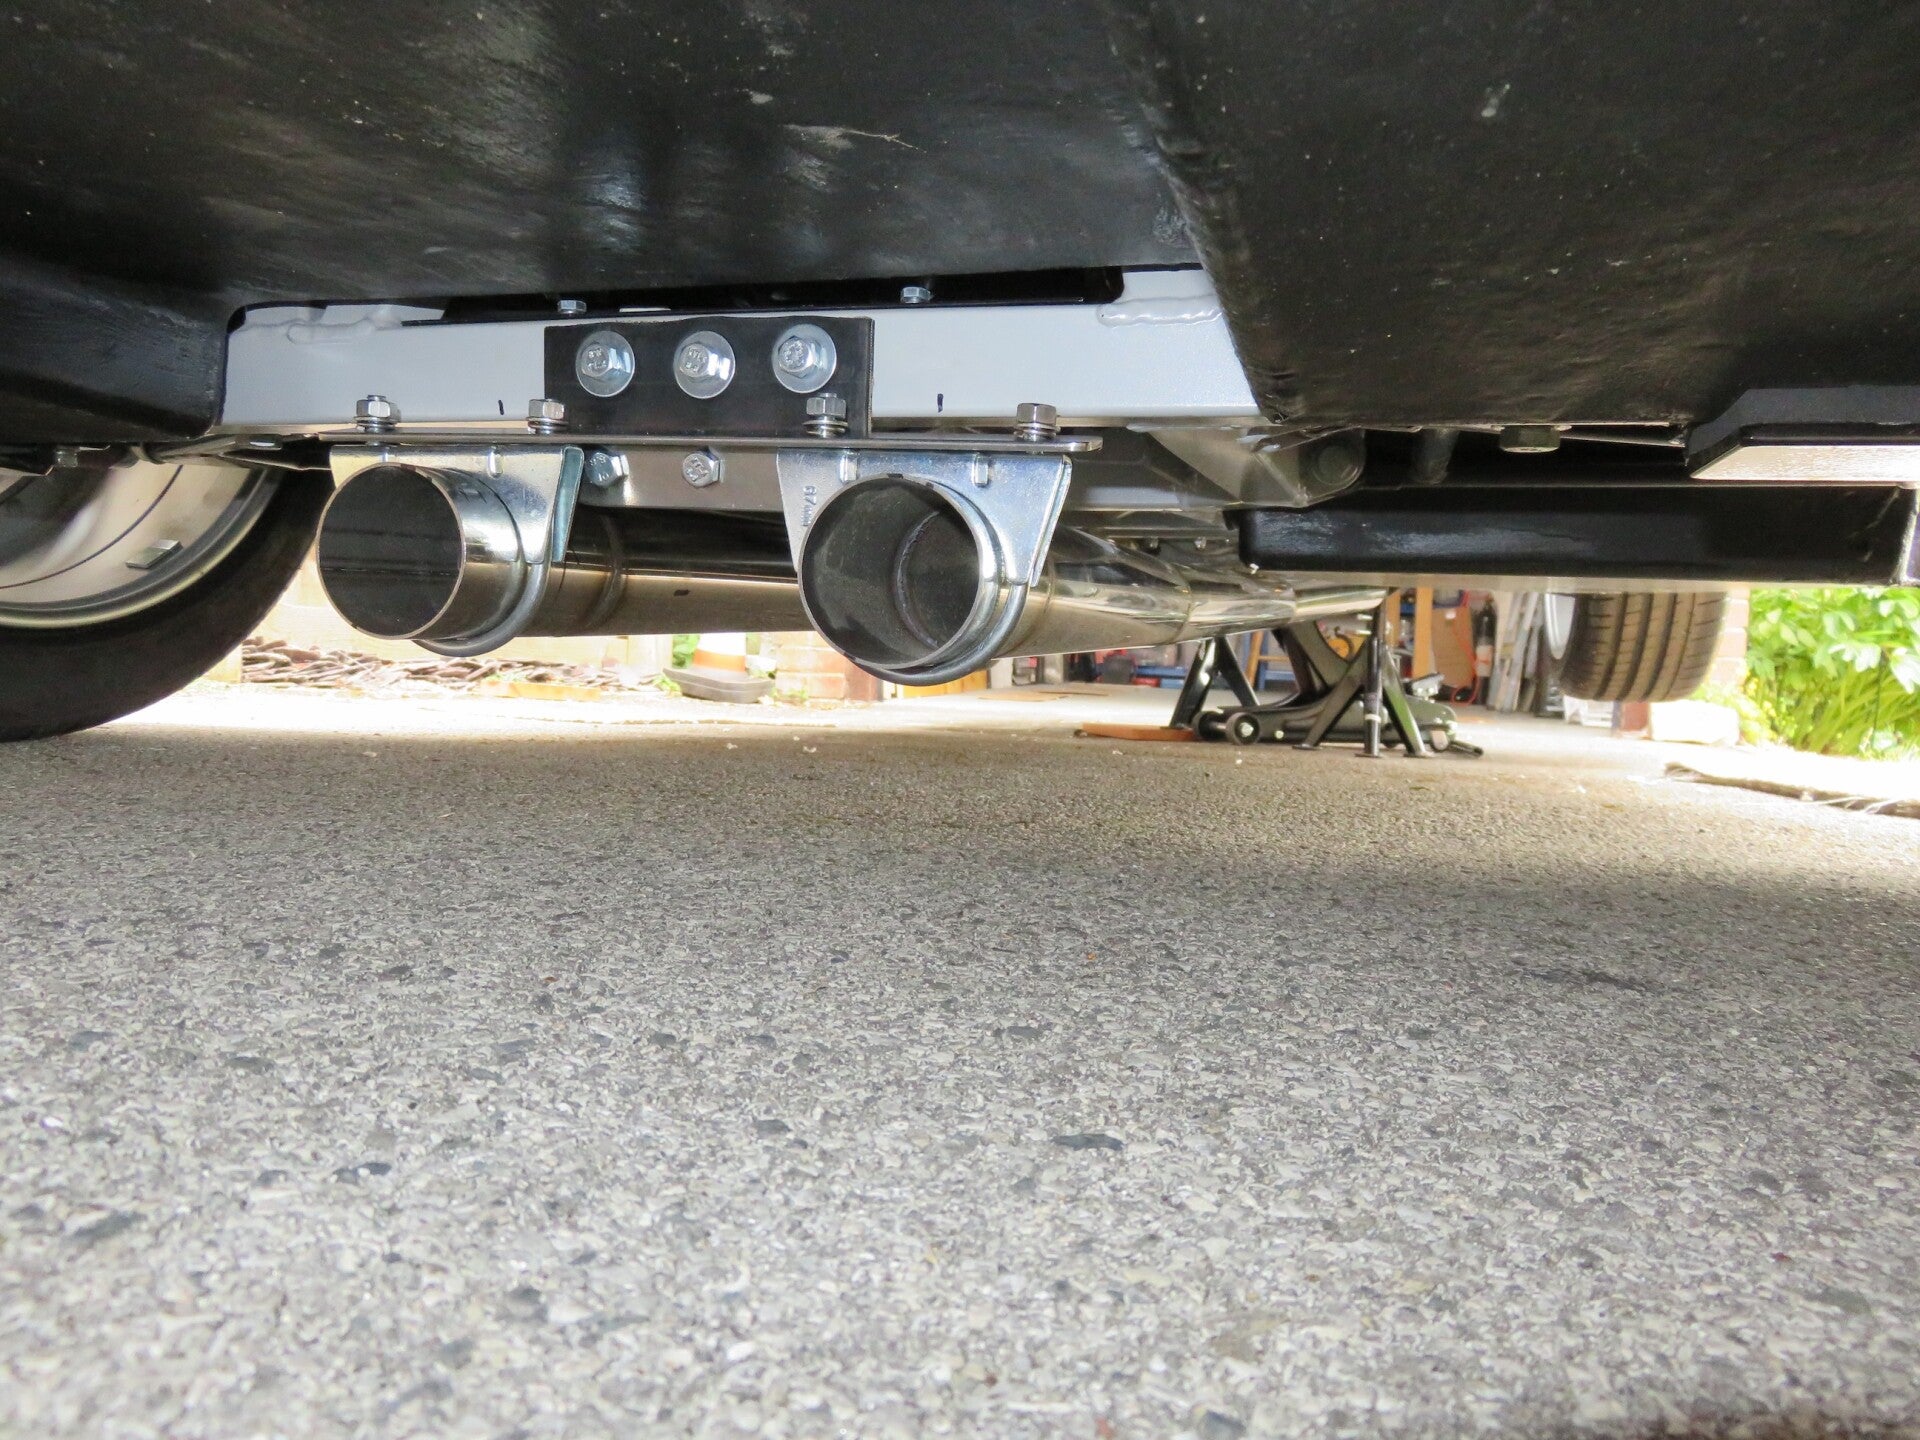
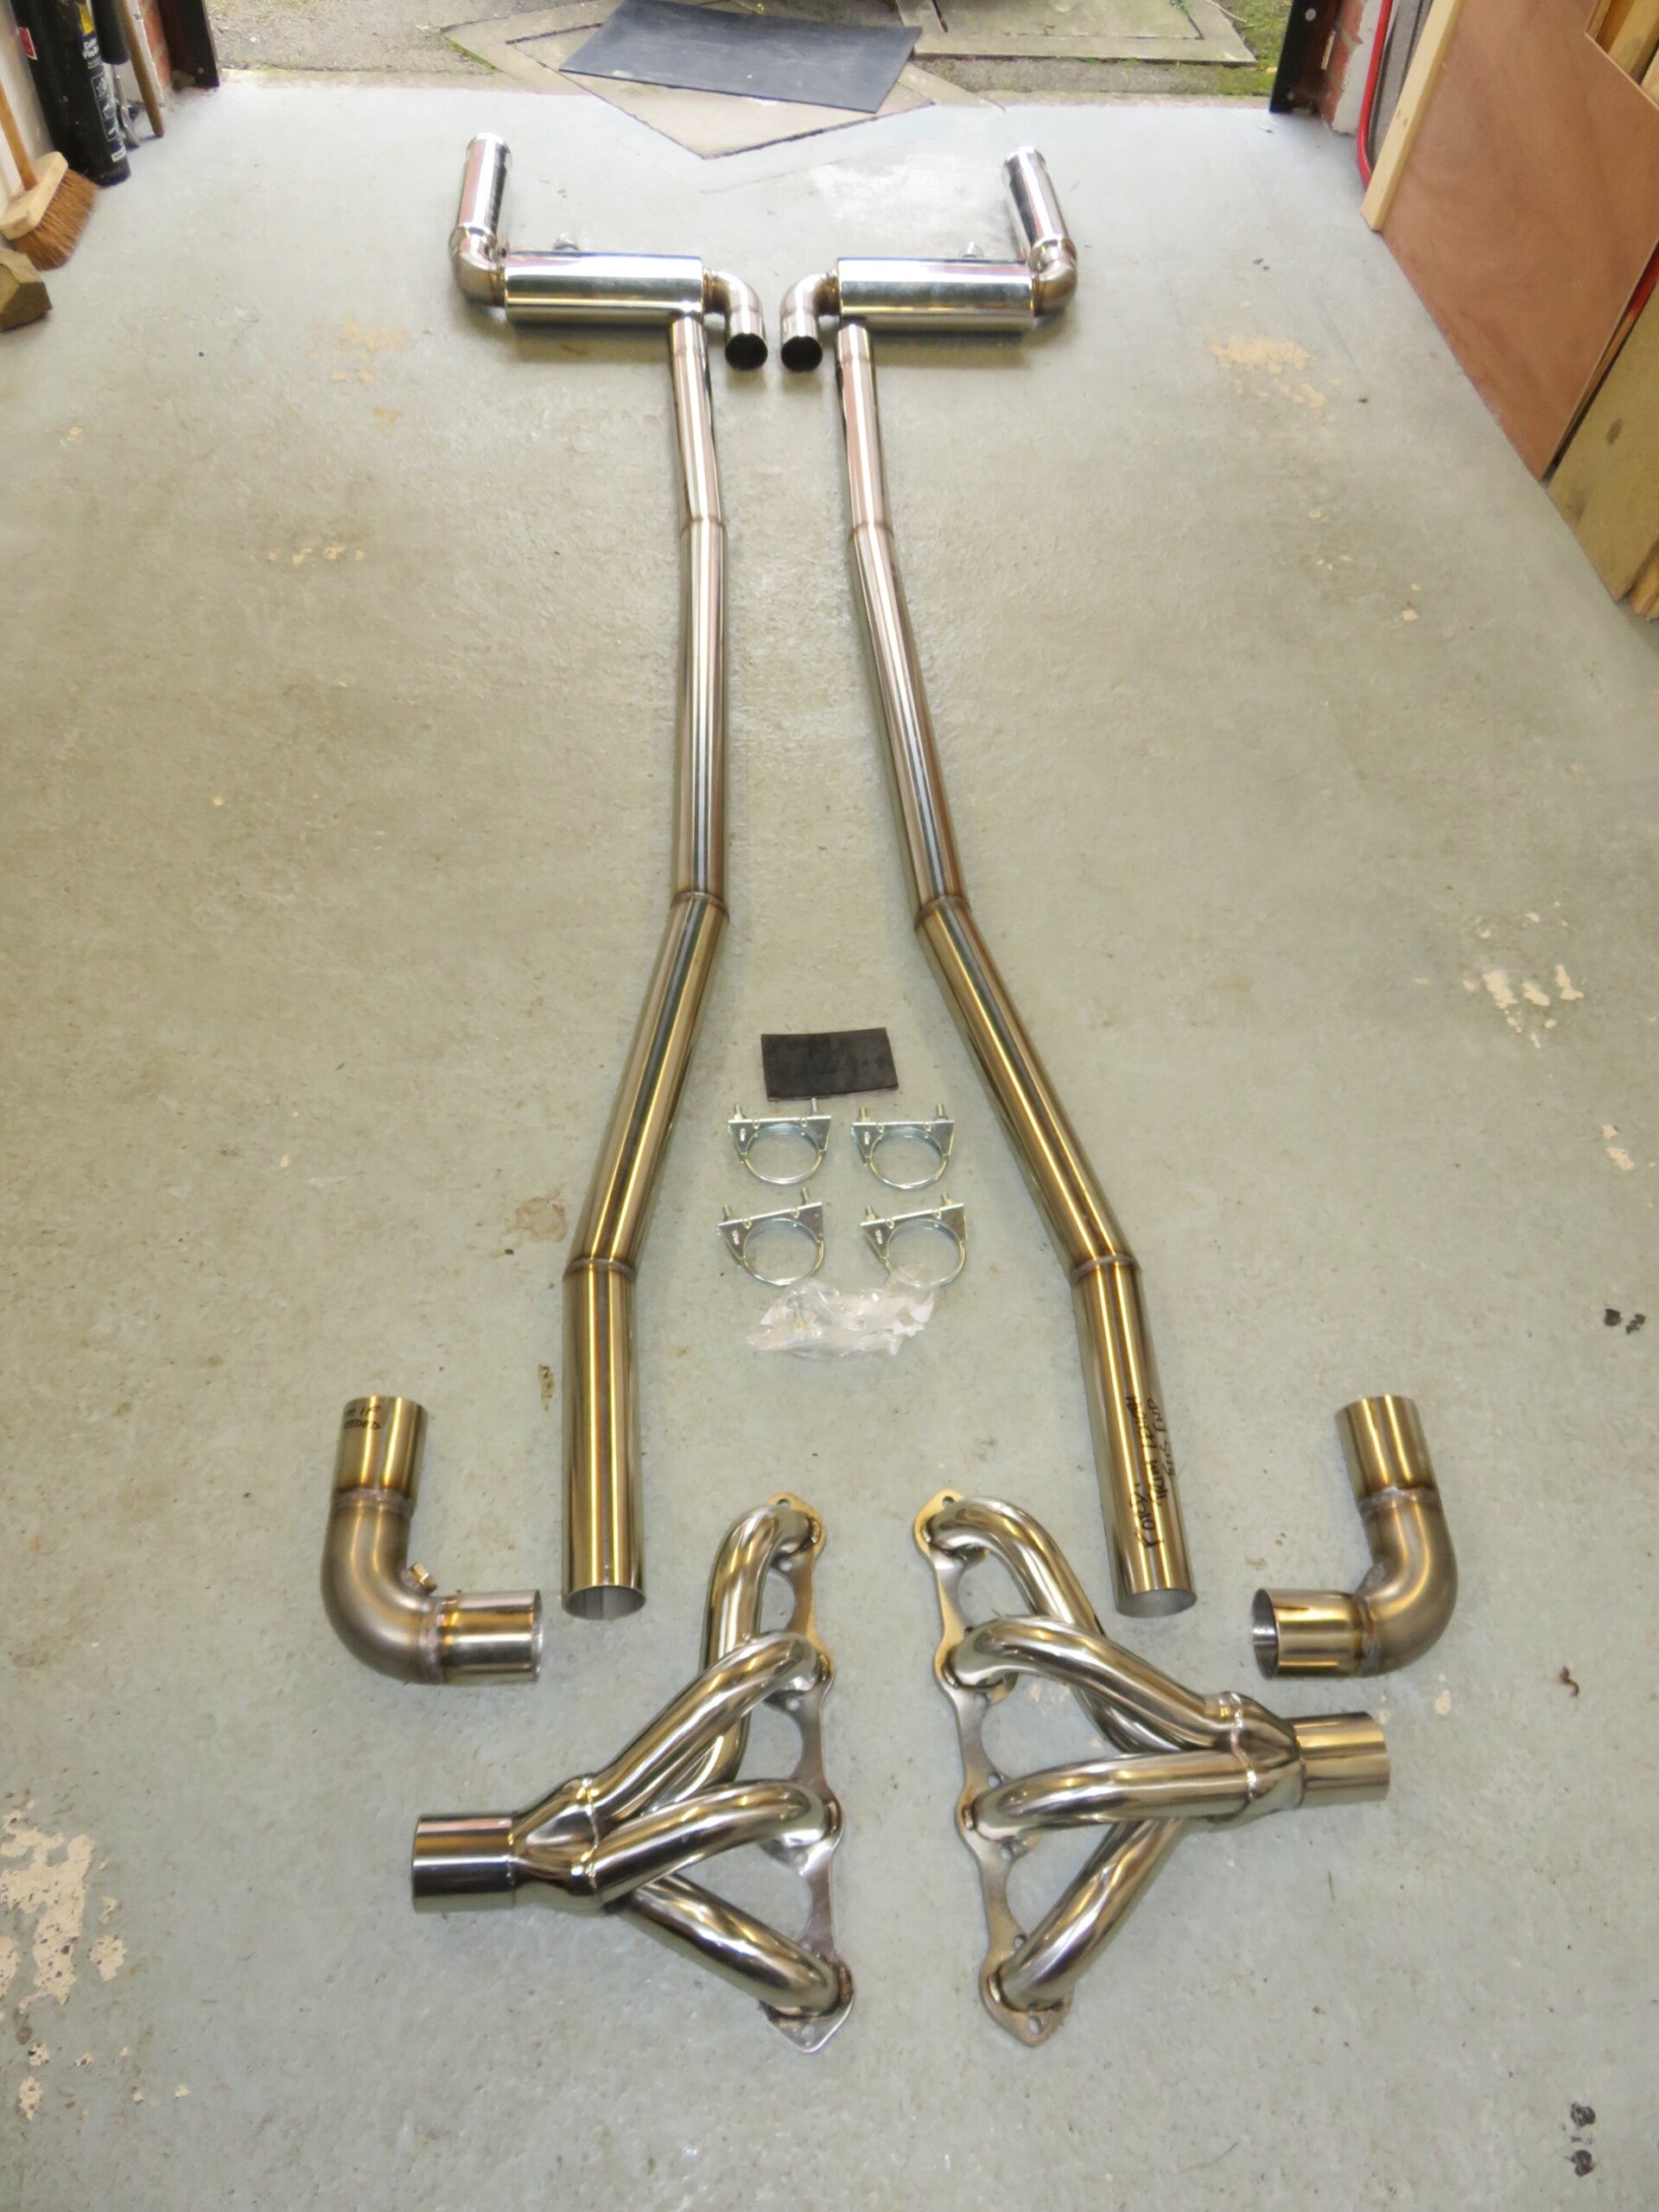
Exhaust
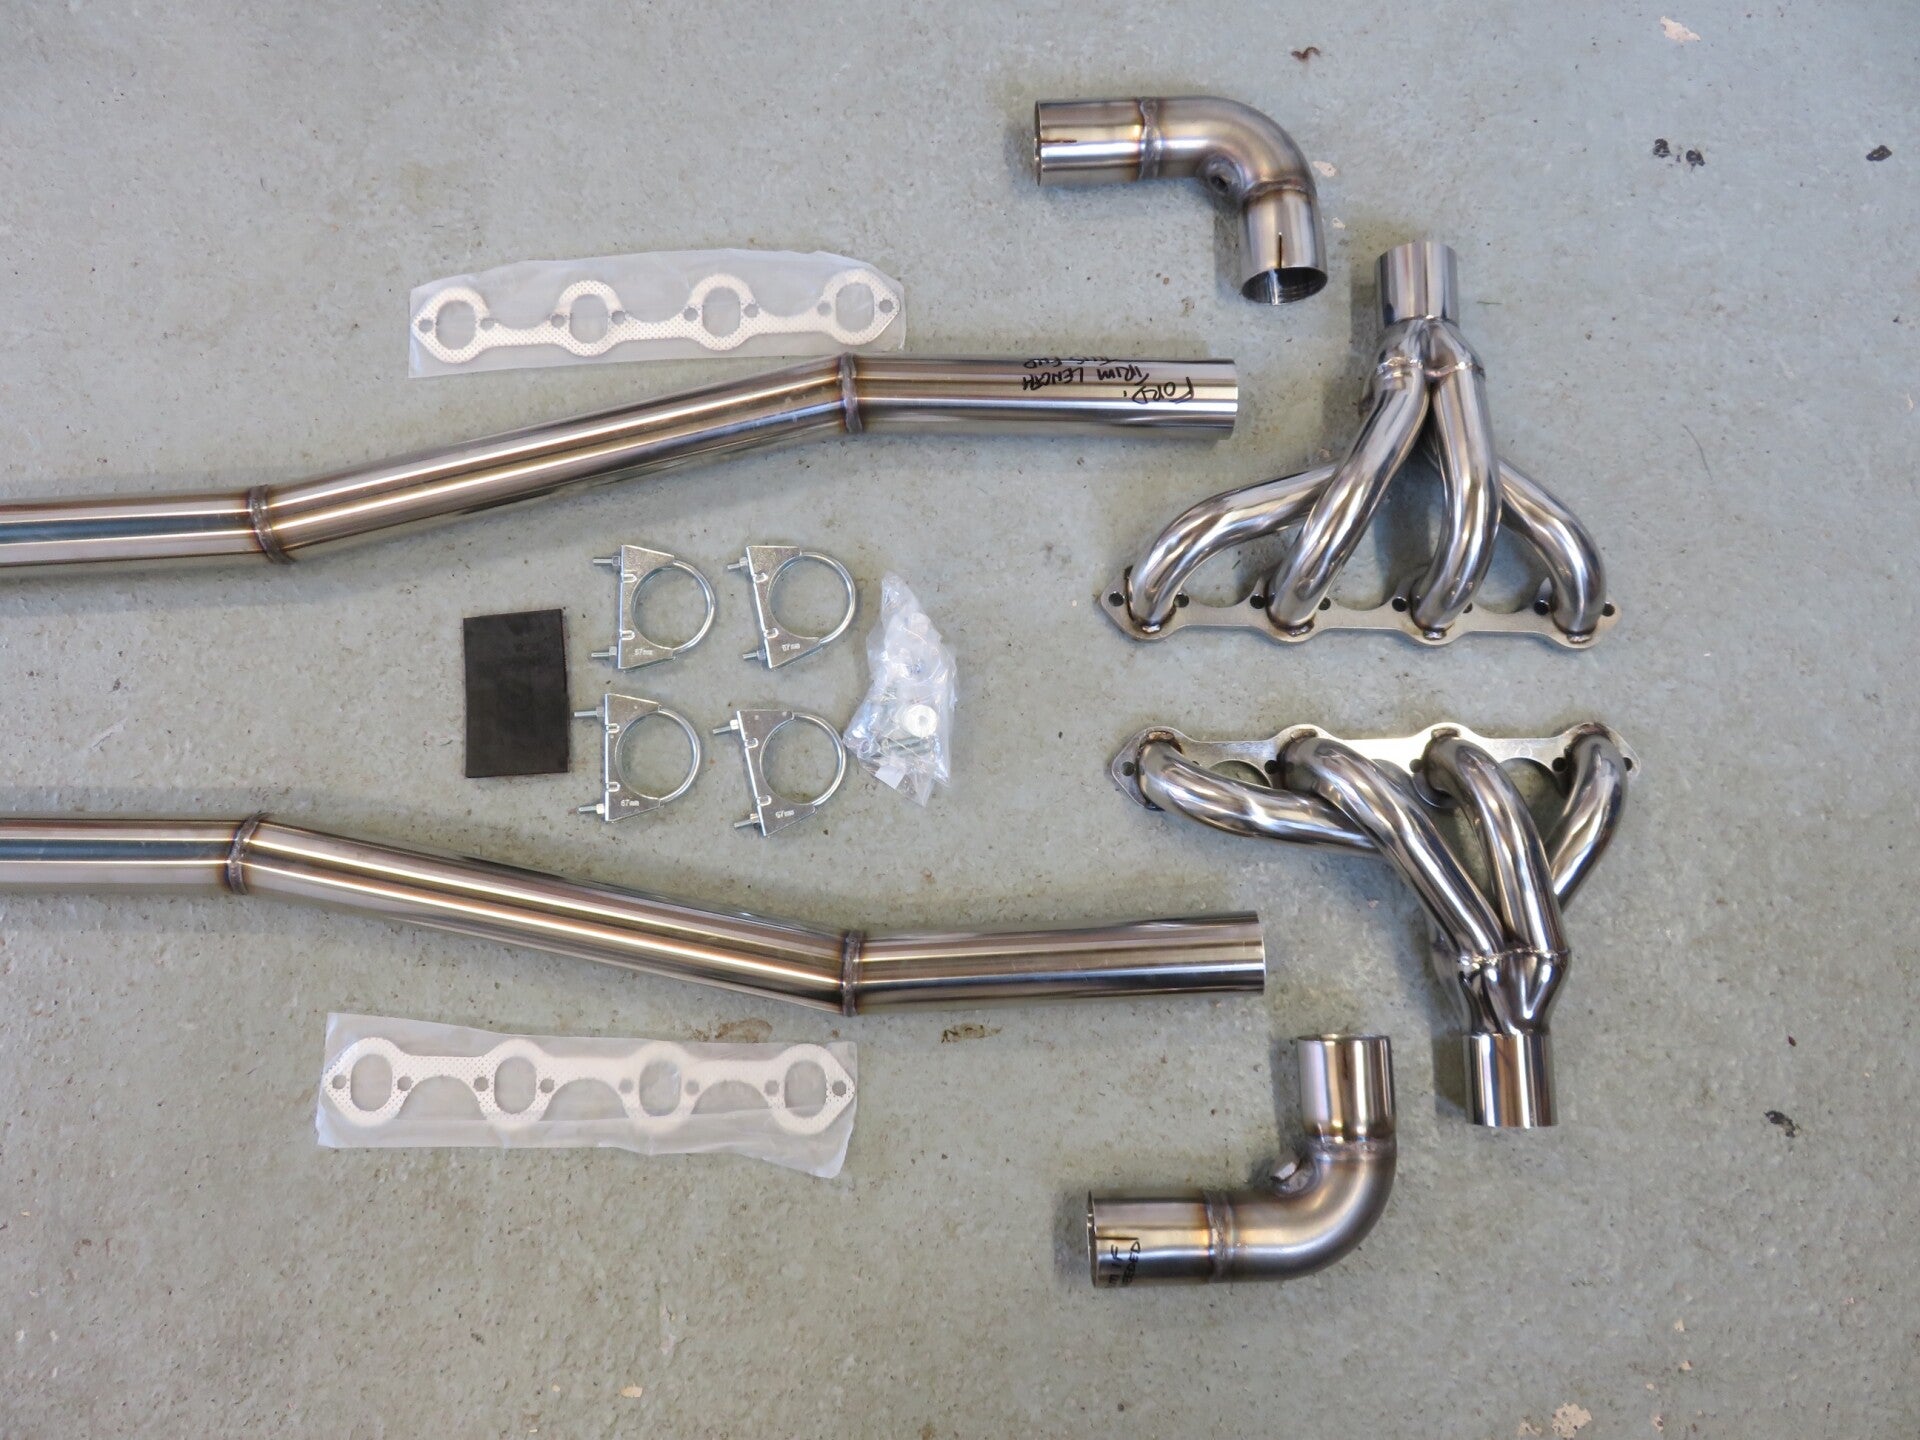
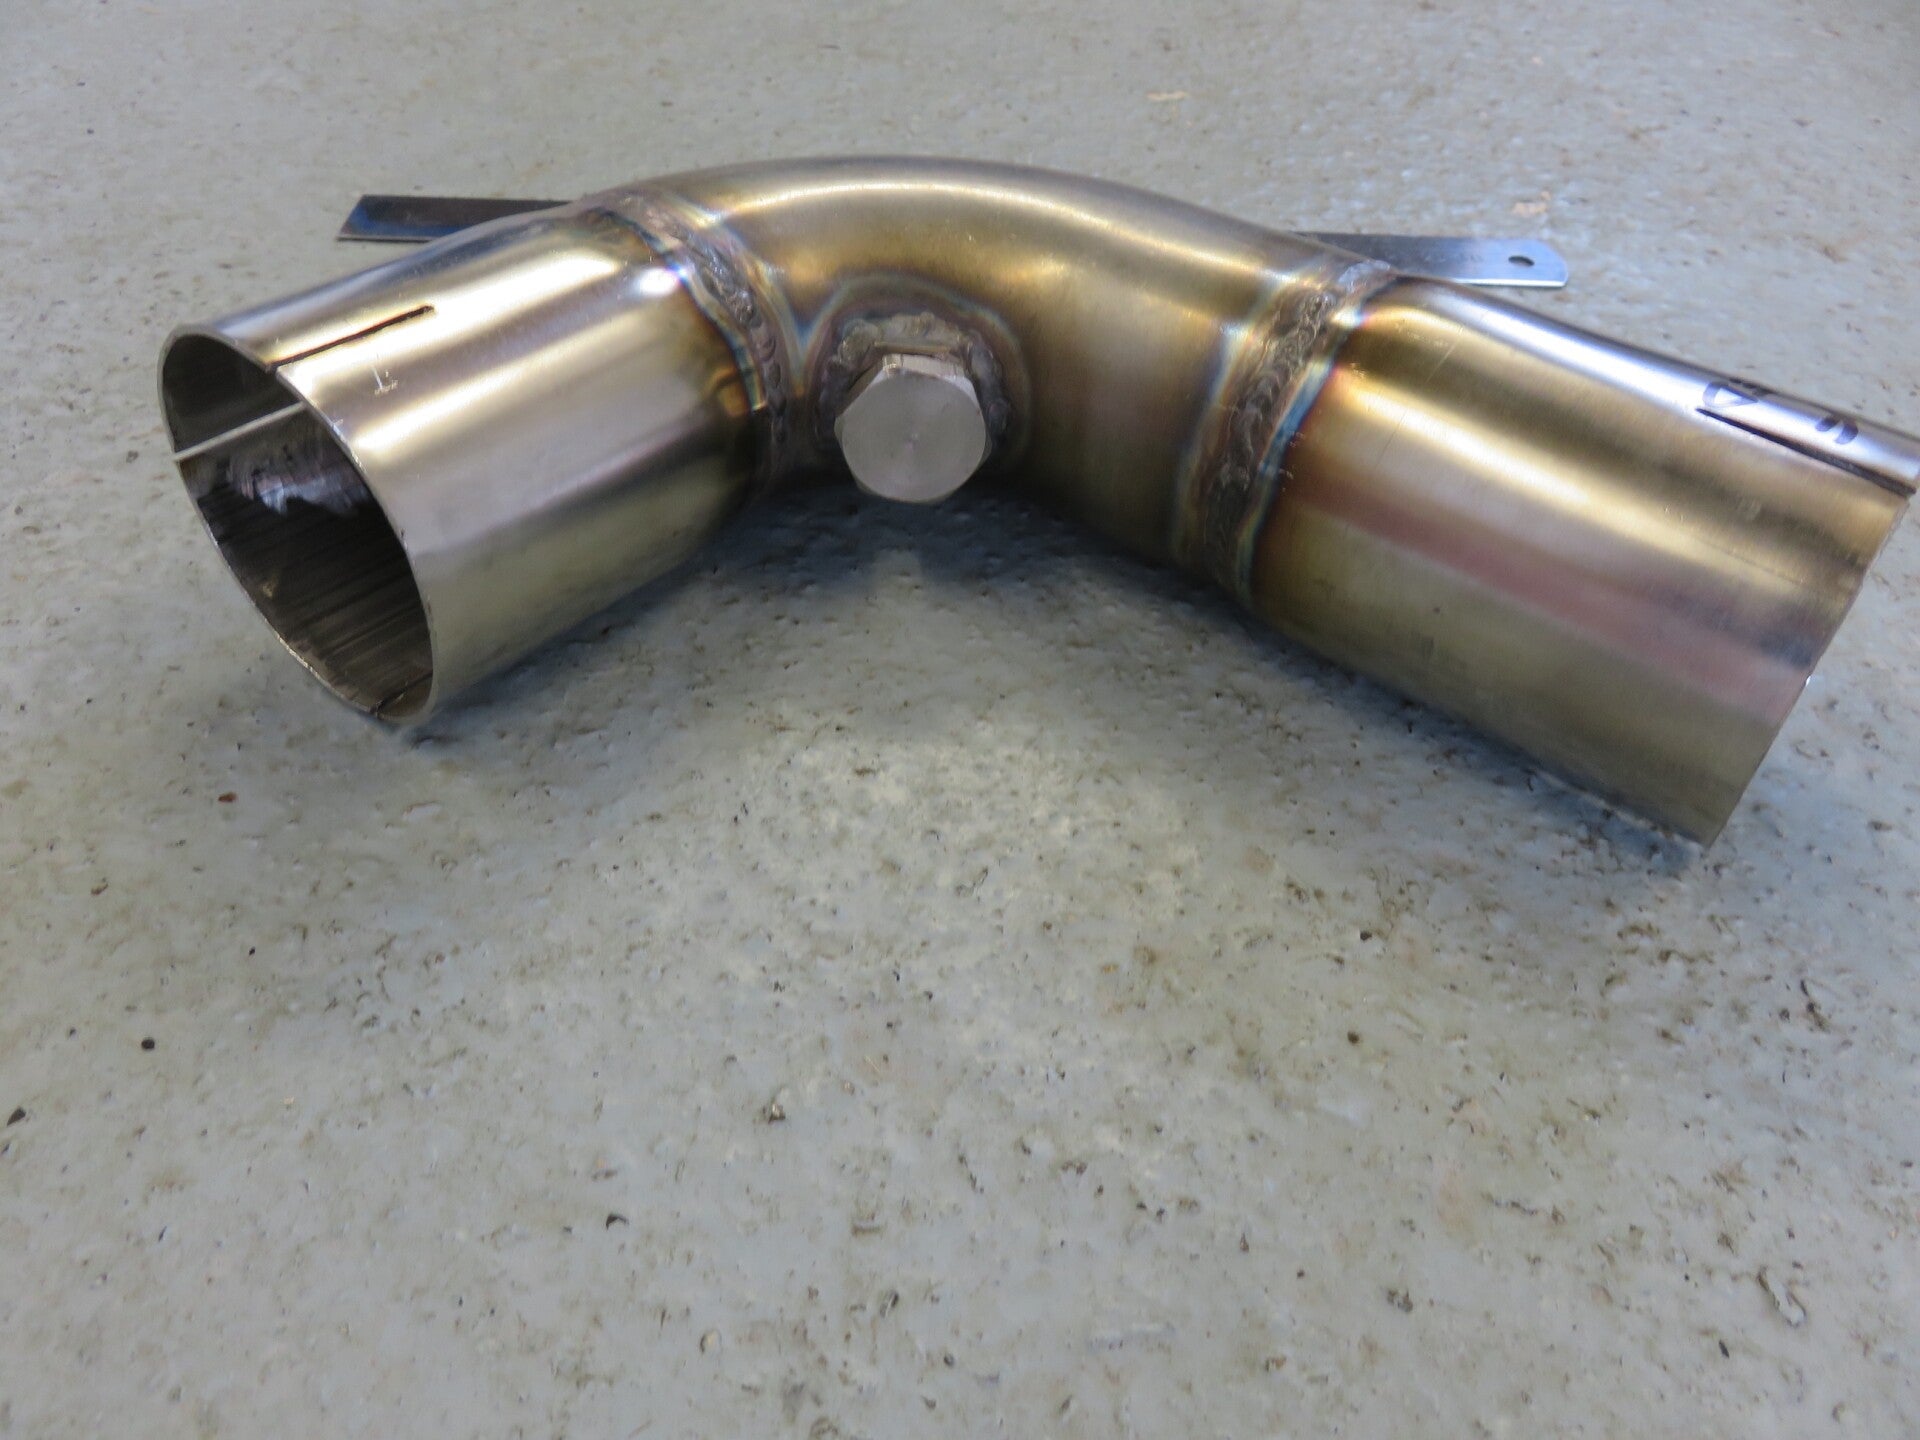
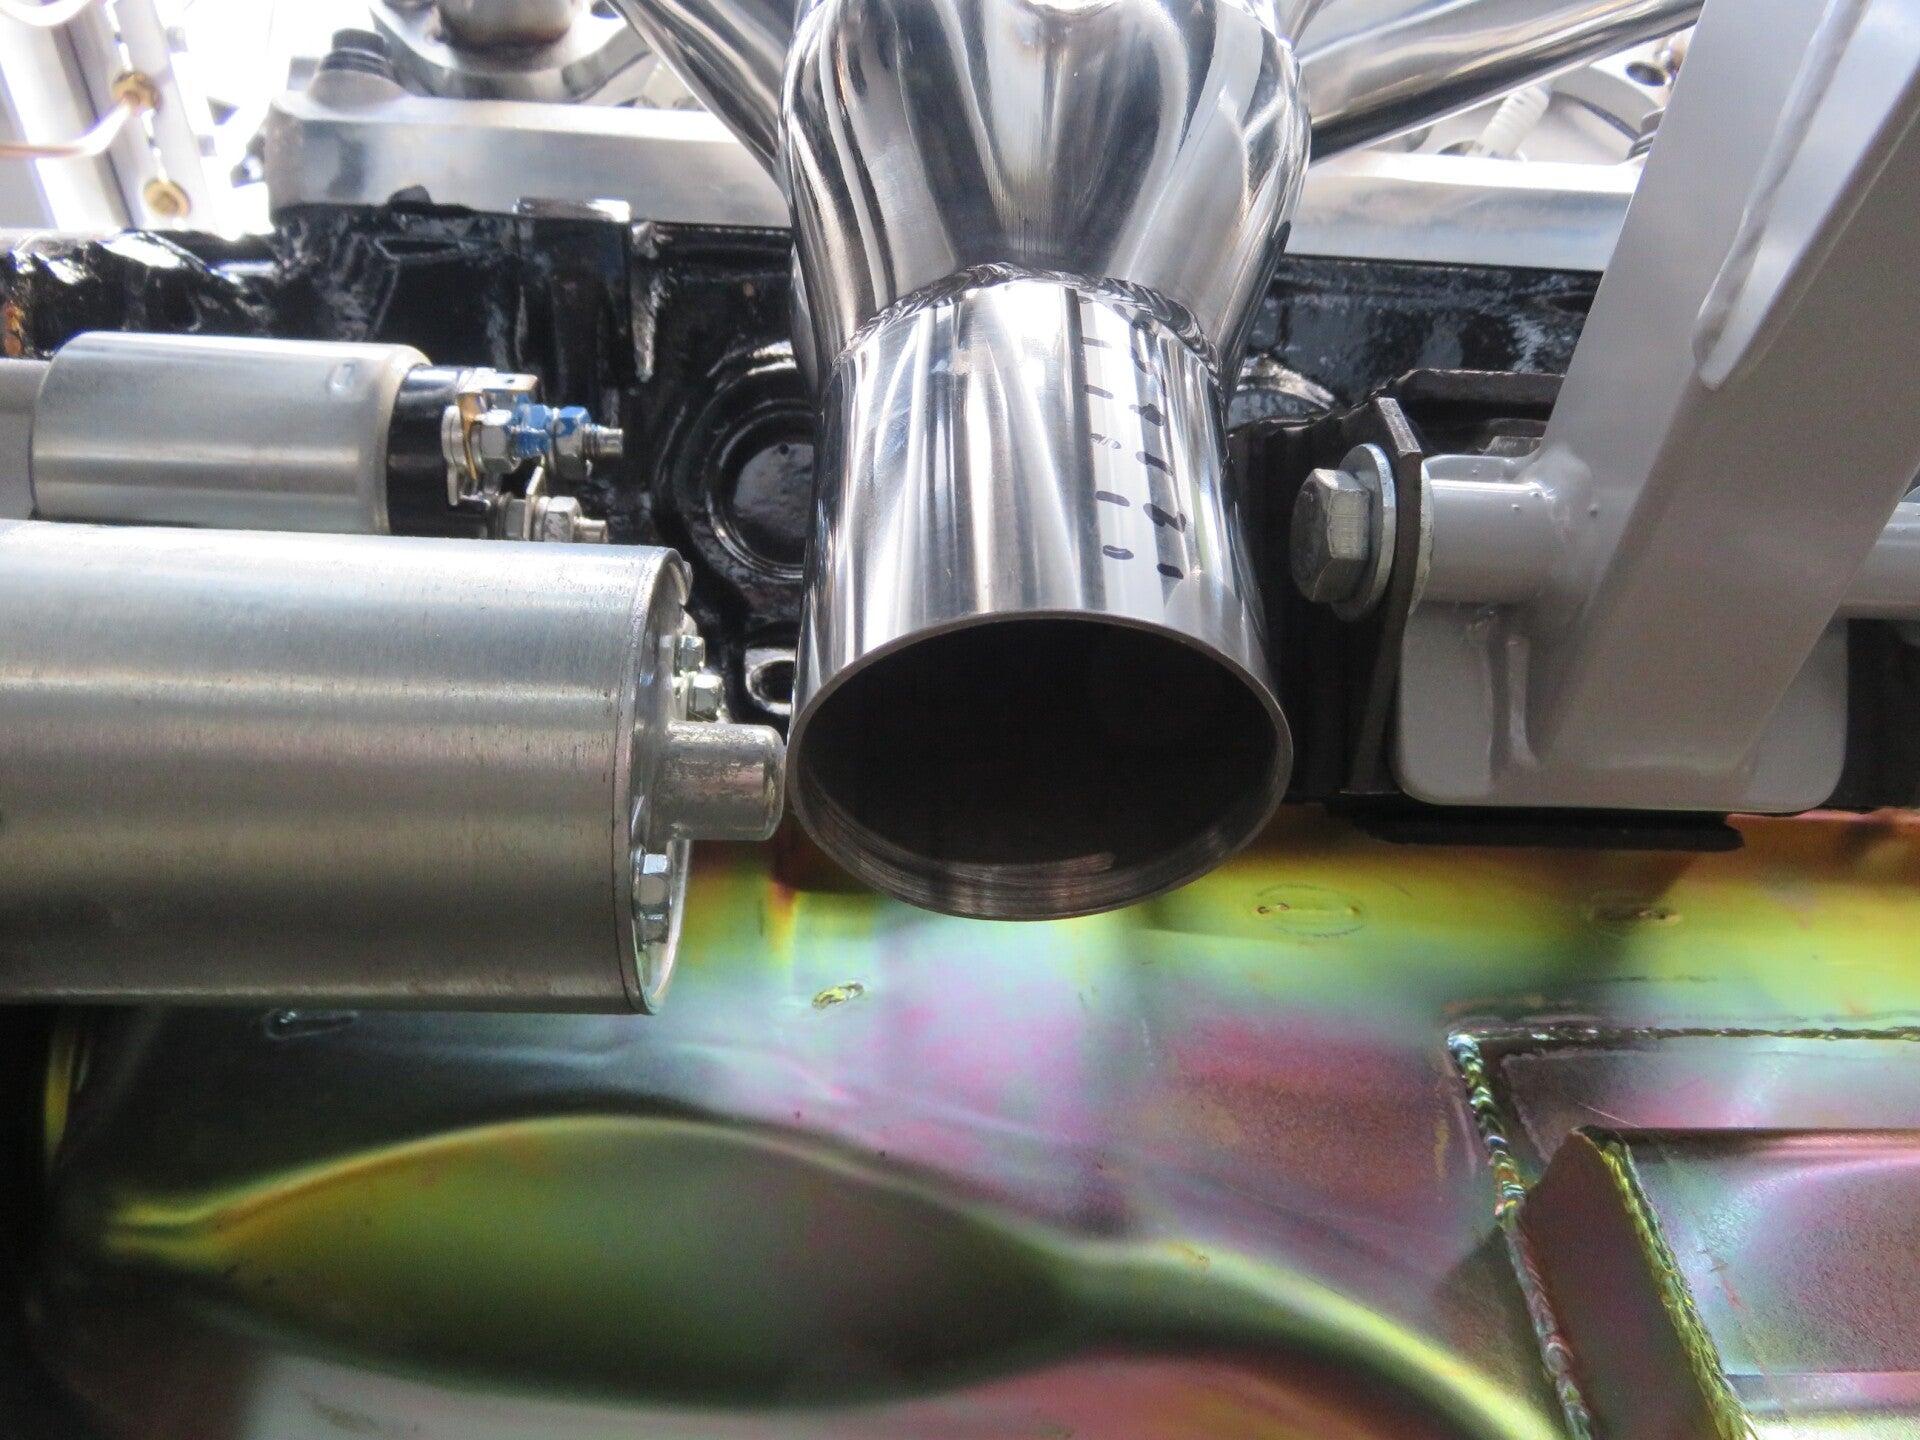
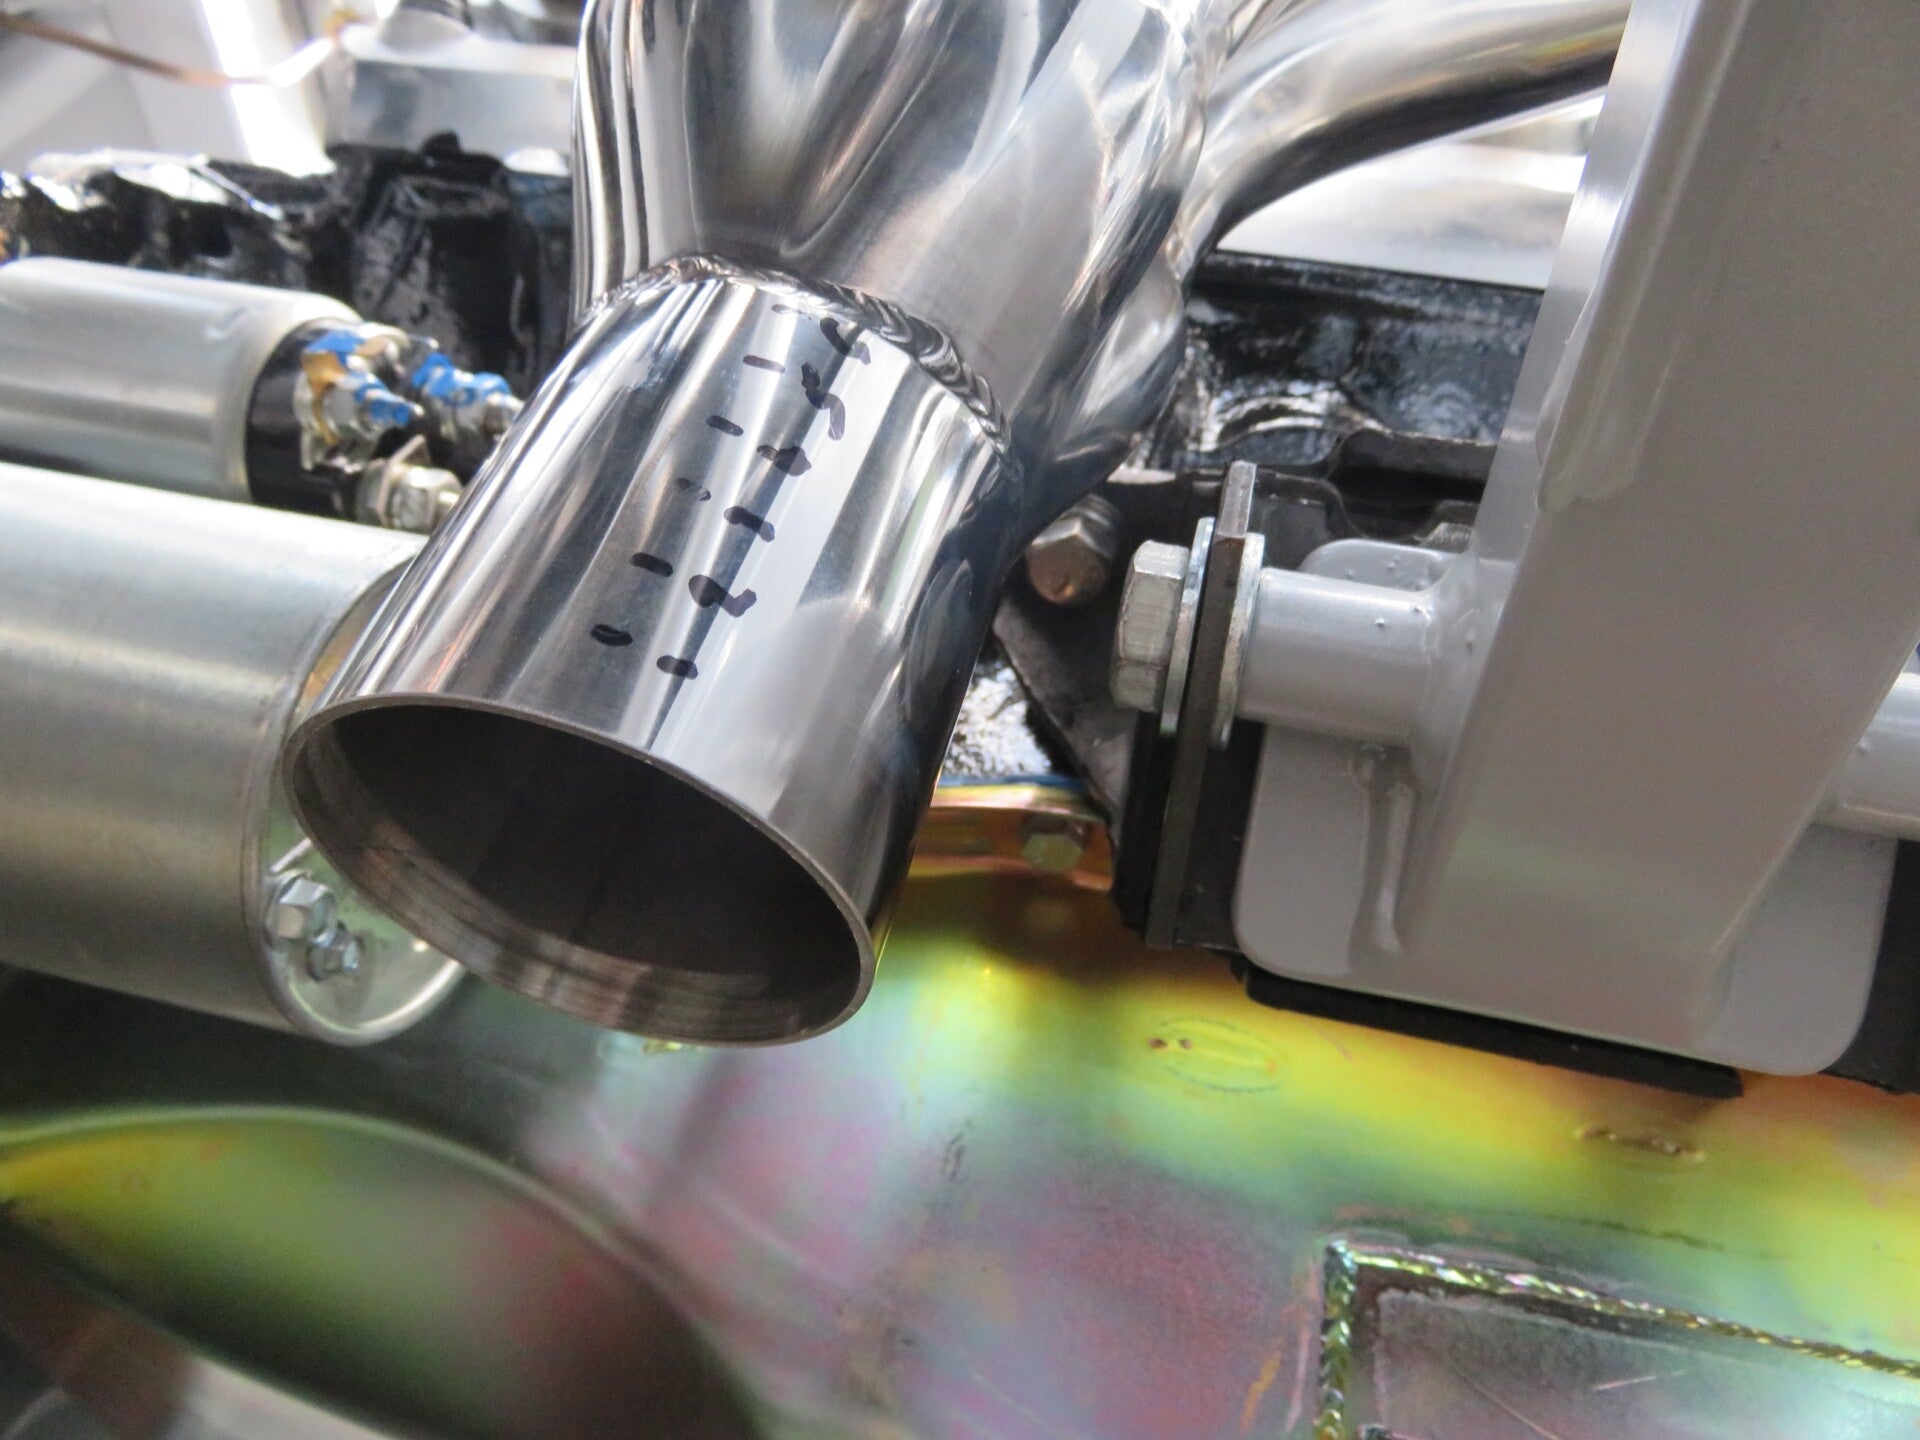
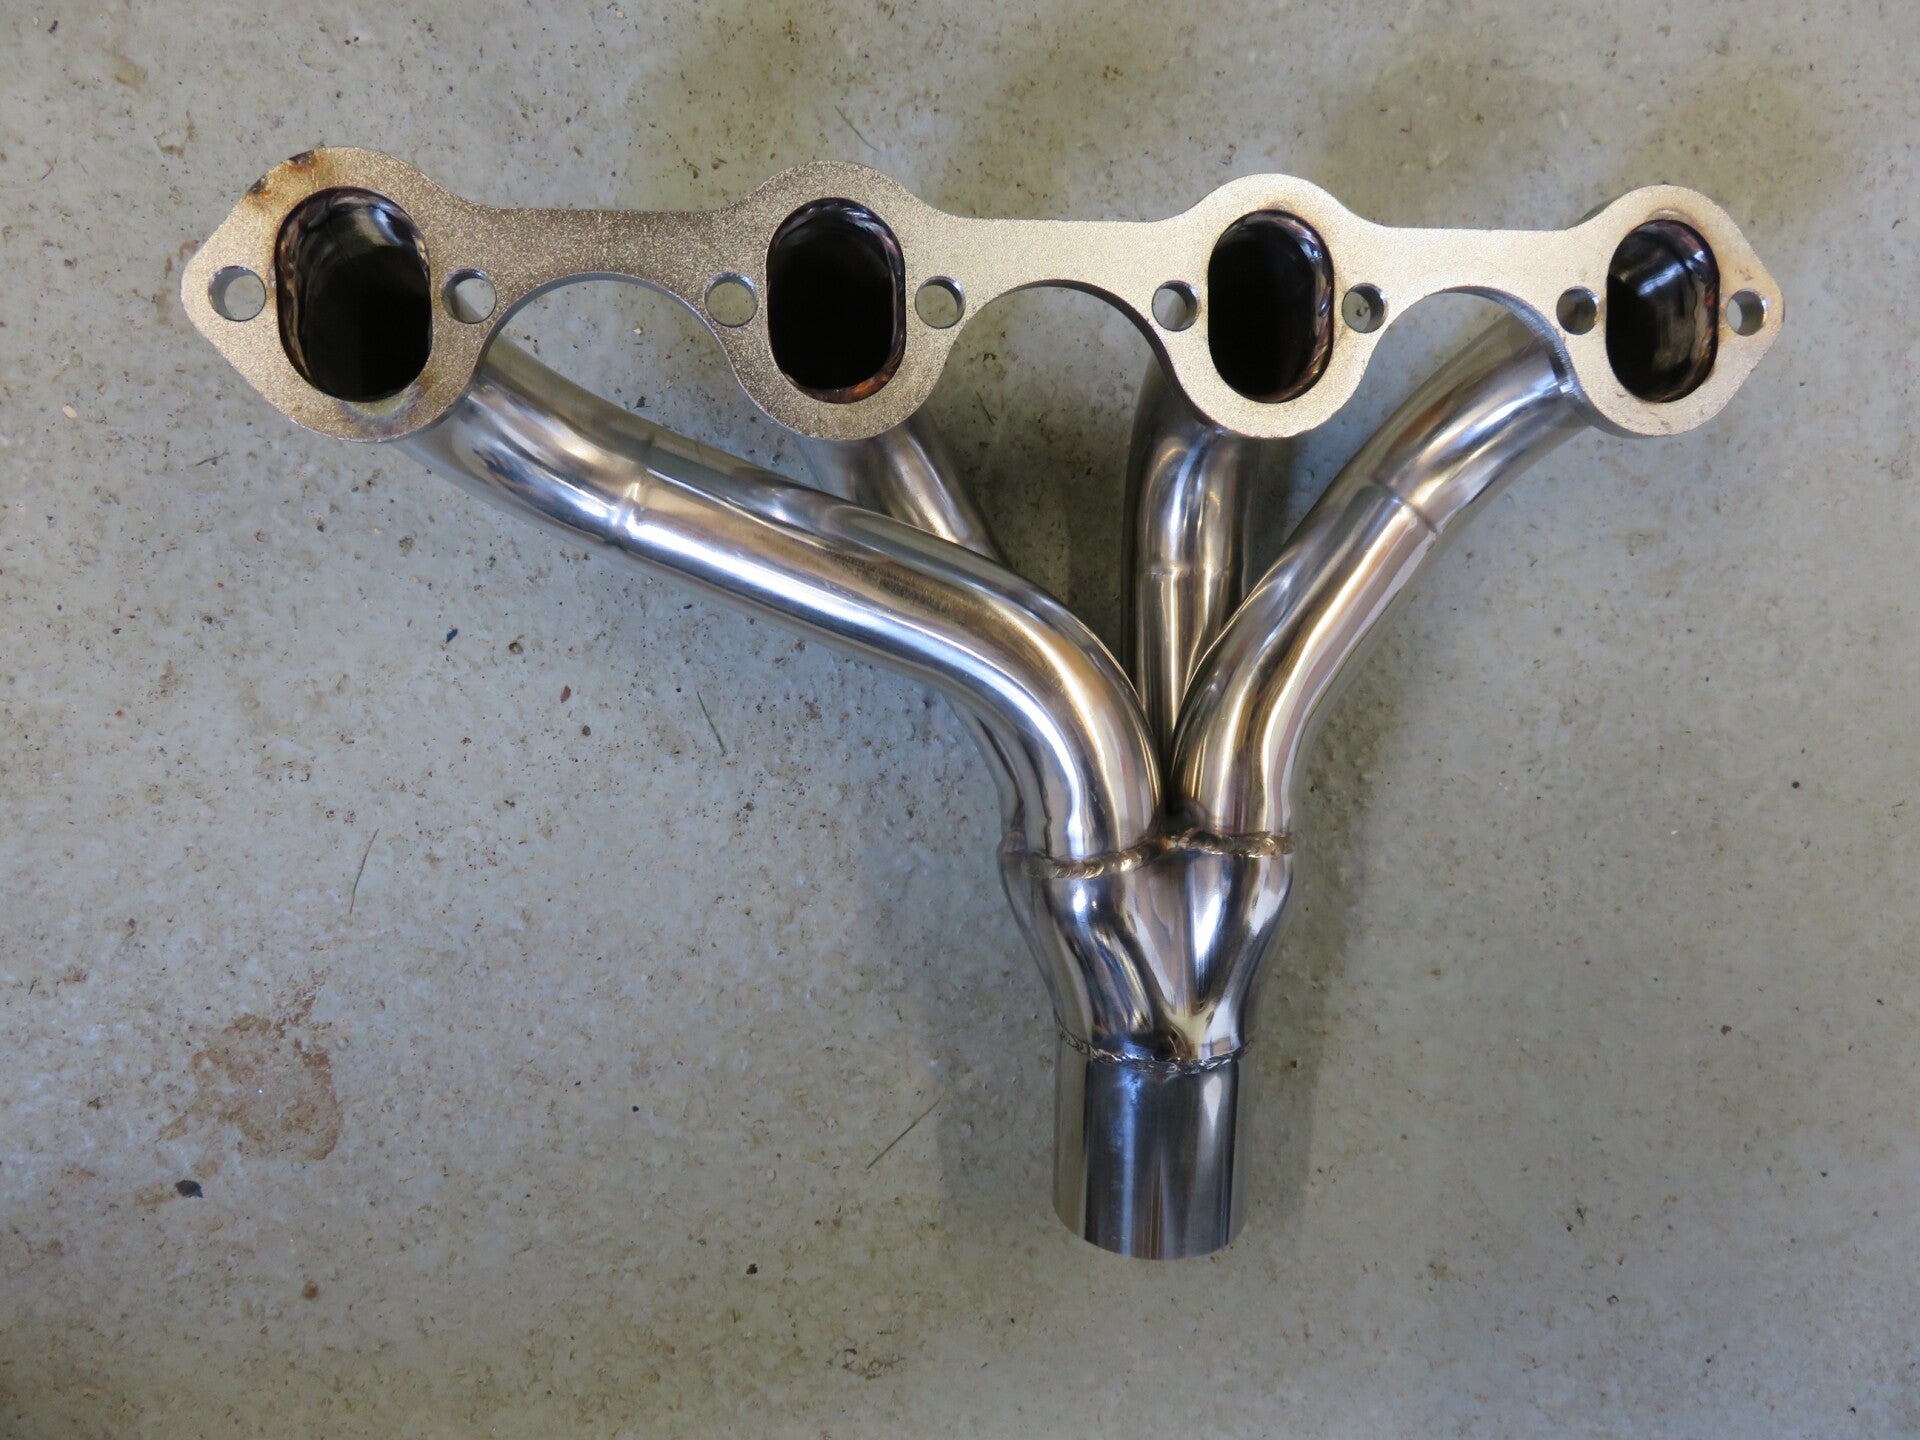
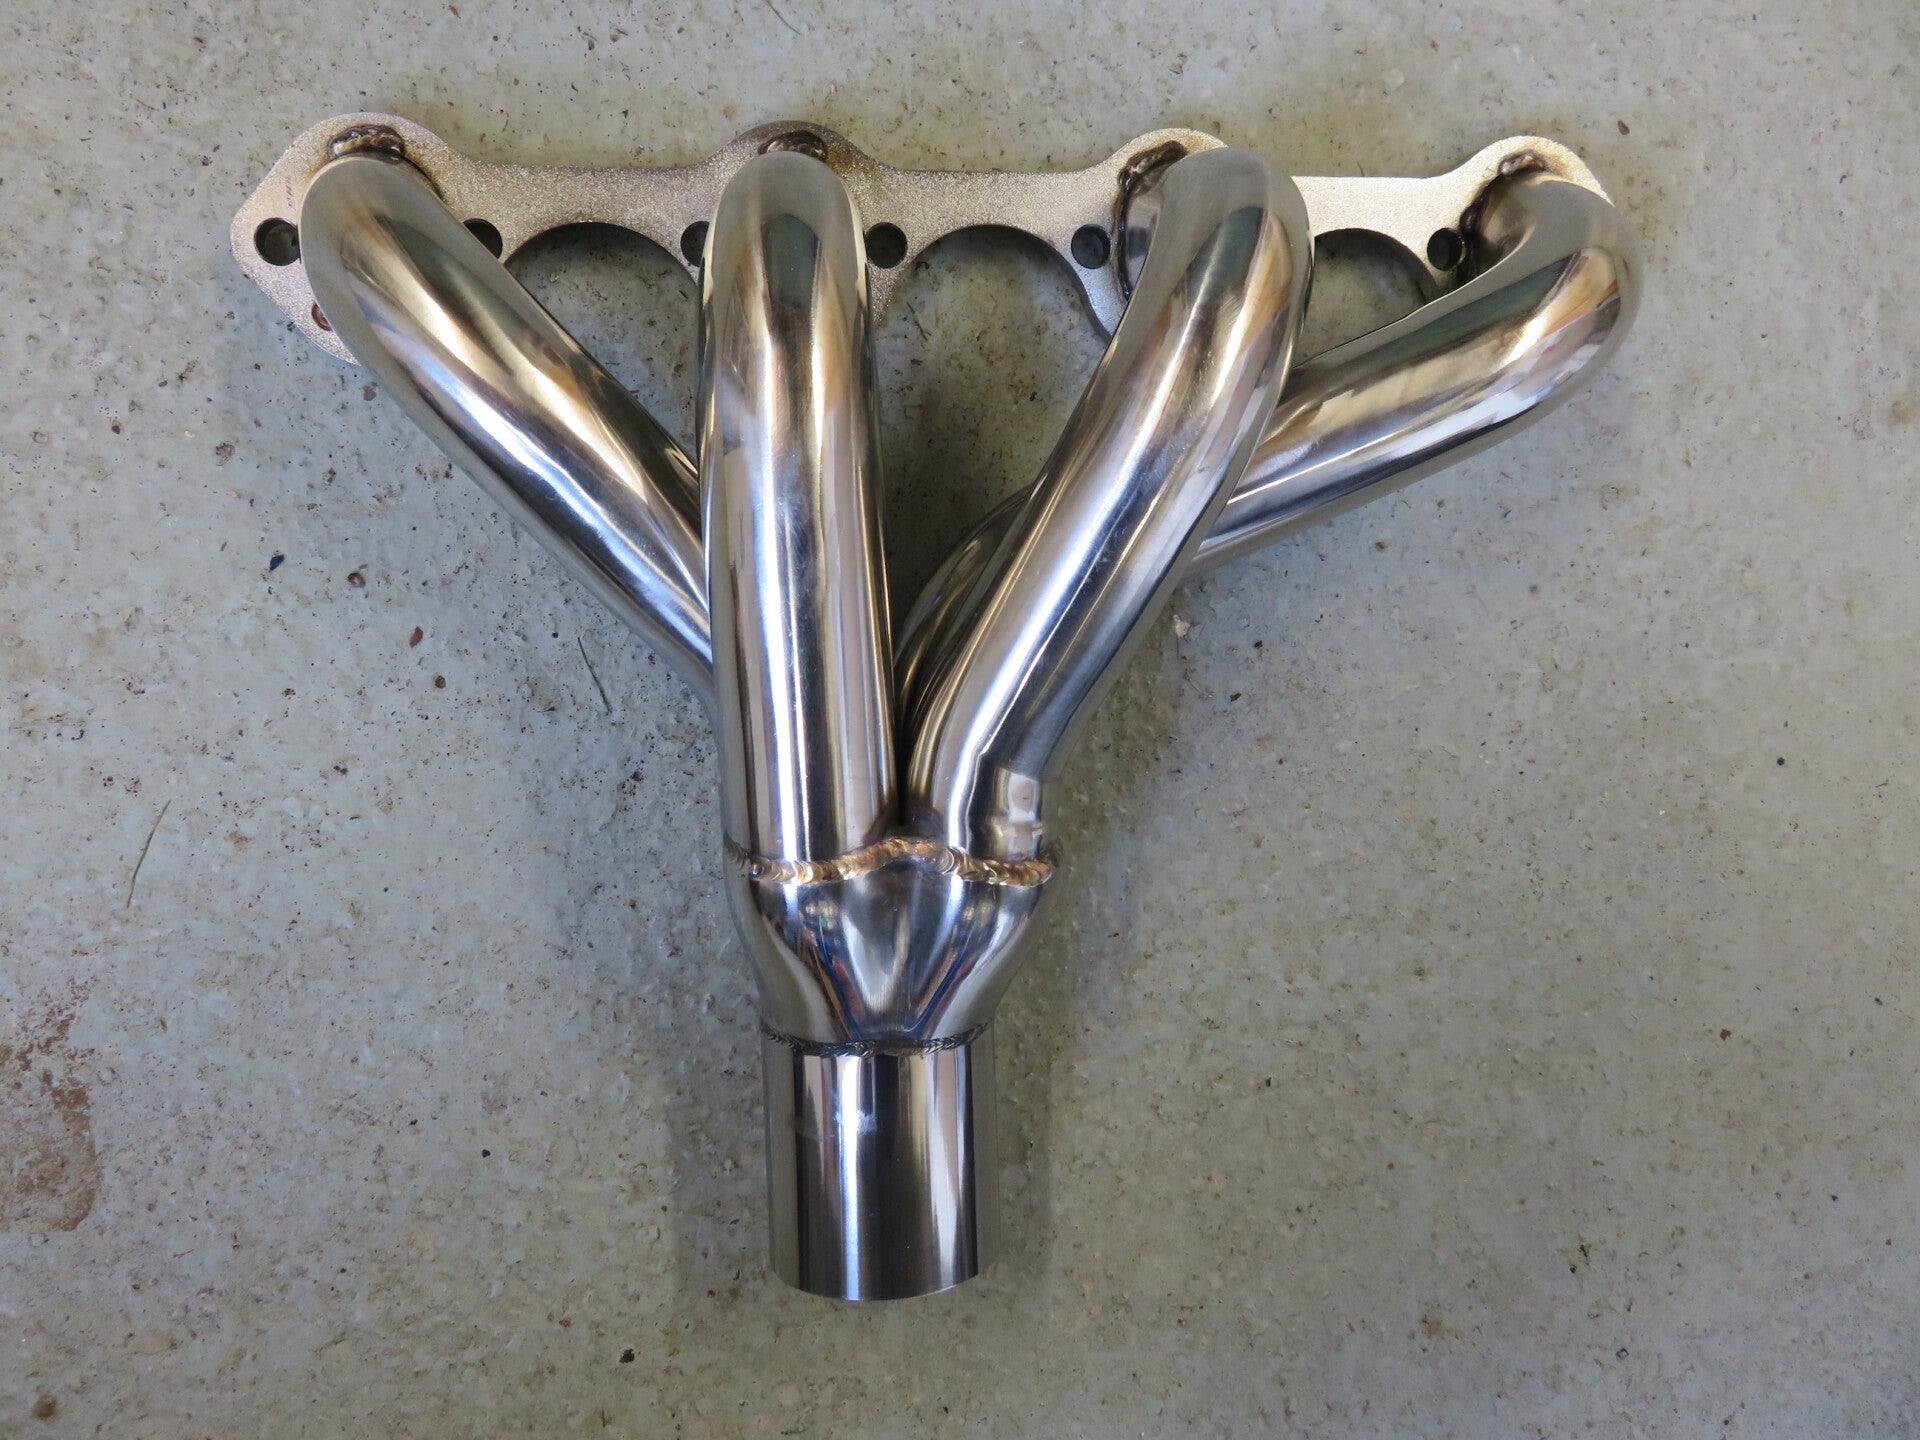
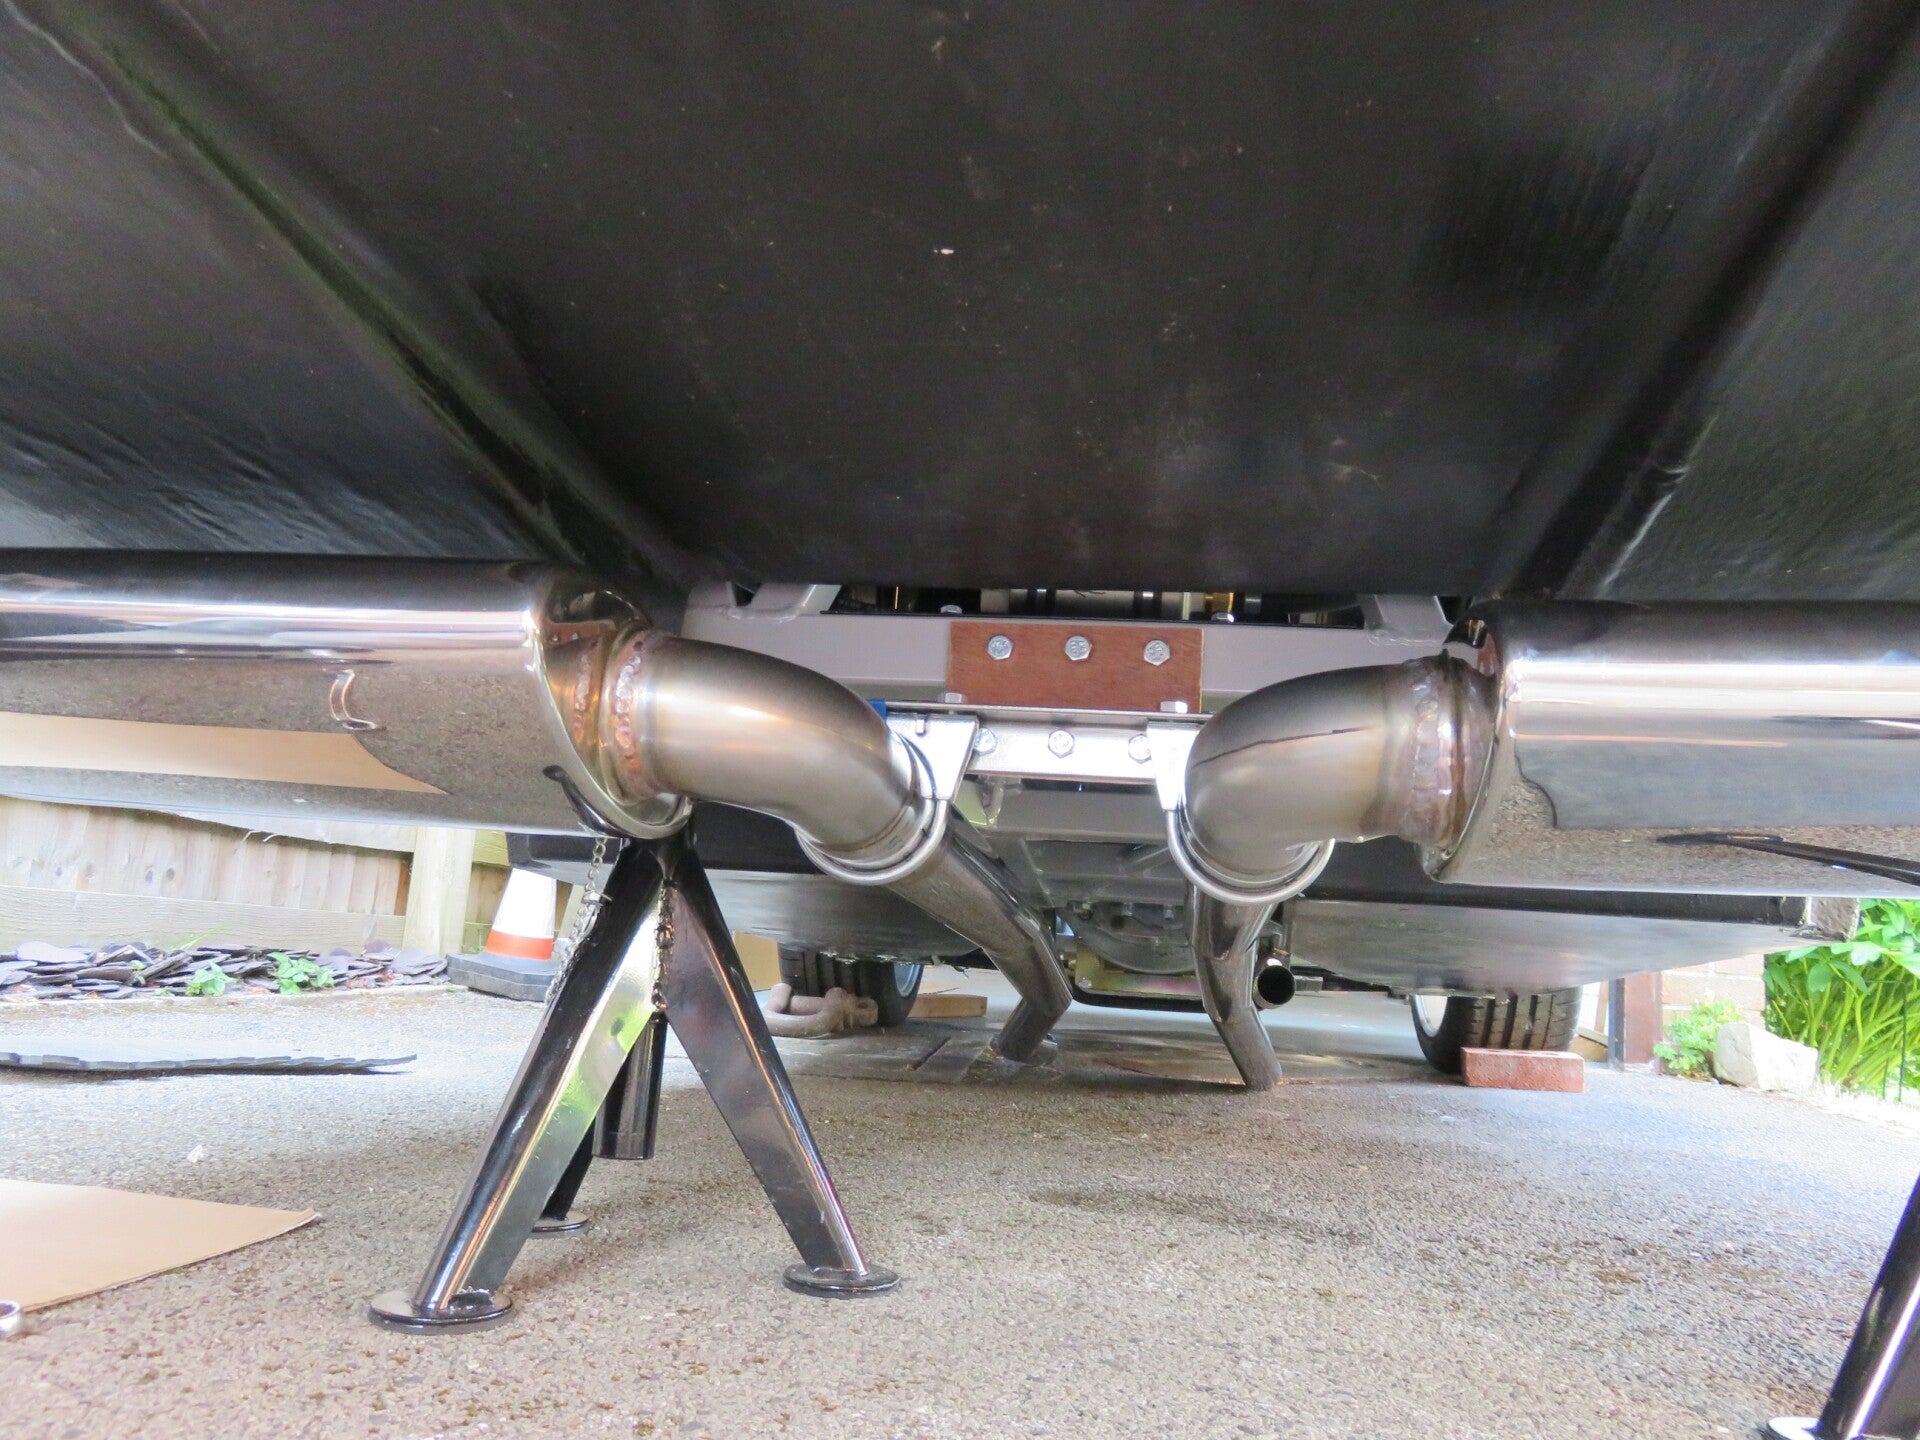
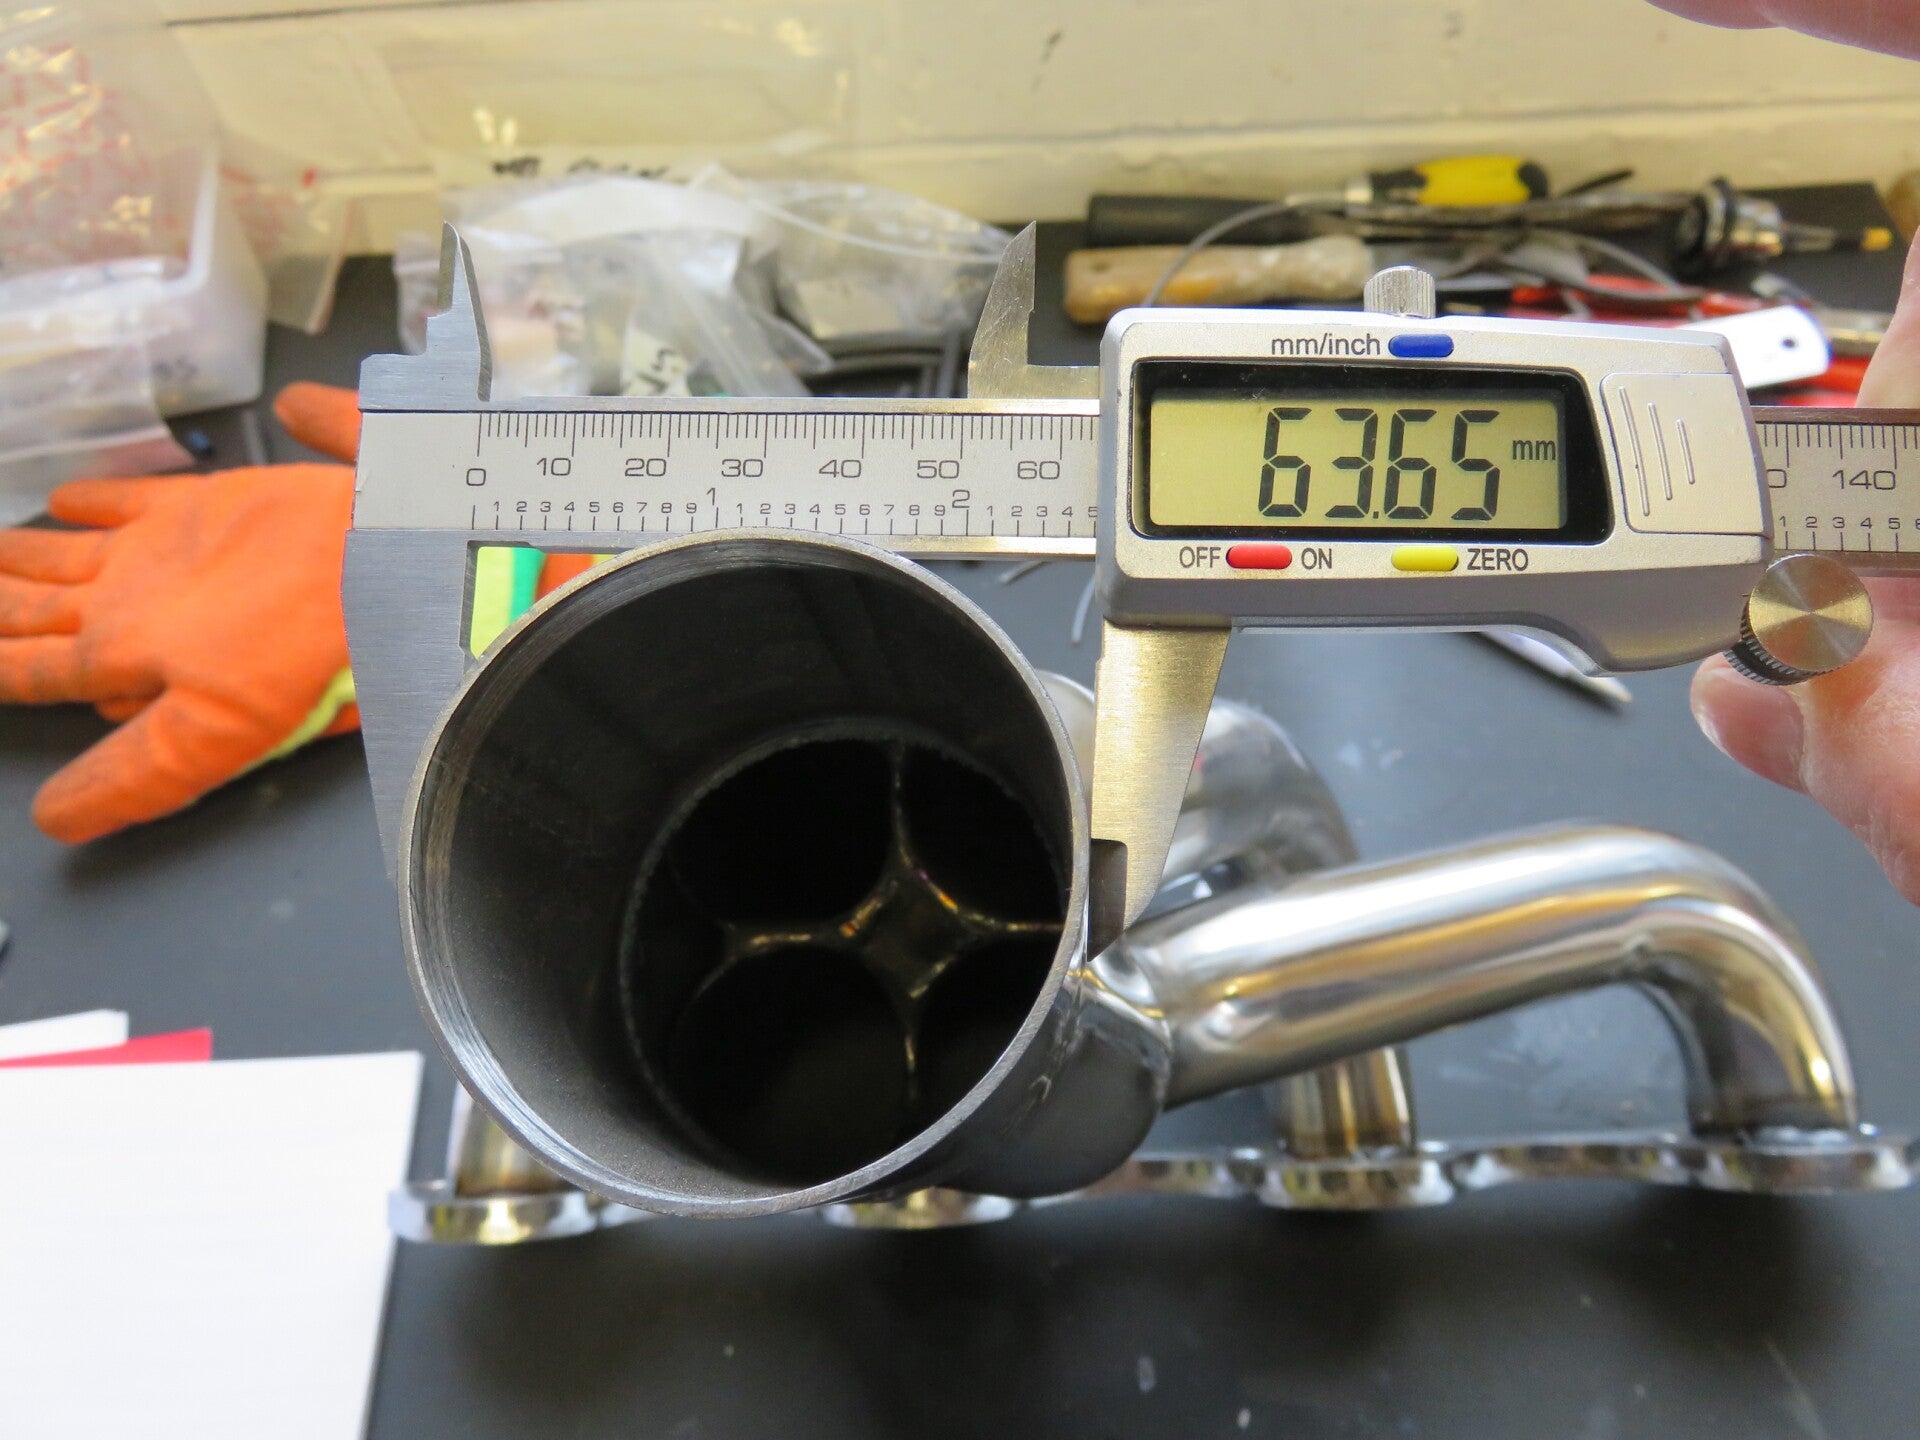
I decided to go for under-slung, unbalanced exhausts exiting at each end of the rear of the car, as I wanted that distinctive alternating and punctuating "booom-booom" sound from each end of the back of the car. And in that theme, I am very impressed with the quality of the steel exhaust and the shape of the headers and pipes. The O2 sensor (I only need one for my EFI system) is fitted to the inside bend of the 90° front connecting down-pipe, angled at 45°; this is a perfect position and angle for gas sampling. It also ensures condensation doesn't accumulate and sit in the sensor when the engine is not running. If the sensor is horizontal-ish, rust and crap will build up in the important sensory bit and will give false readings - and it will prematurely fail.
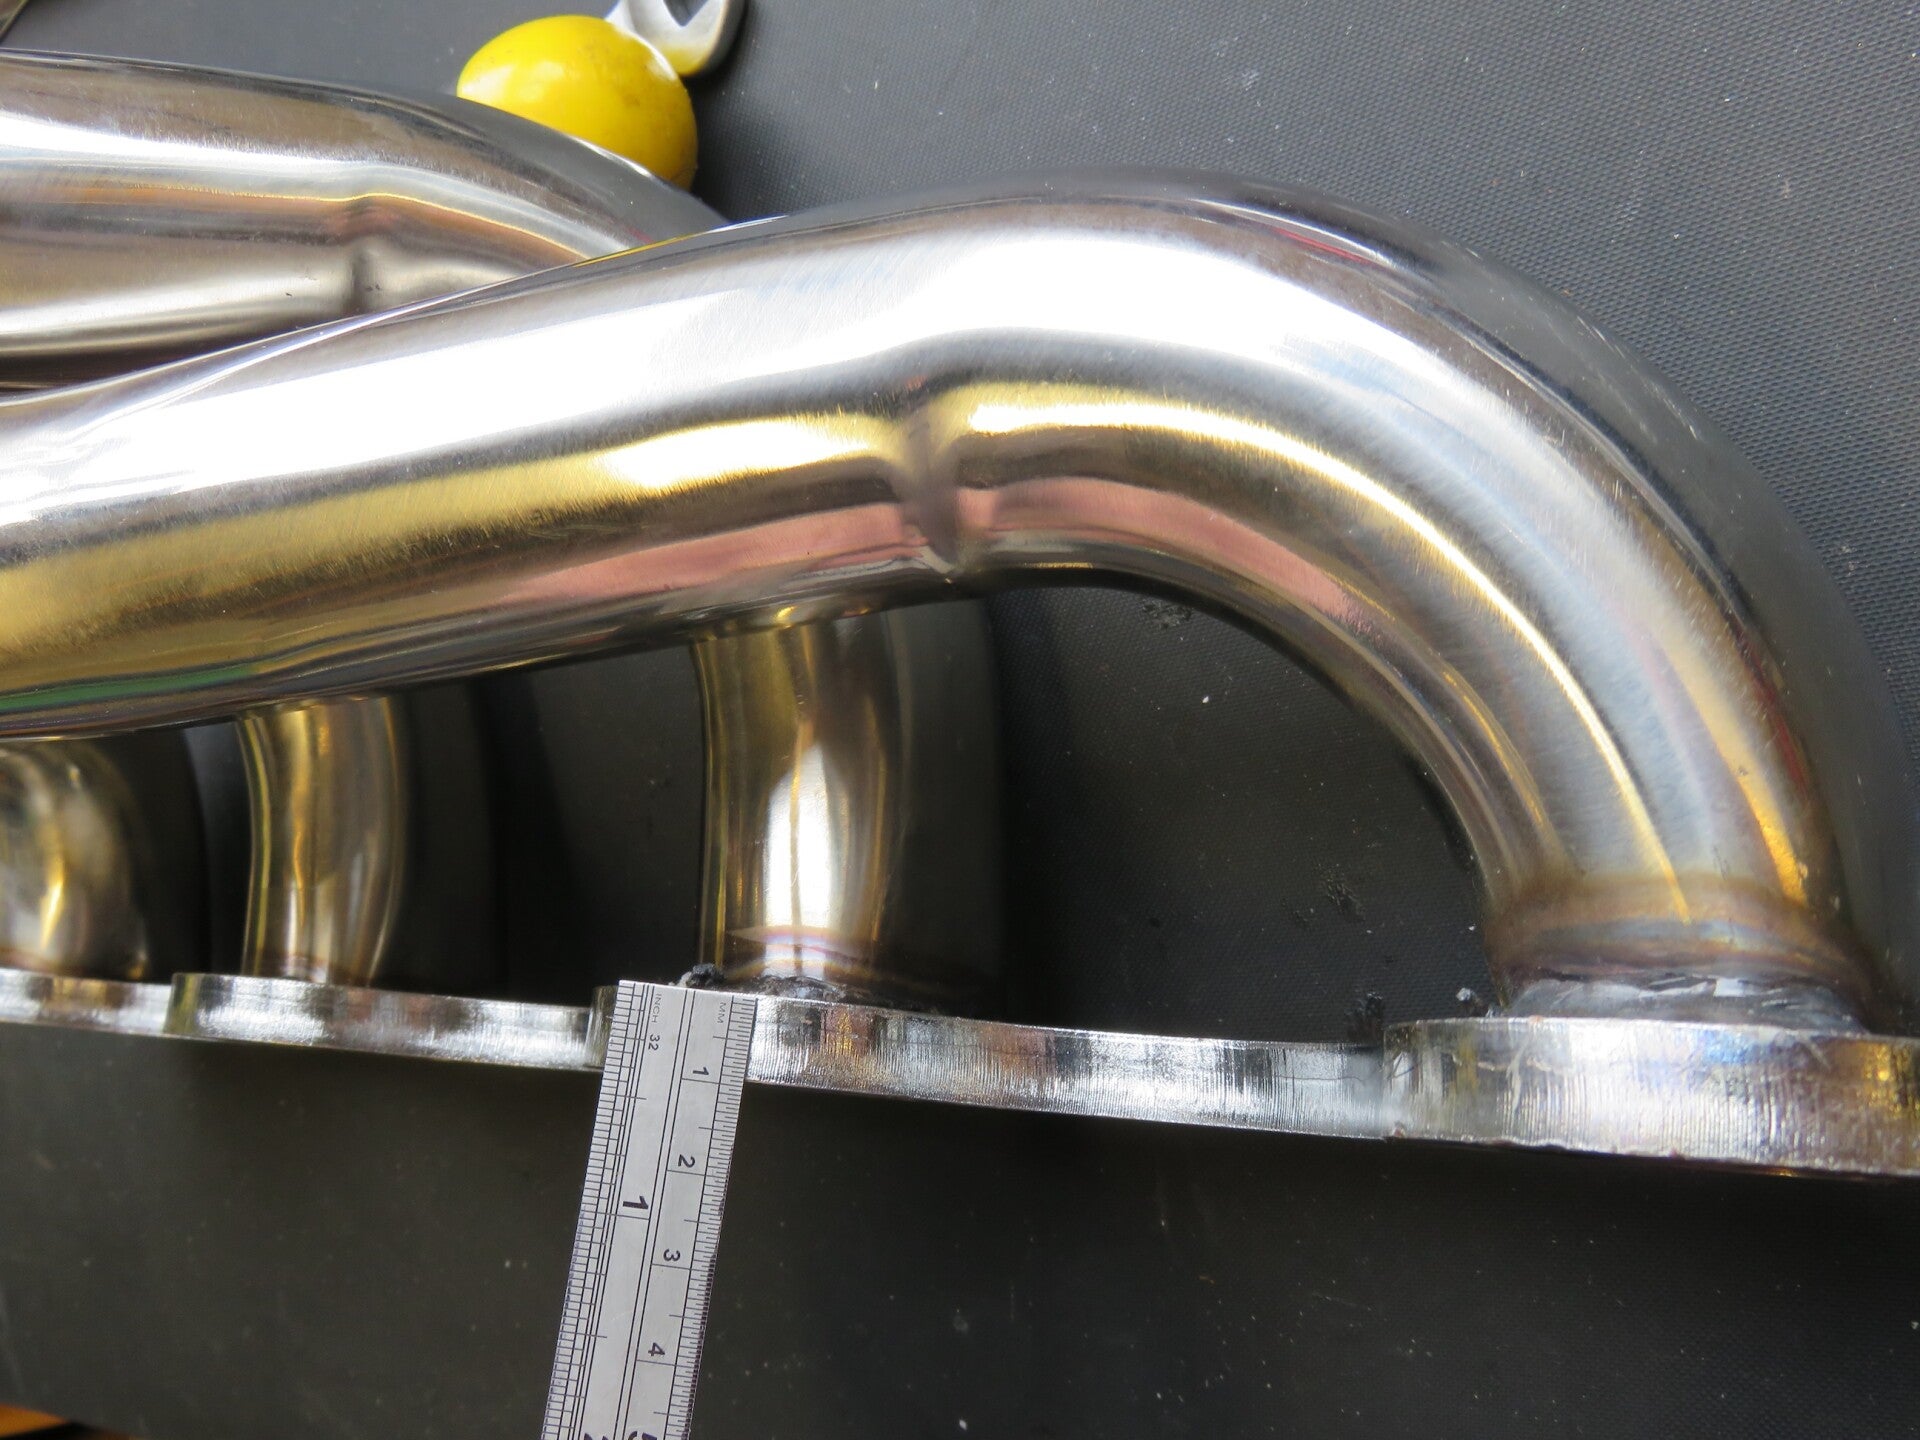
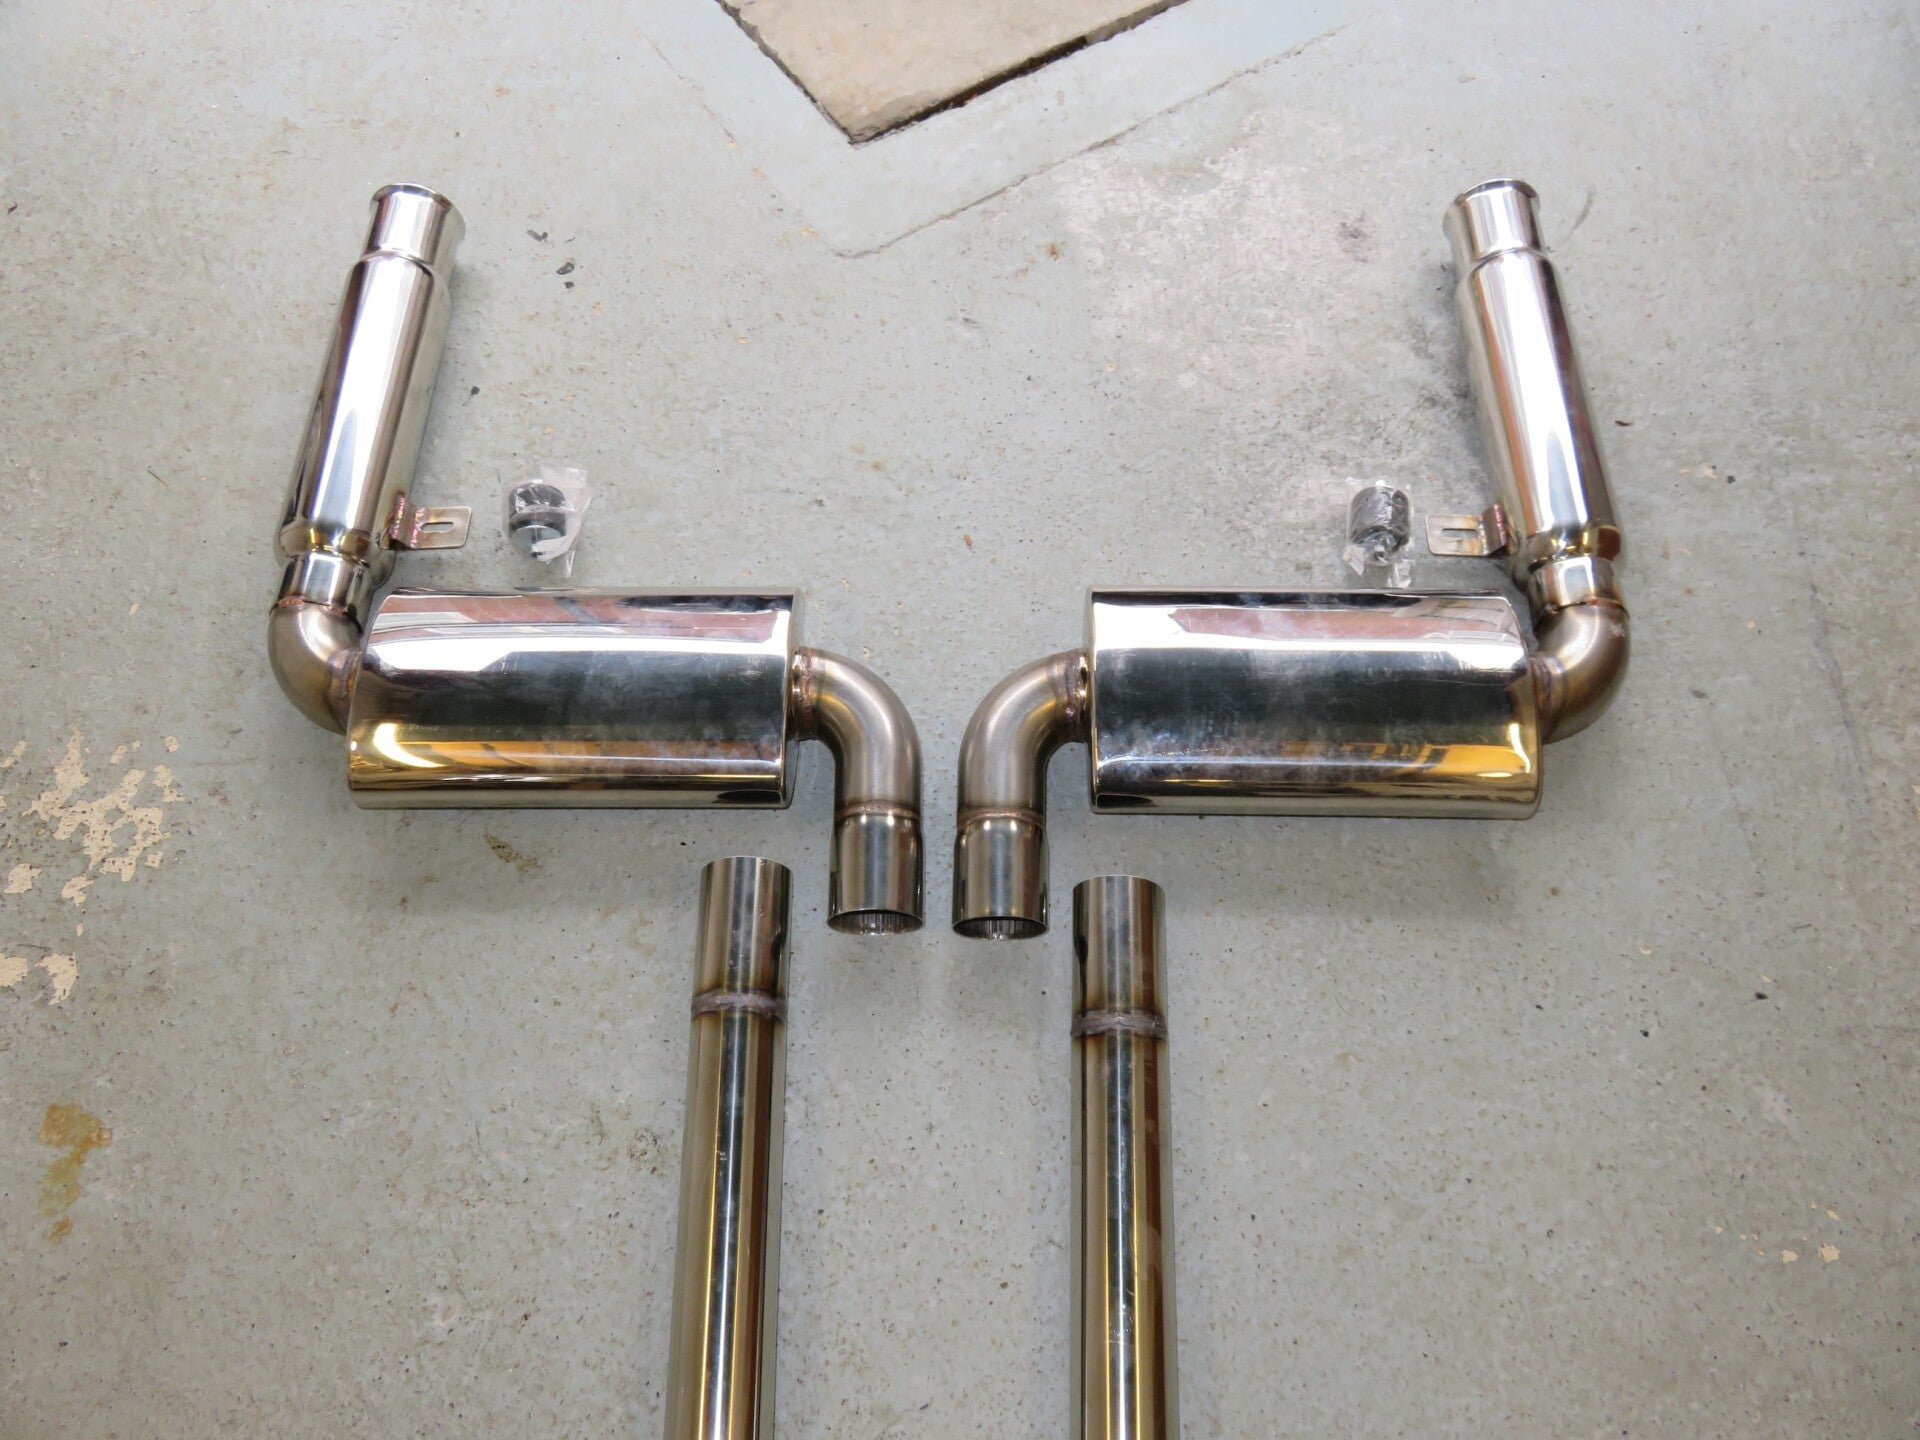
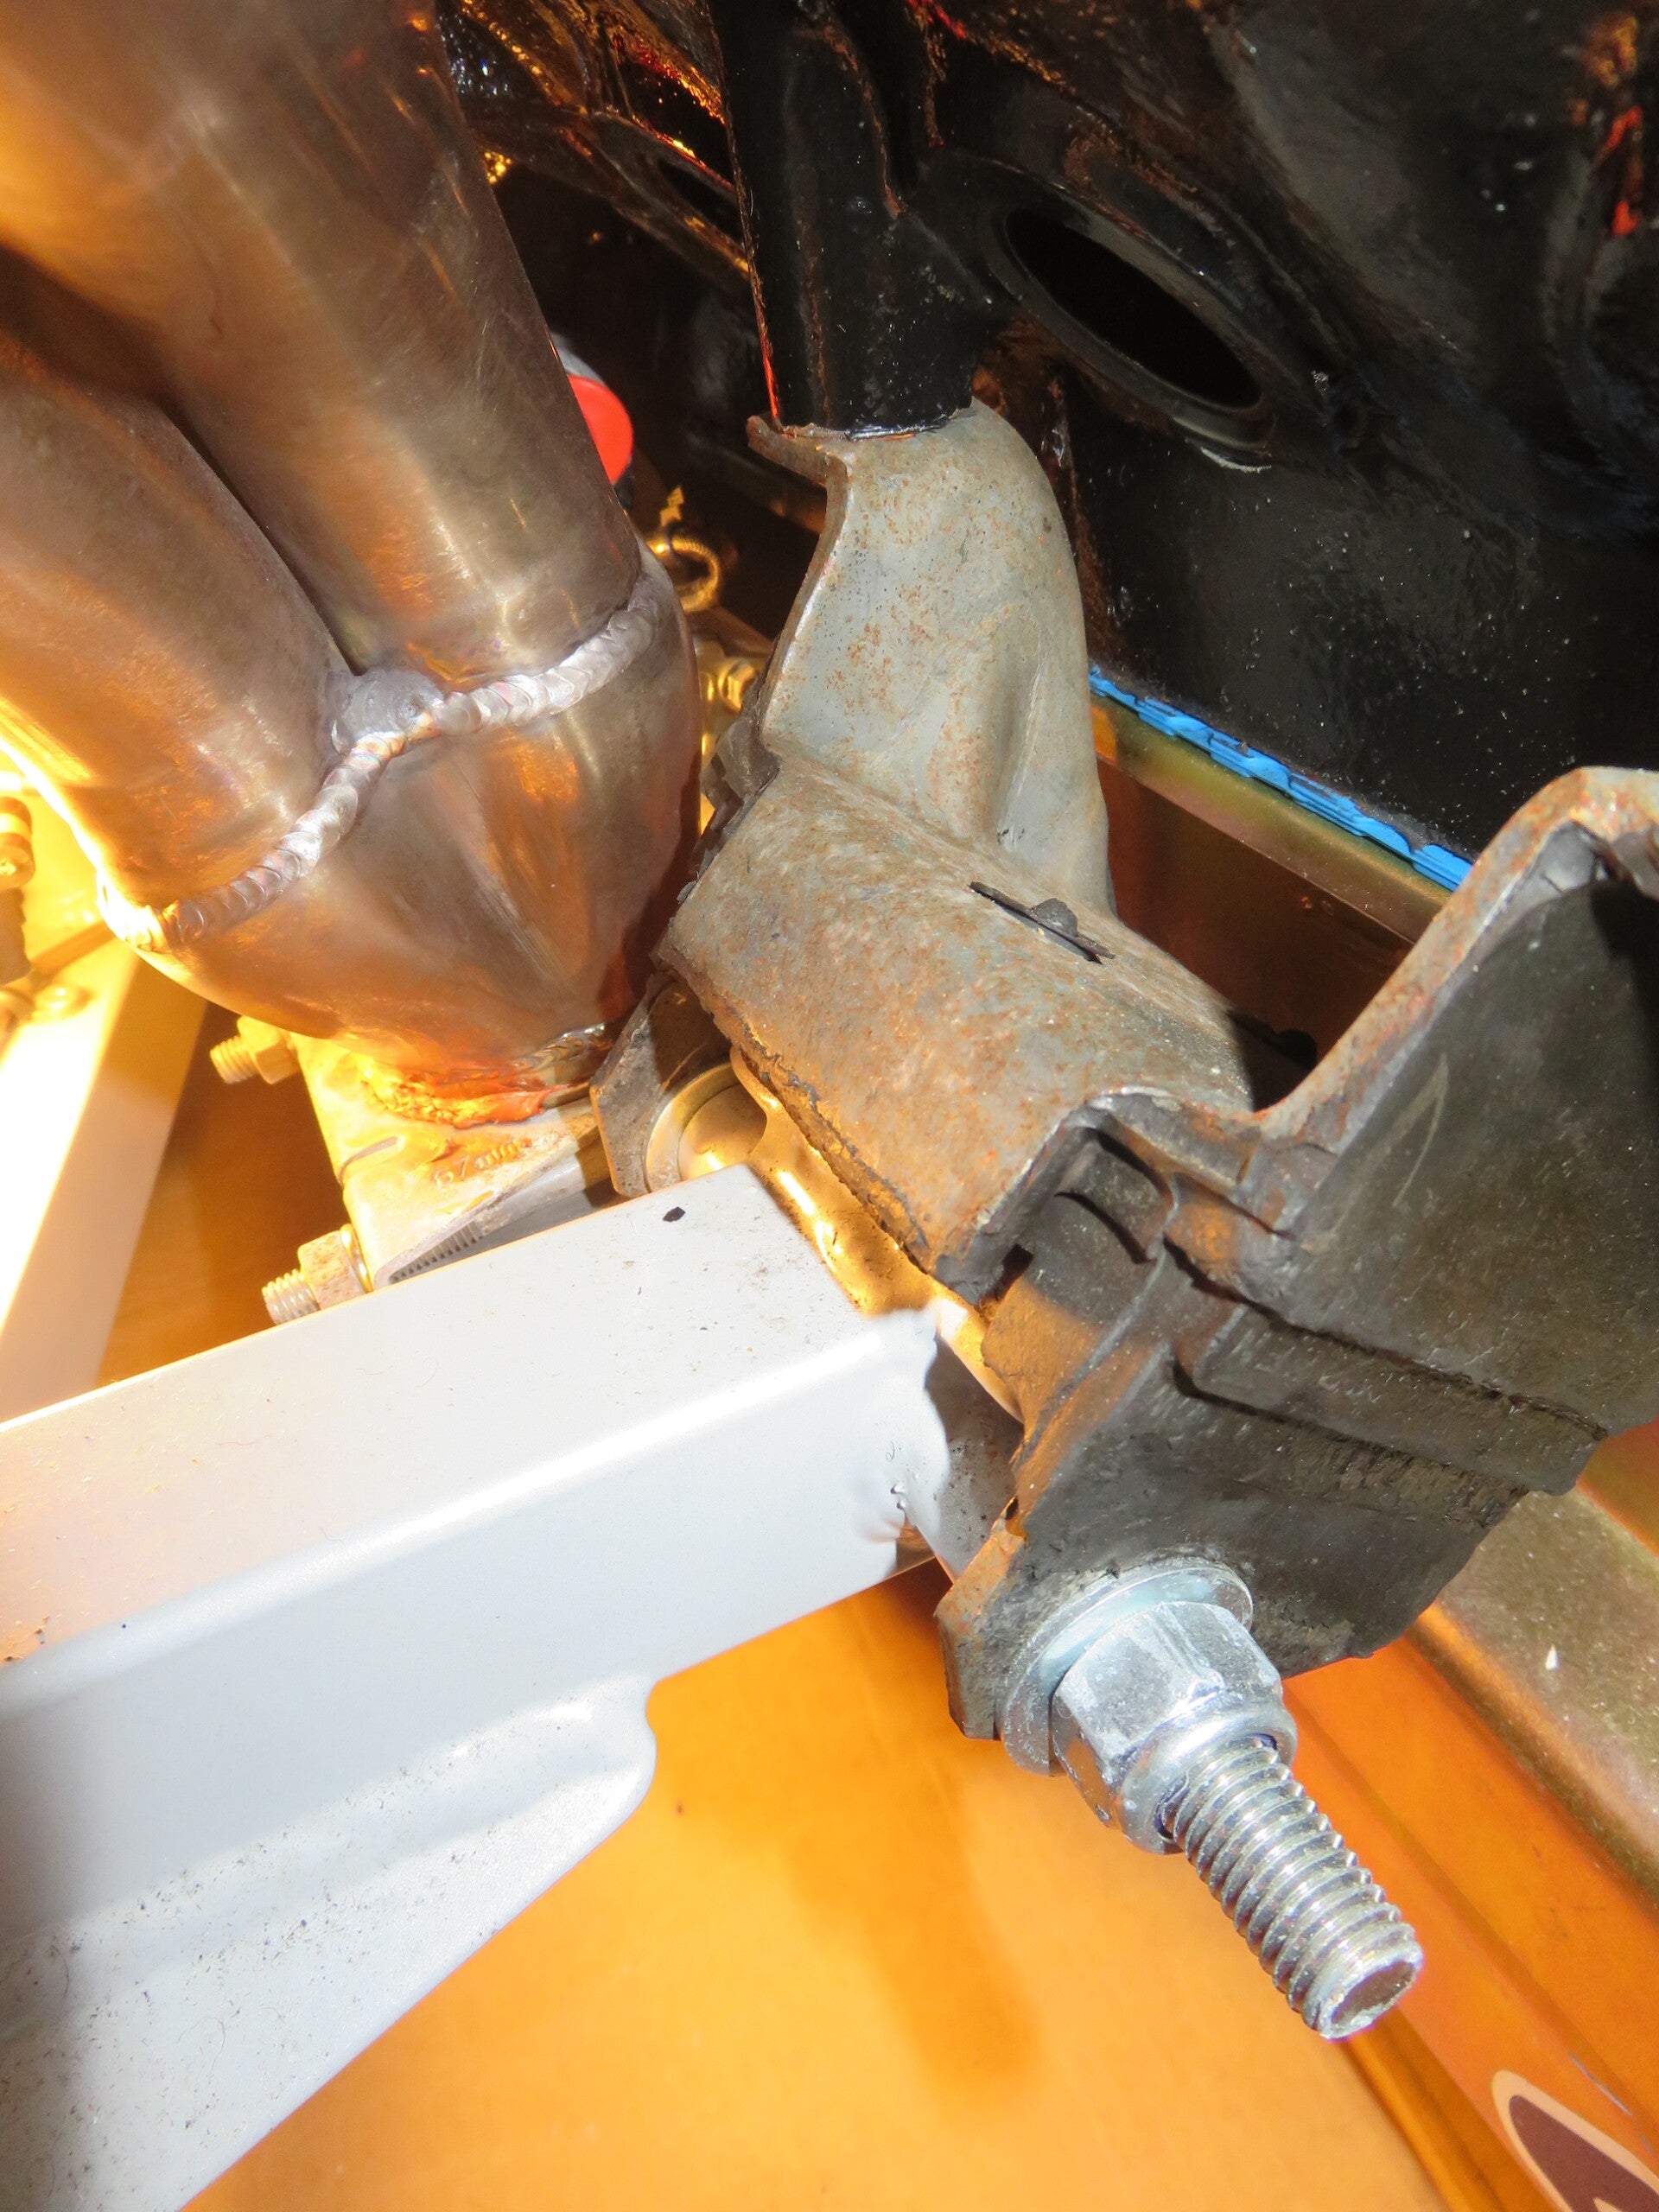
Pre-Fitting: Trial-fitted the headers and they looked awesome... Like a pair of gills on something really dangerous. However, I did have one non-associated but necessary-to-resolve issue. When I fitted the engine, I fitted the nearside engine mounting bolt -thread facing backwards, i.e. the thread being adjacent to the downpipe. But, when the header was in position, the surplus thread end was less than a gnat's hair away from the collector down-pipe… Not good. Luckily, the engine mounting bolt undid easily, and five minutes later the bolt was oriented with the thread facing forward, i.e. the hex' nut being adjacent to the downpipe. Now there was plenty of room between the engine mounting bolt and the downpipe… Phew..! thought I was going to have a major job on there. I did consider just sawing a bit off the surplus thread, but with the nyloc being so close to all that heat, I wasn't willing to compromise.

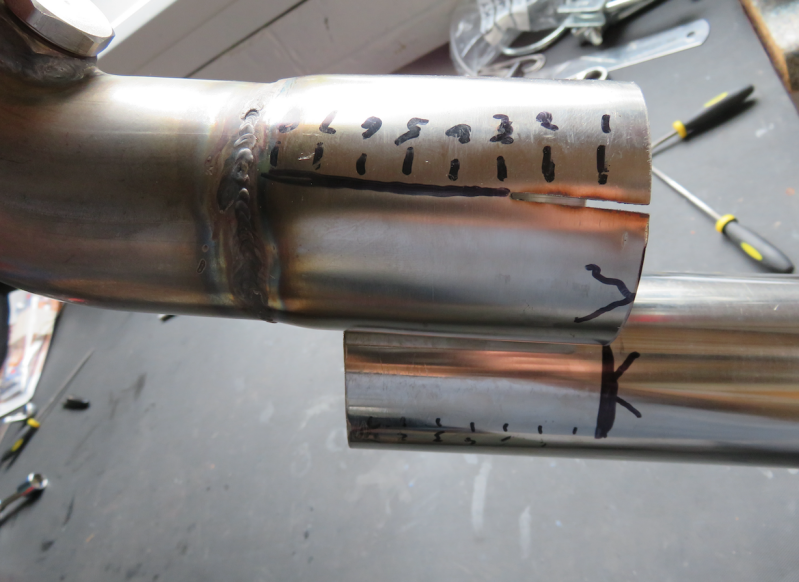
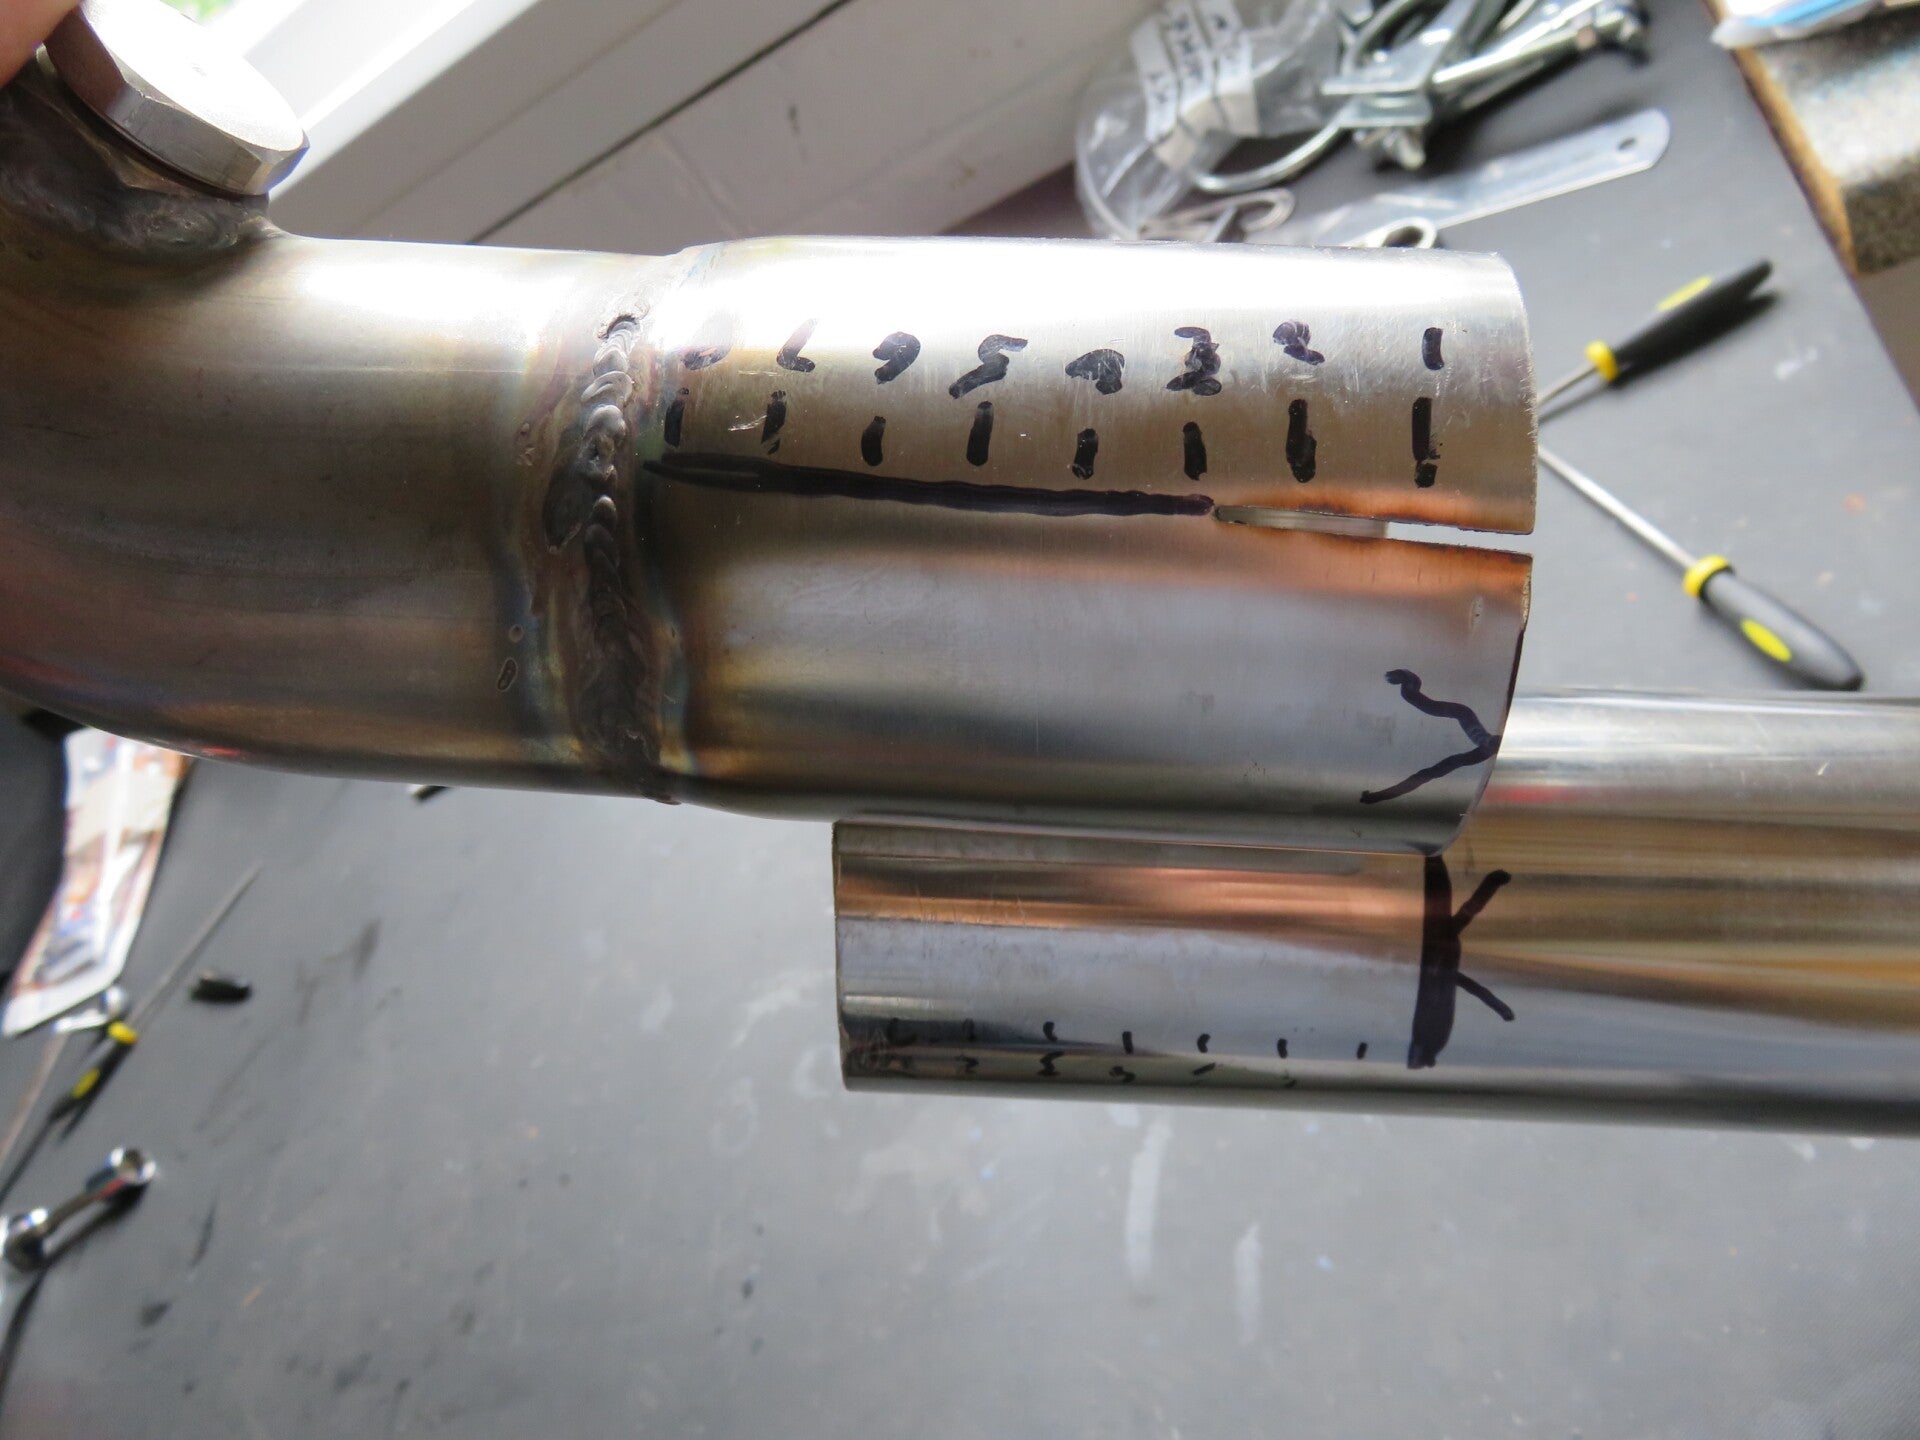
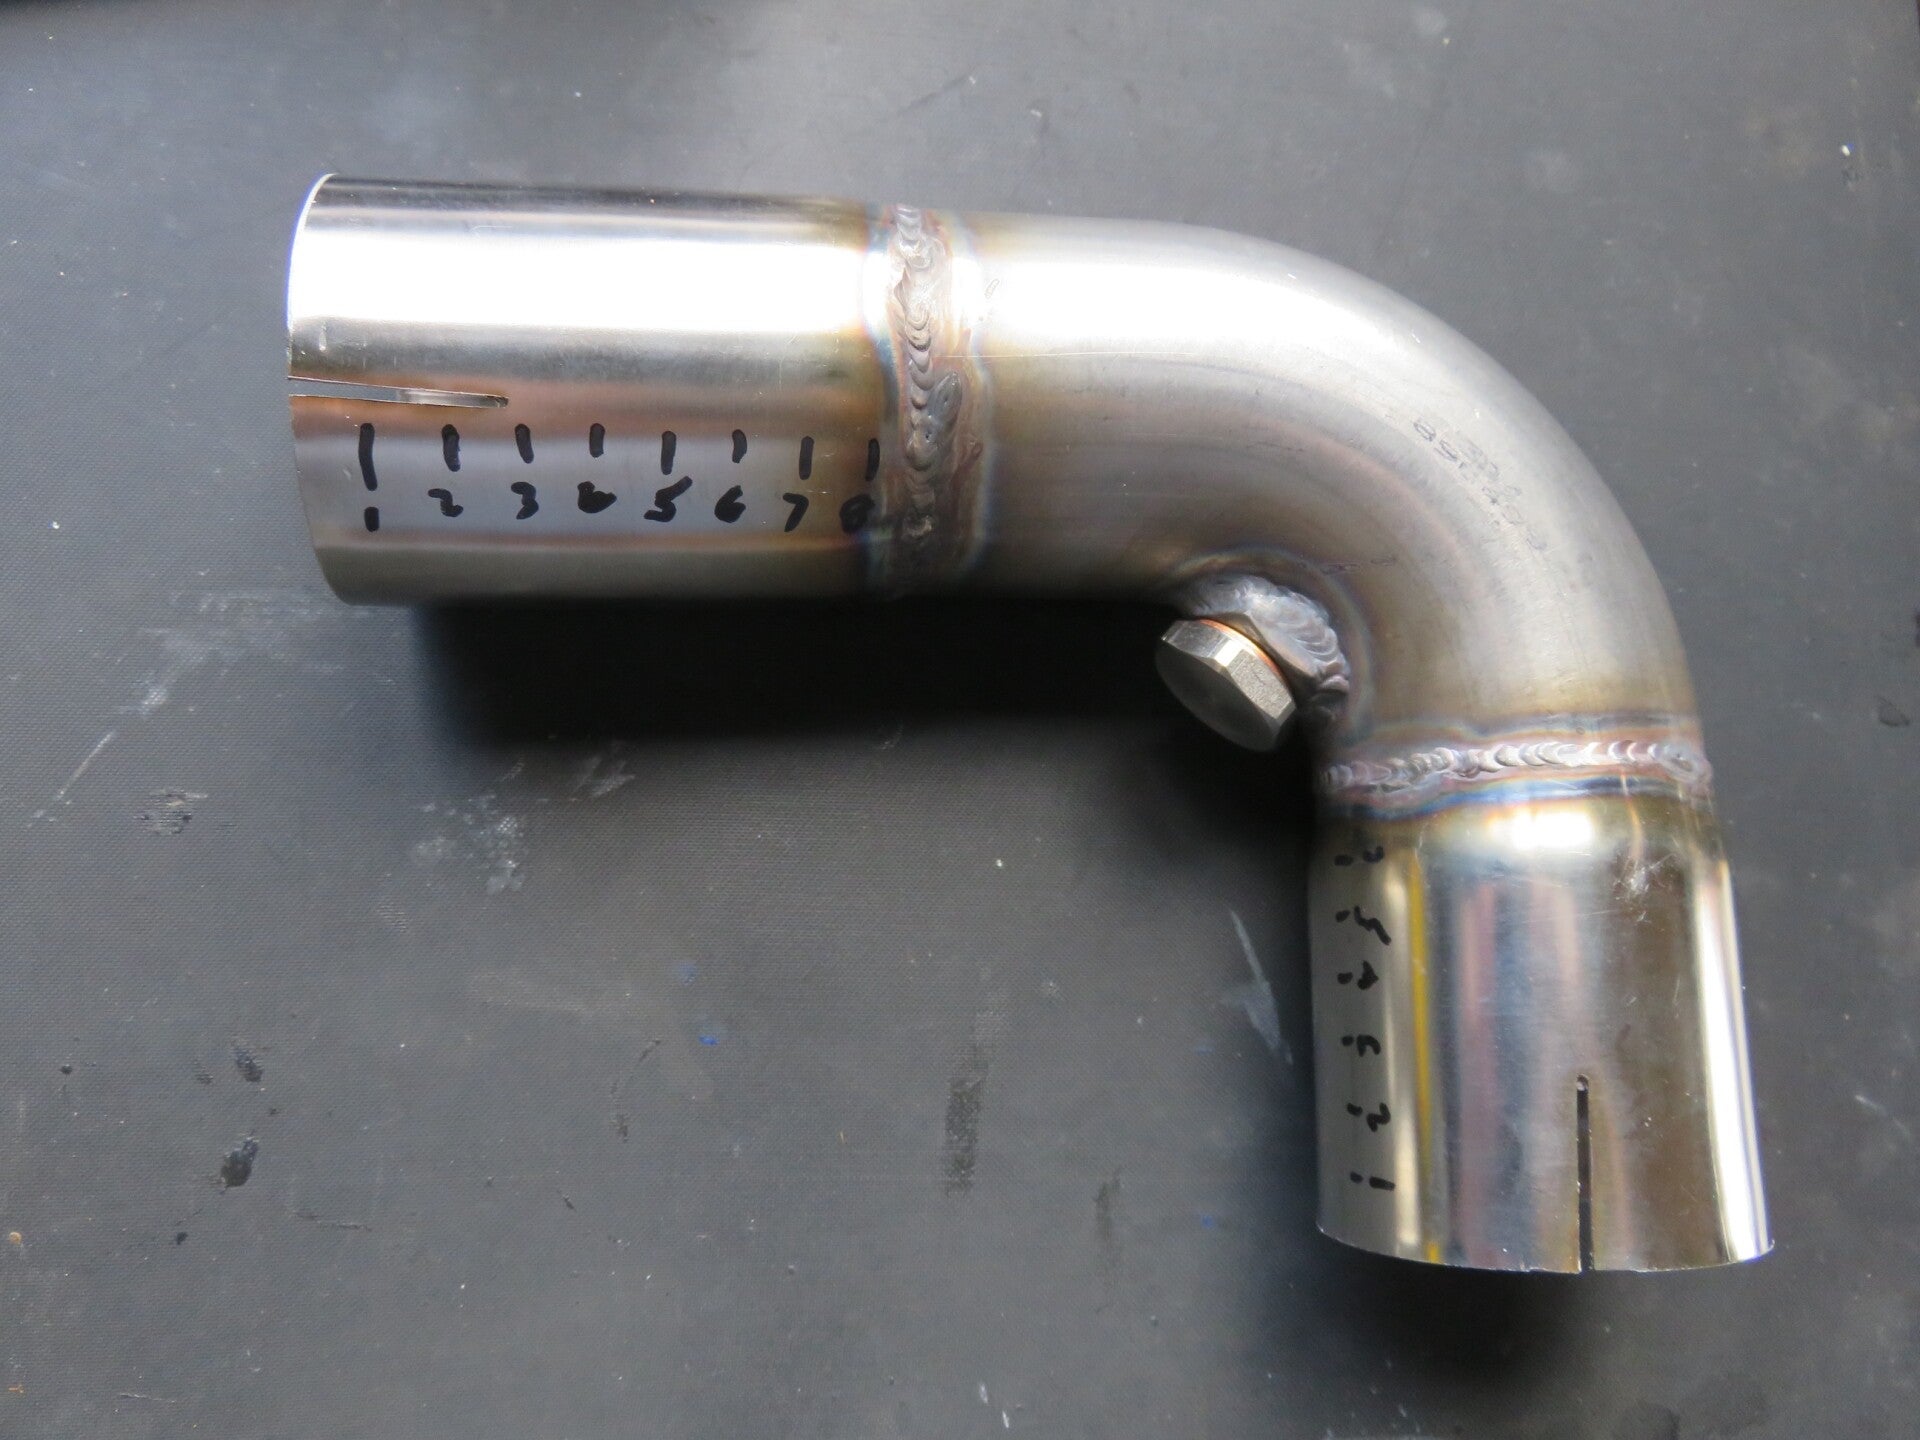
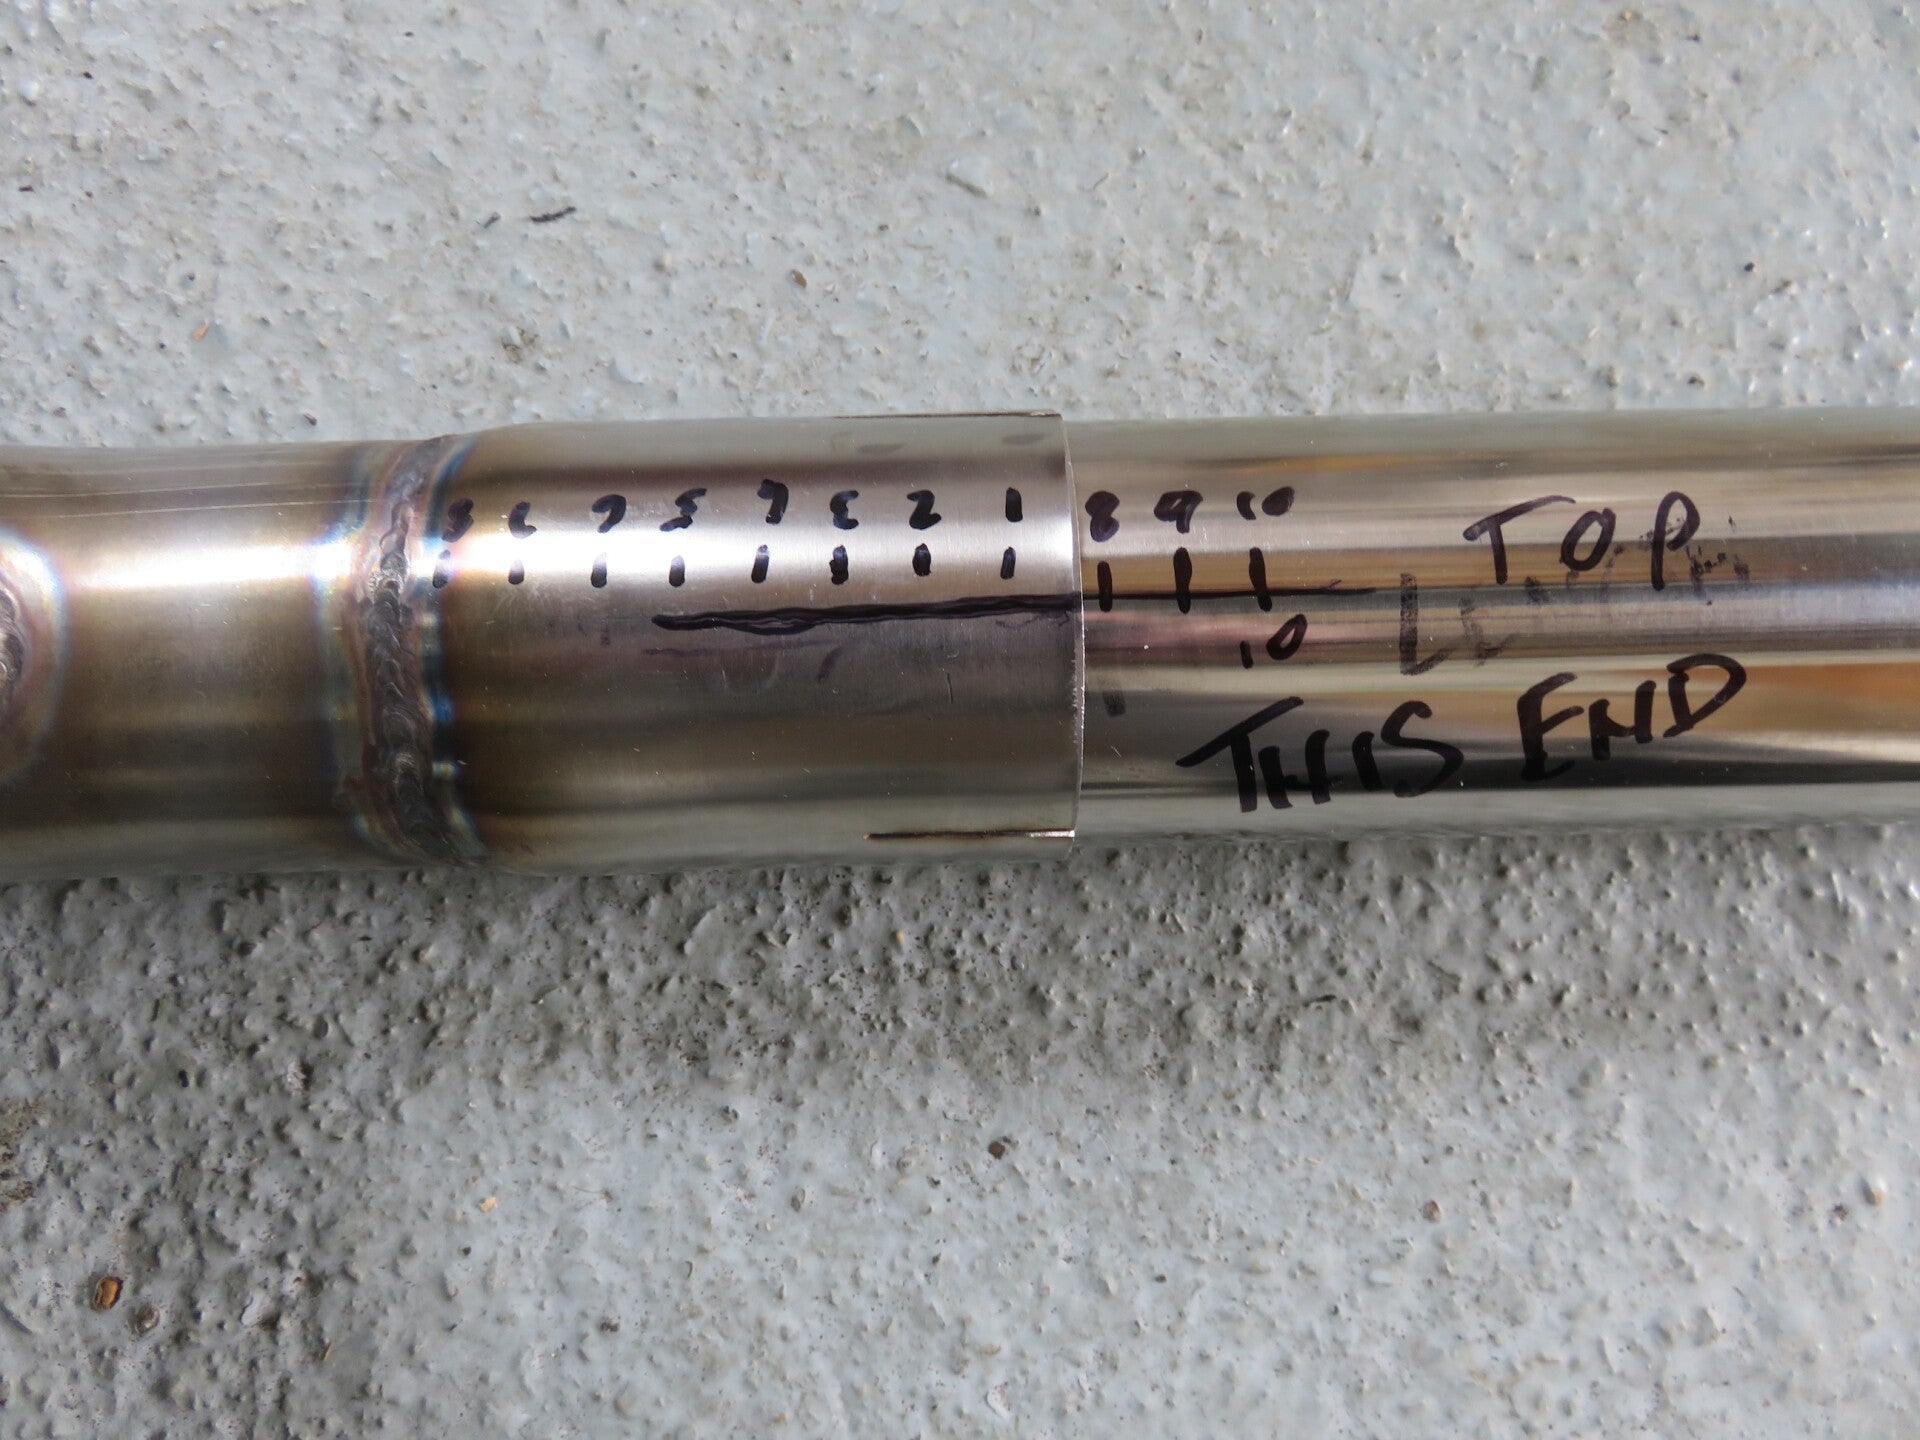
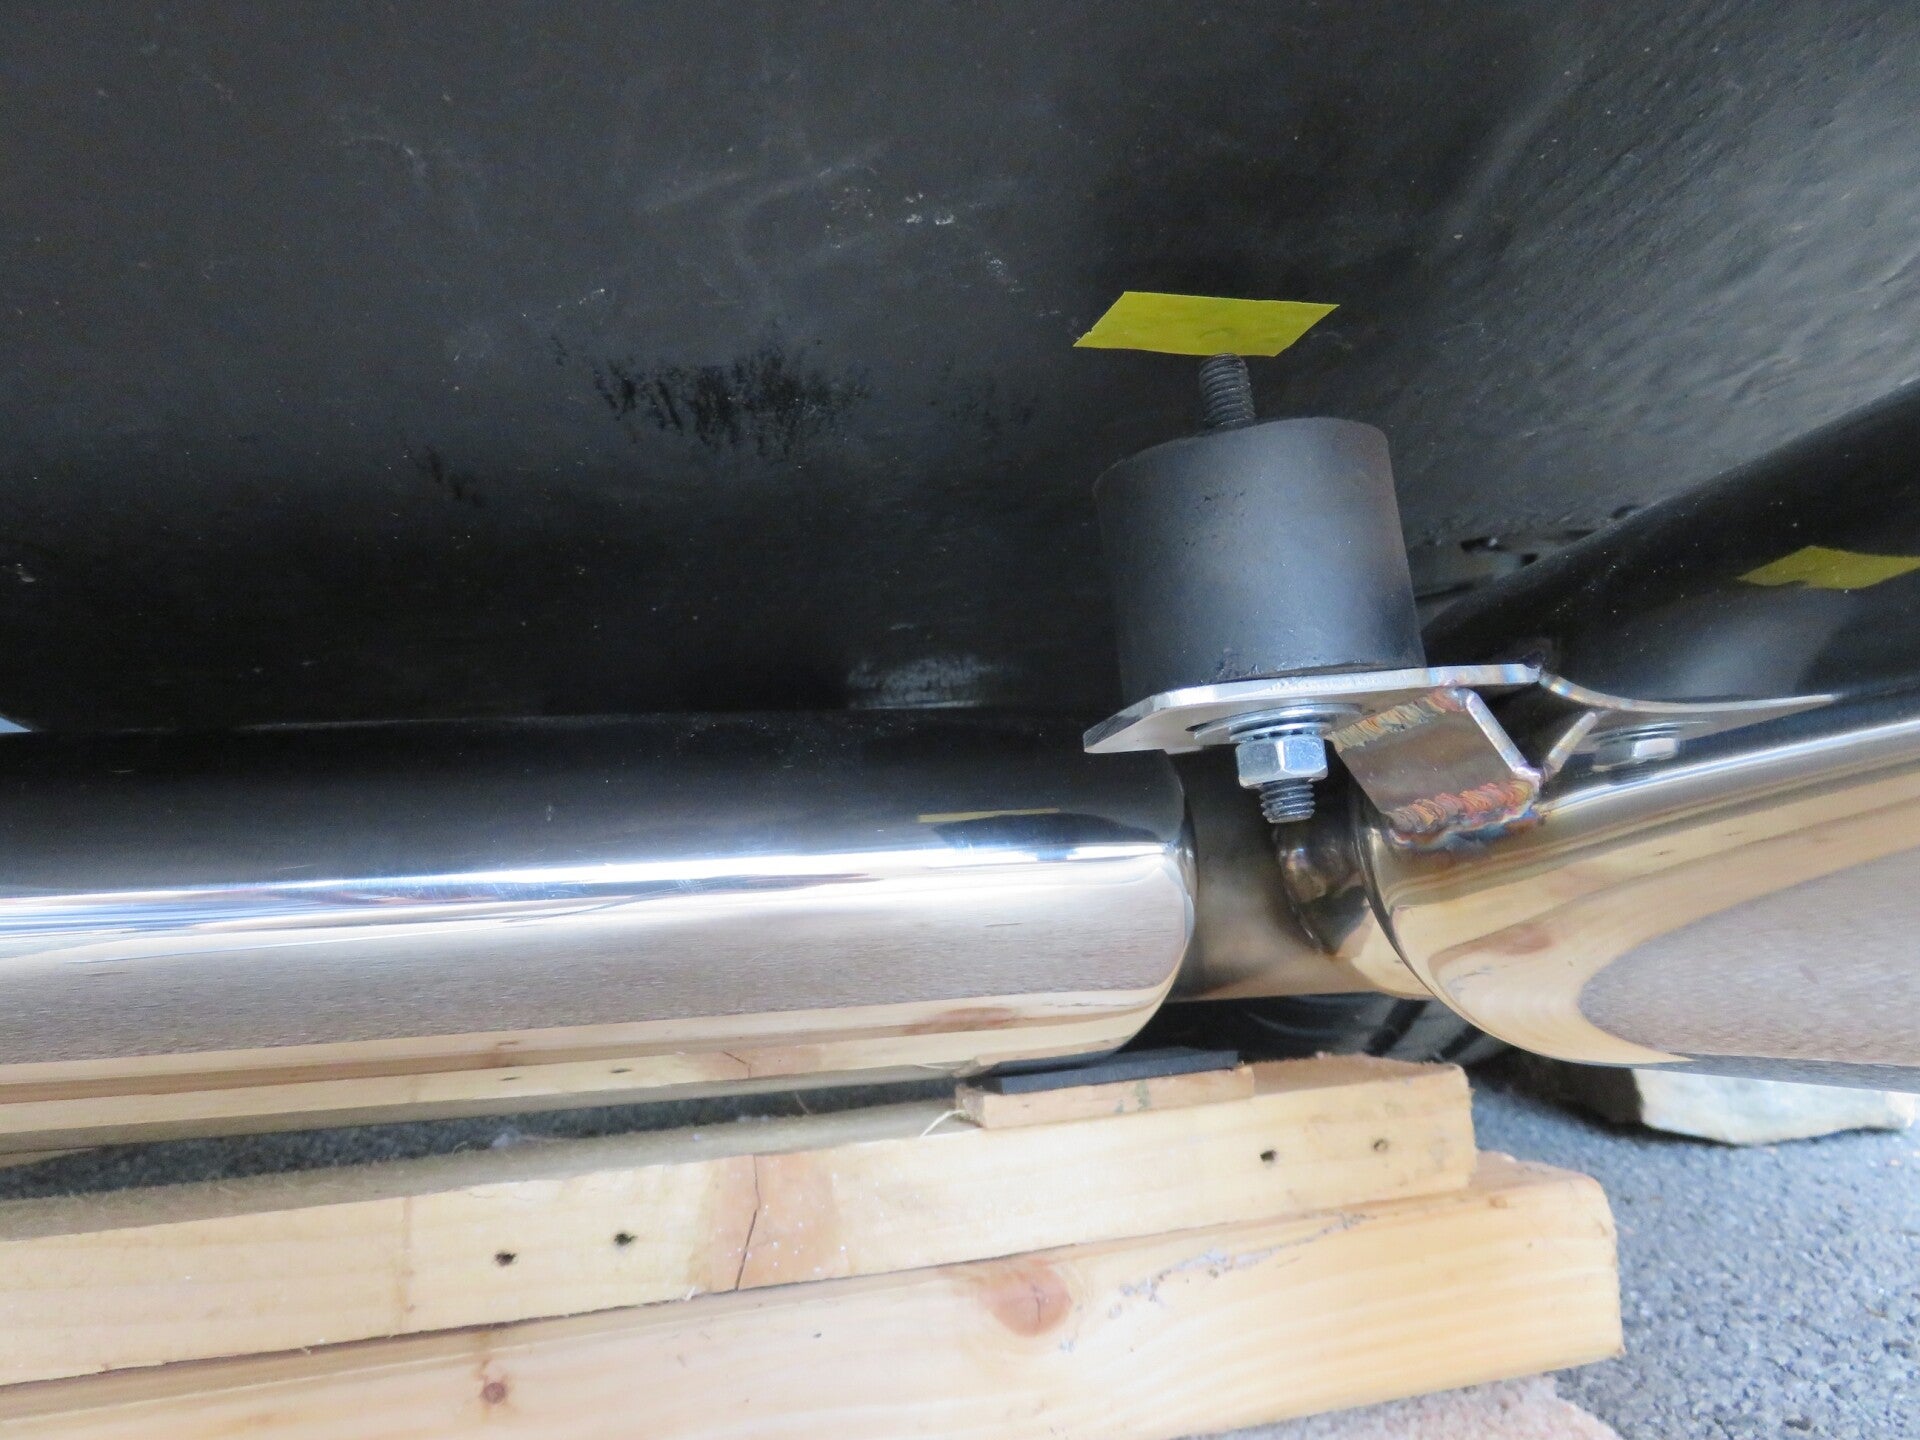
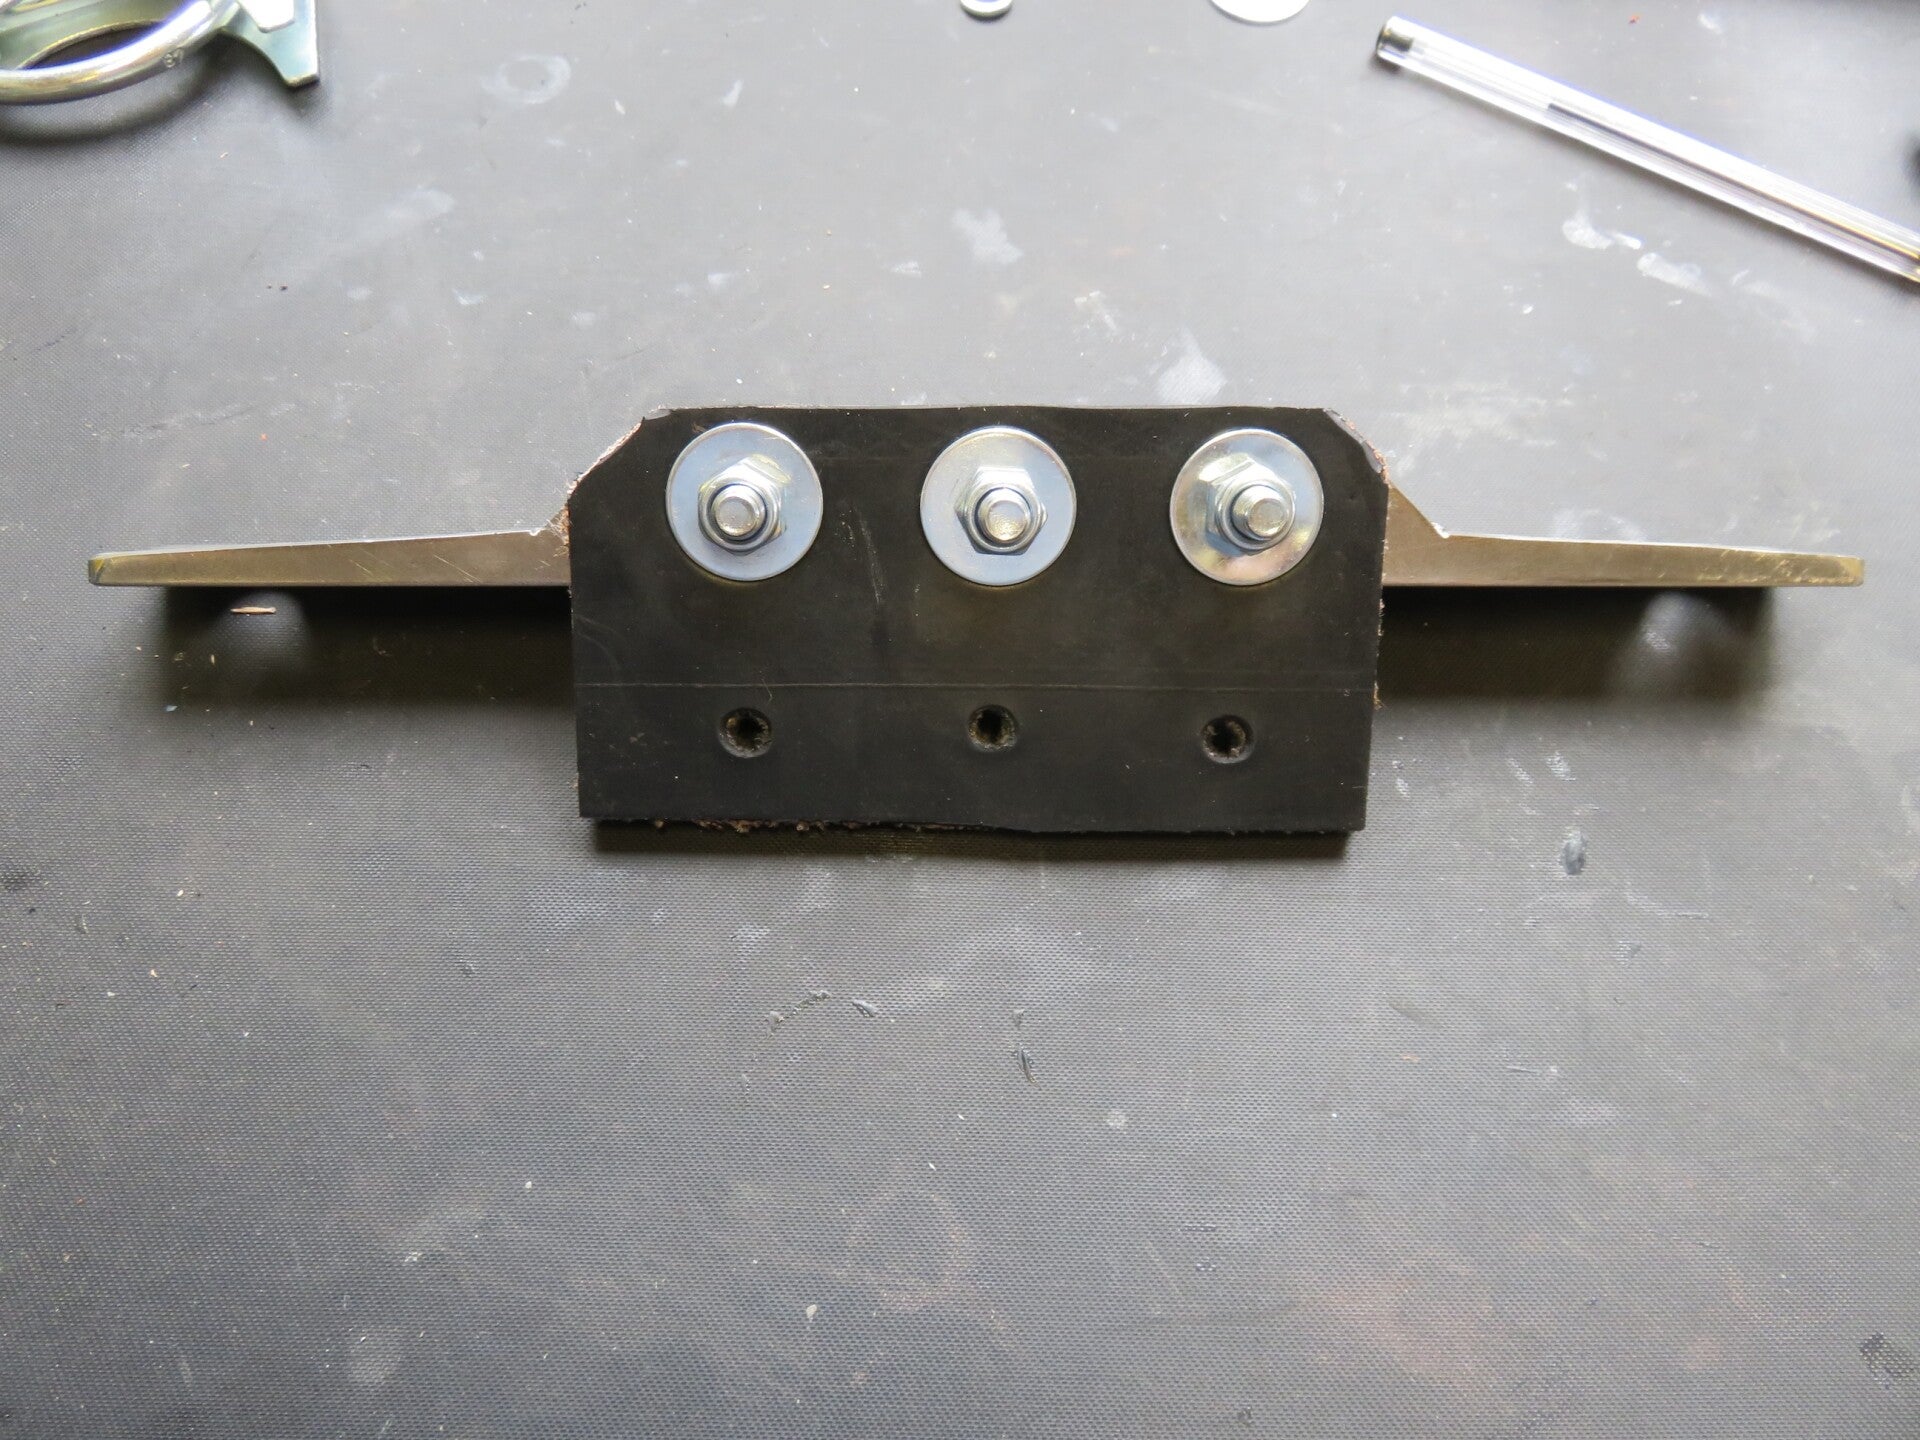
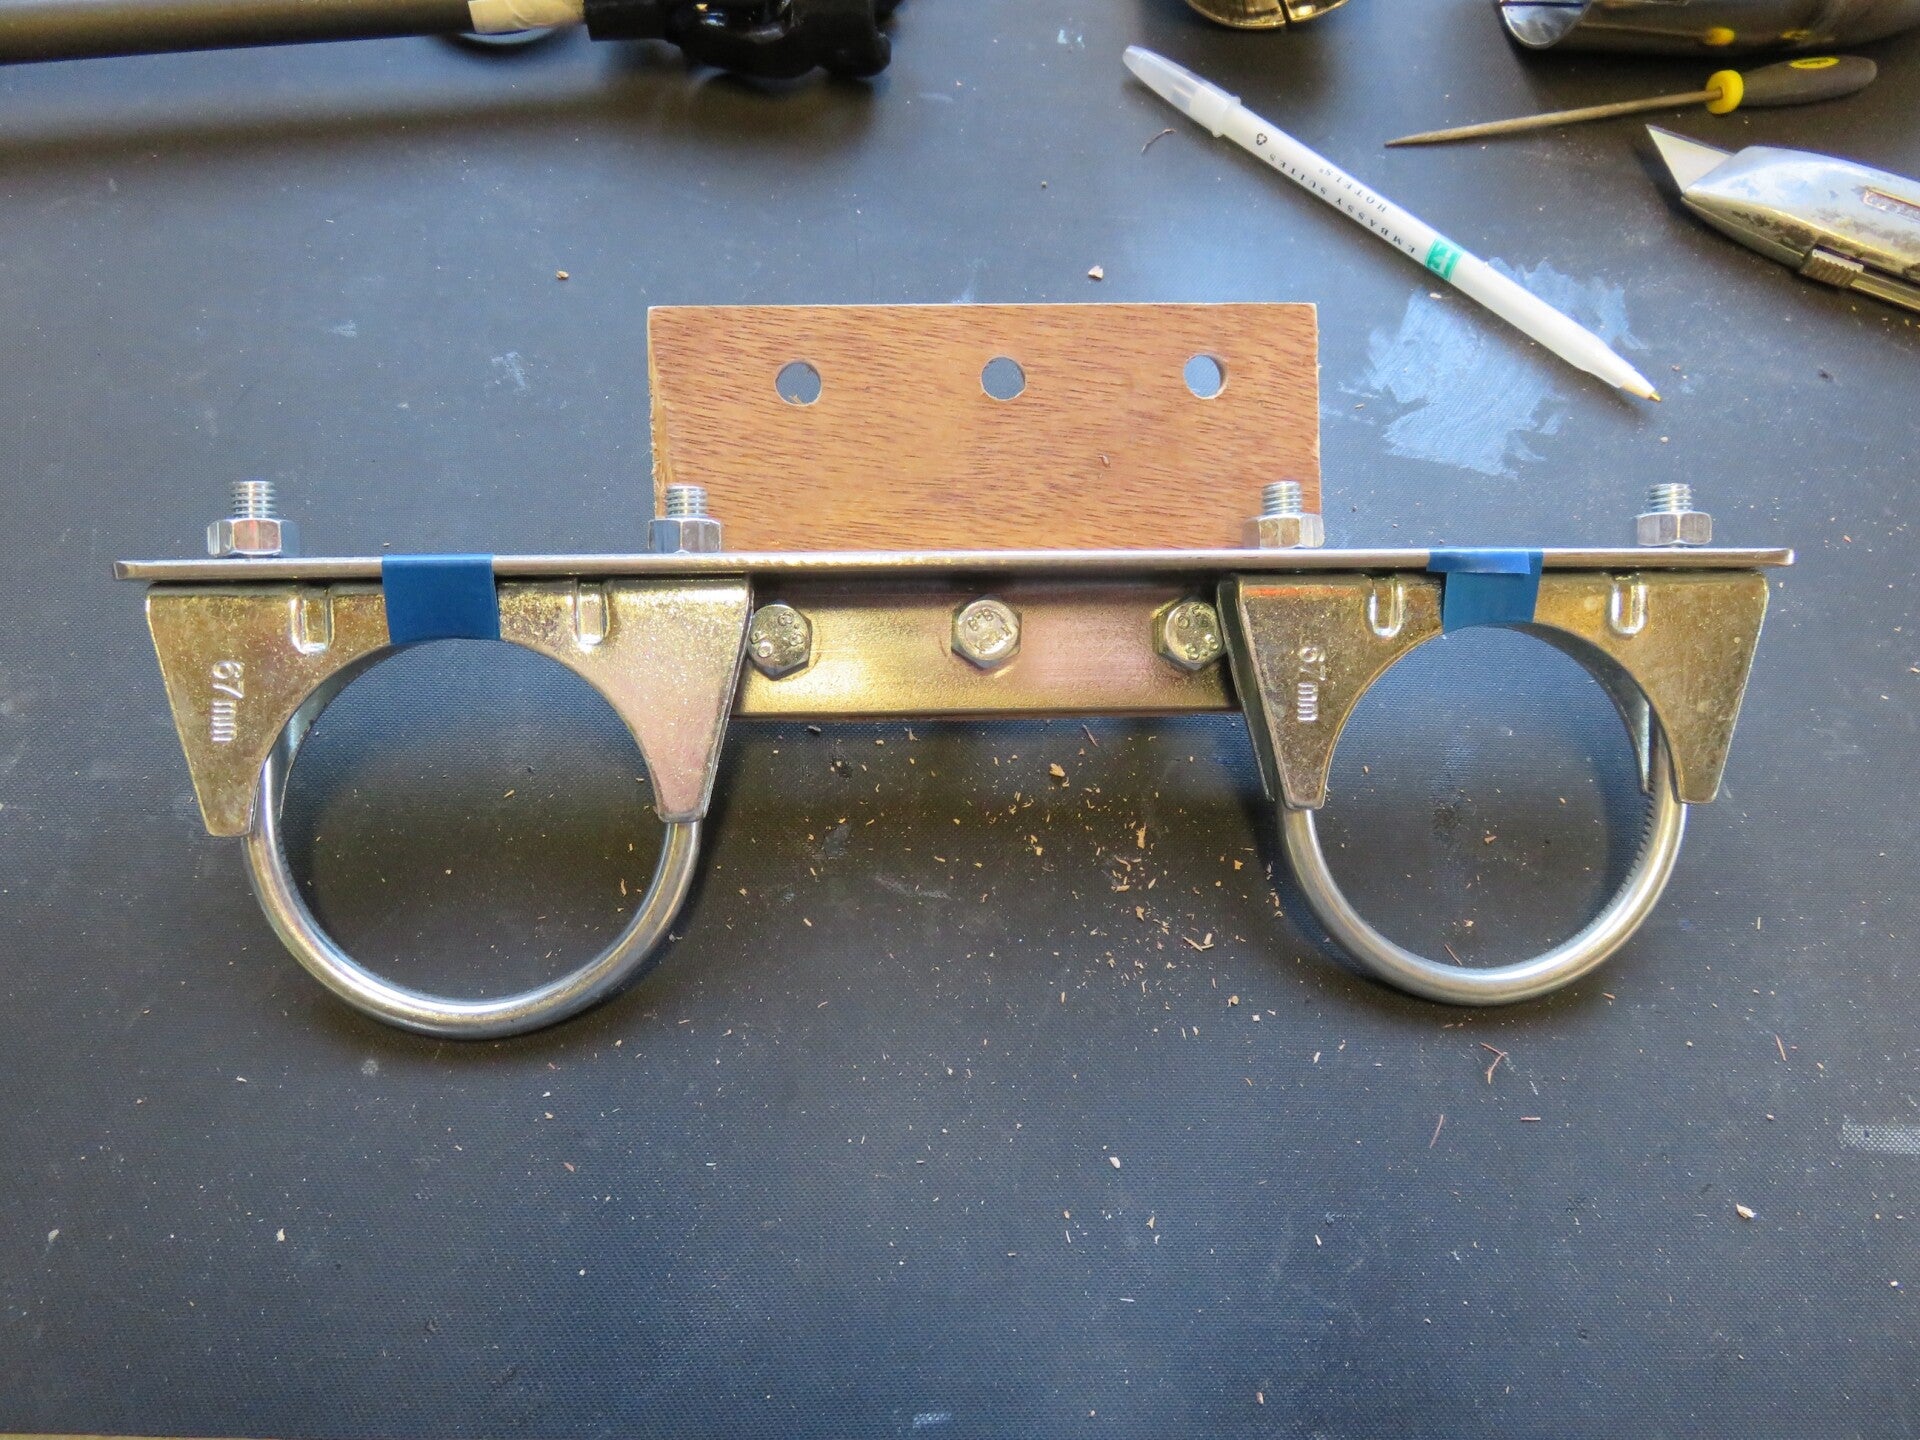
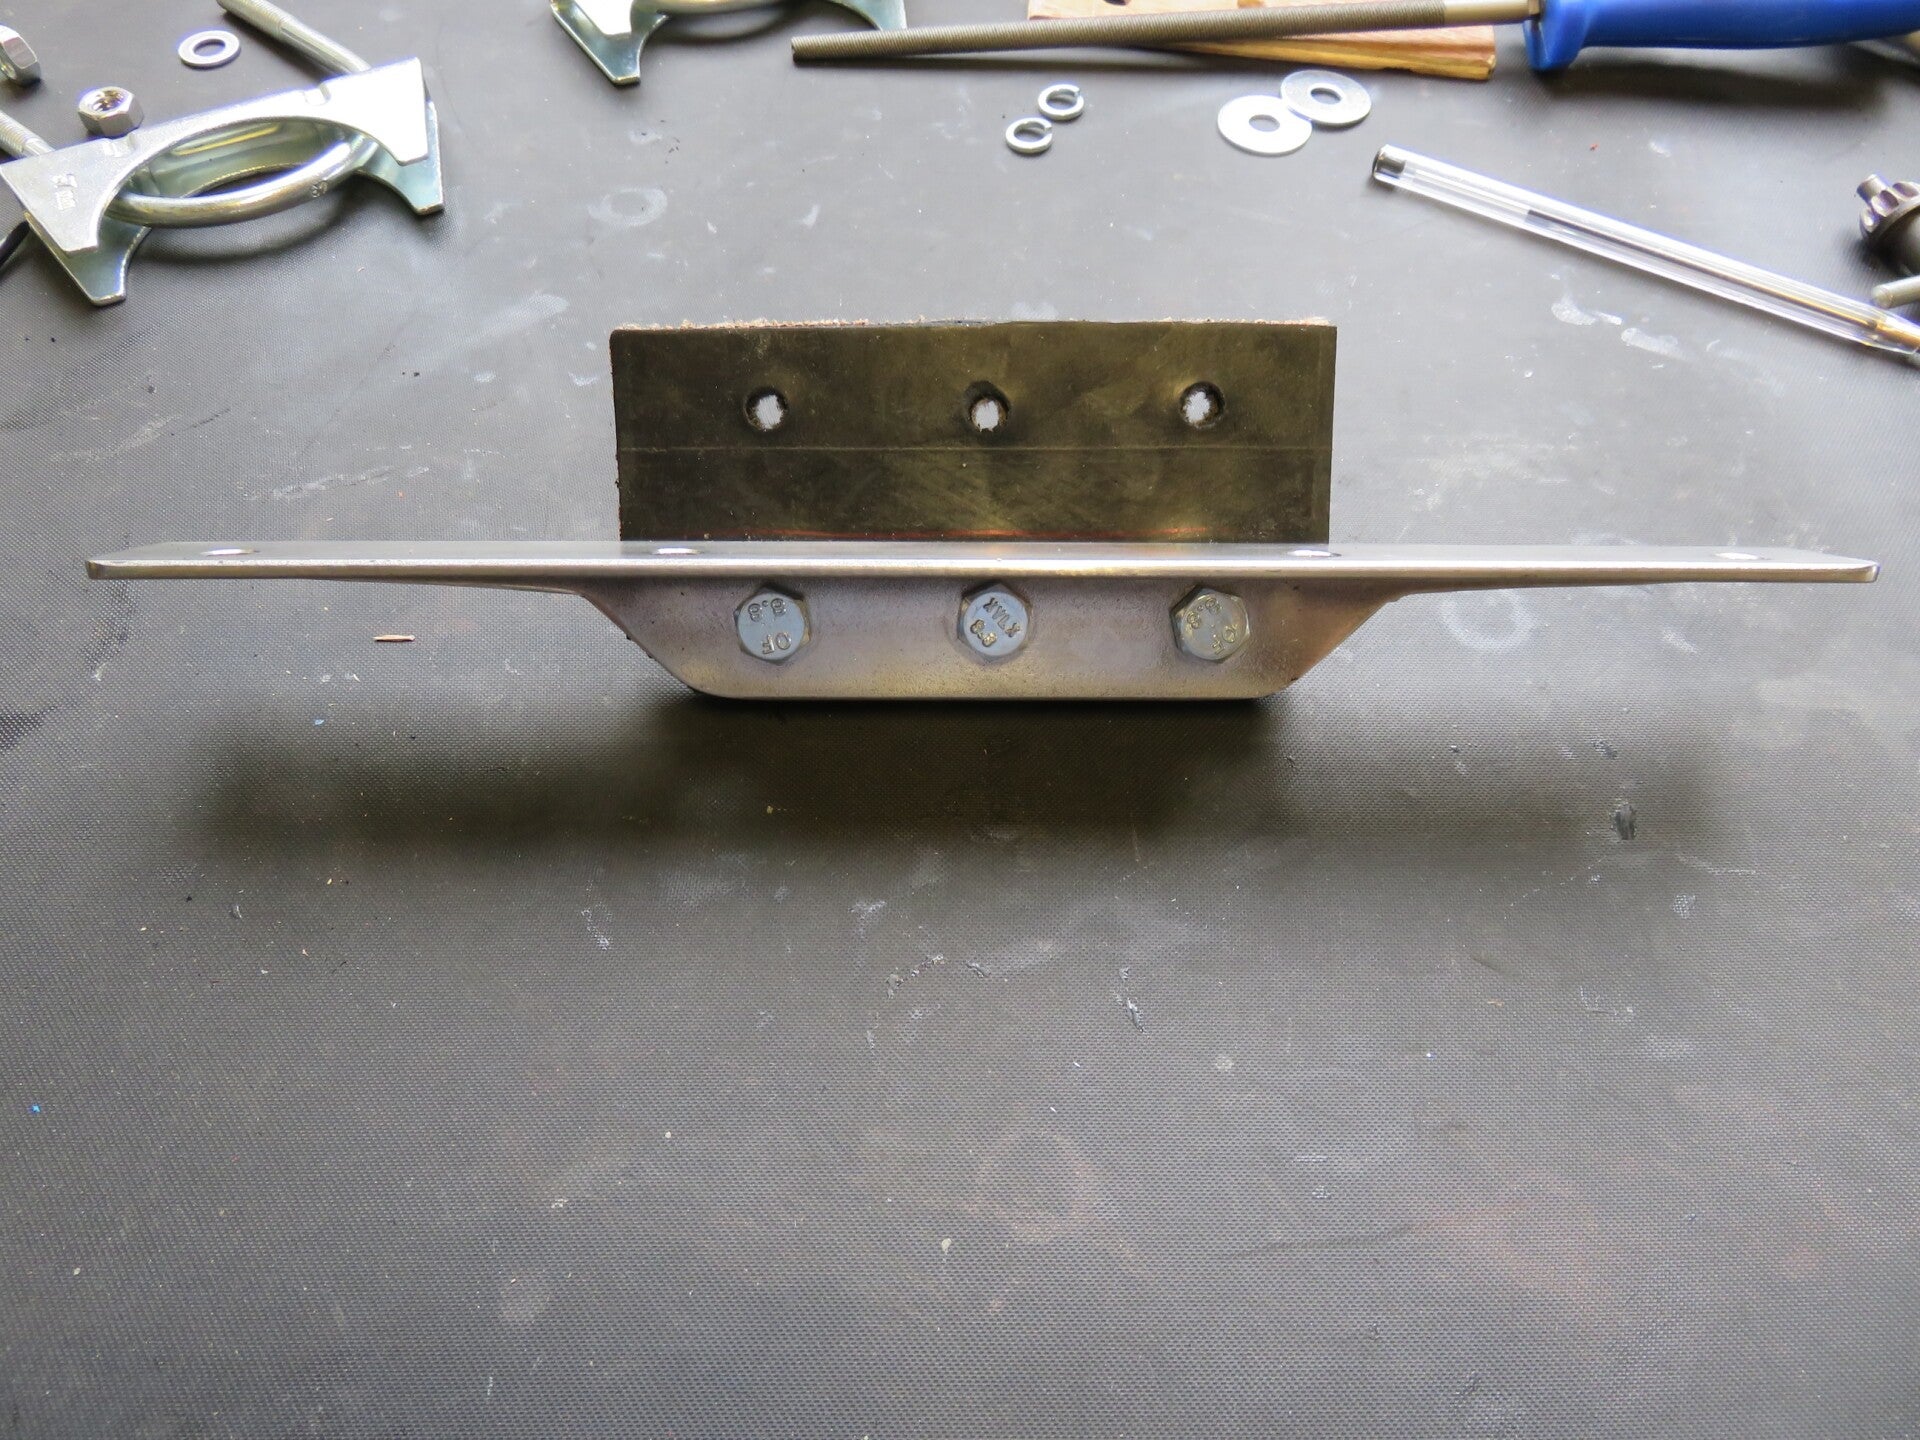
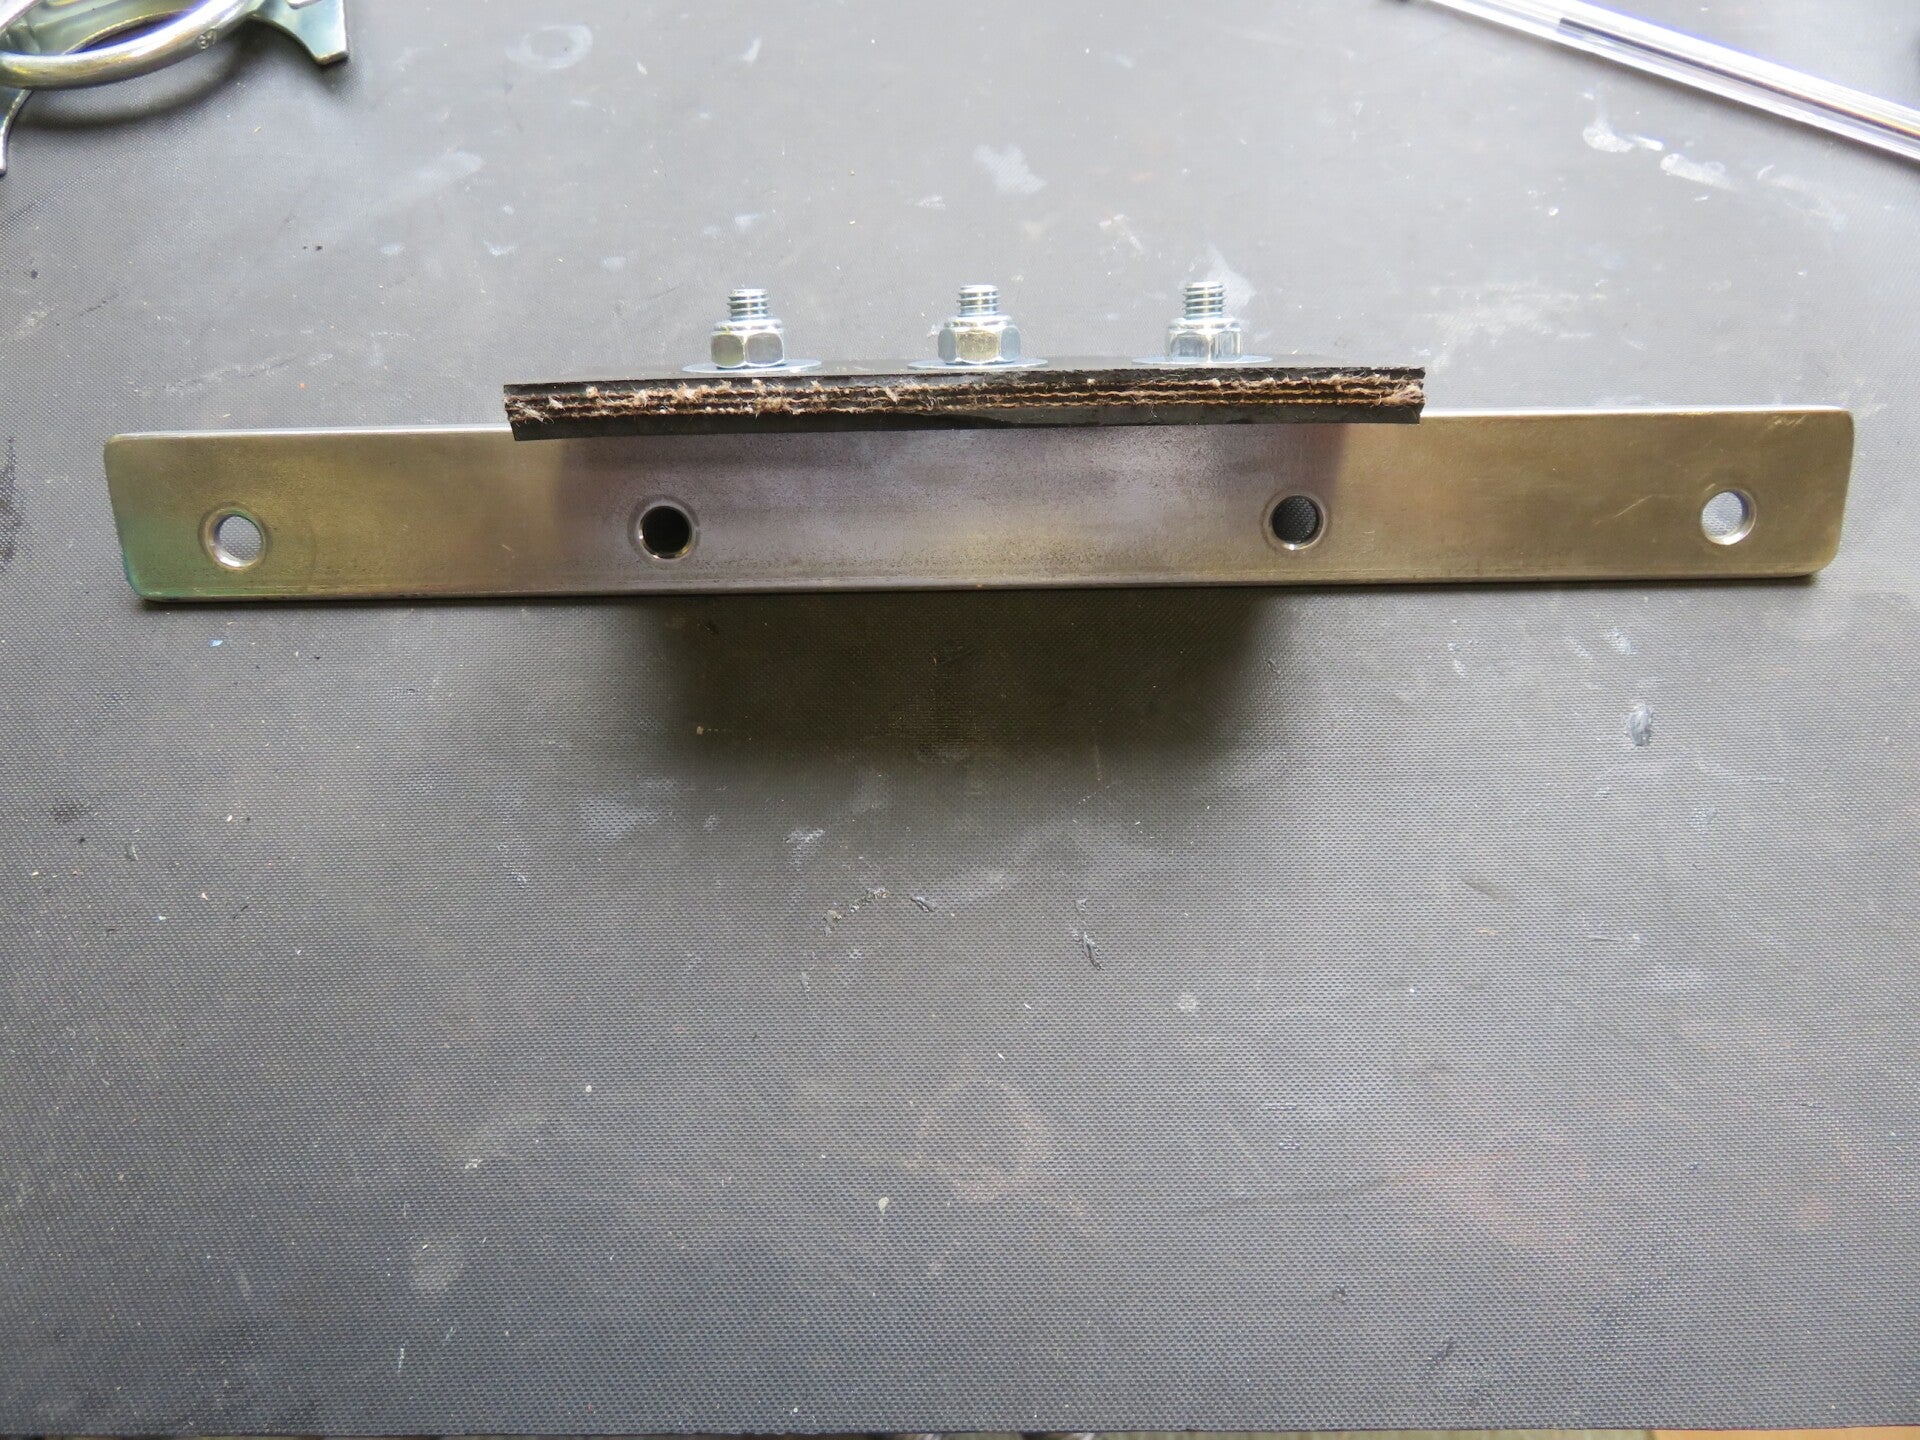
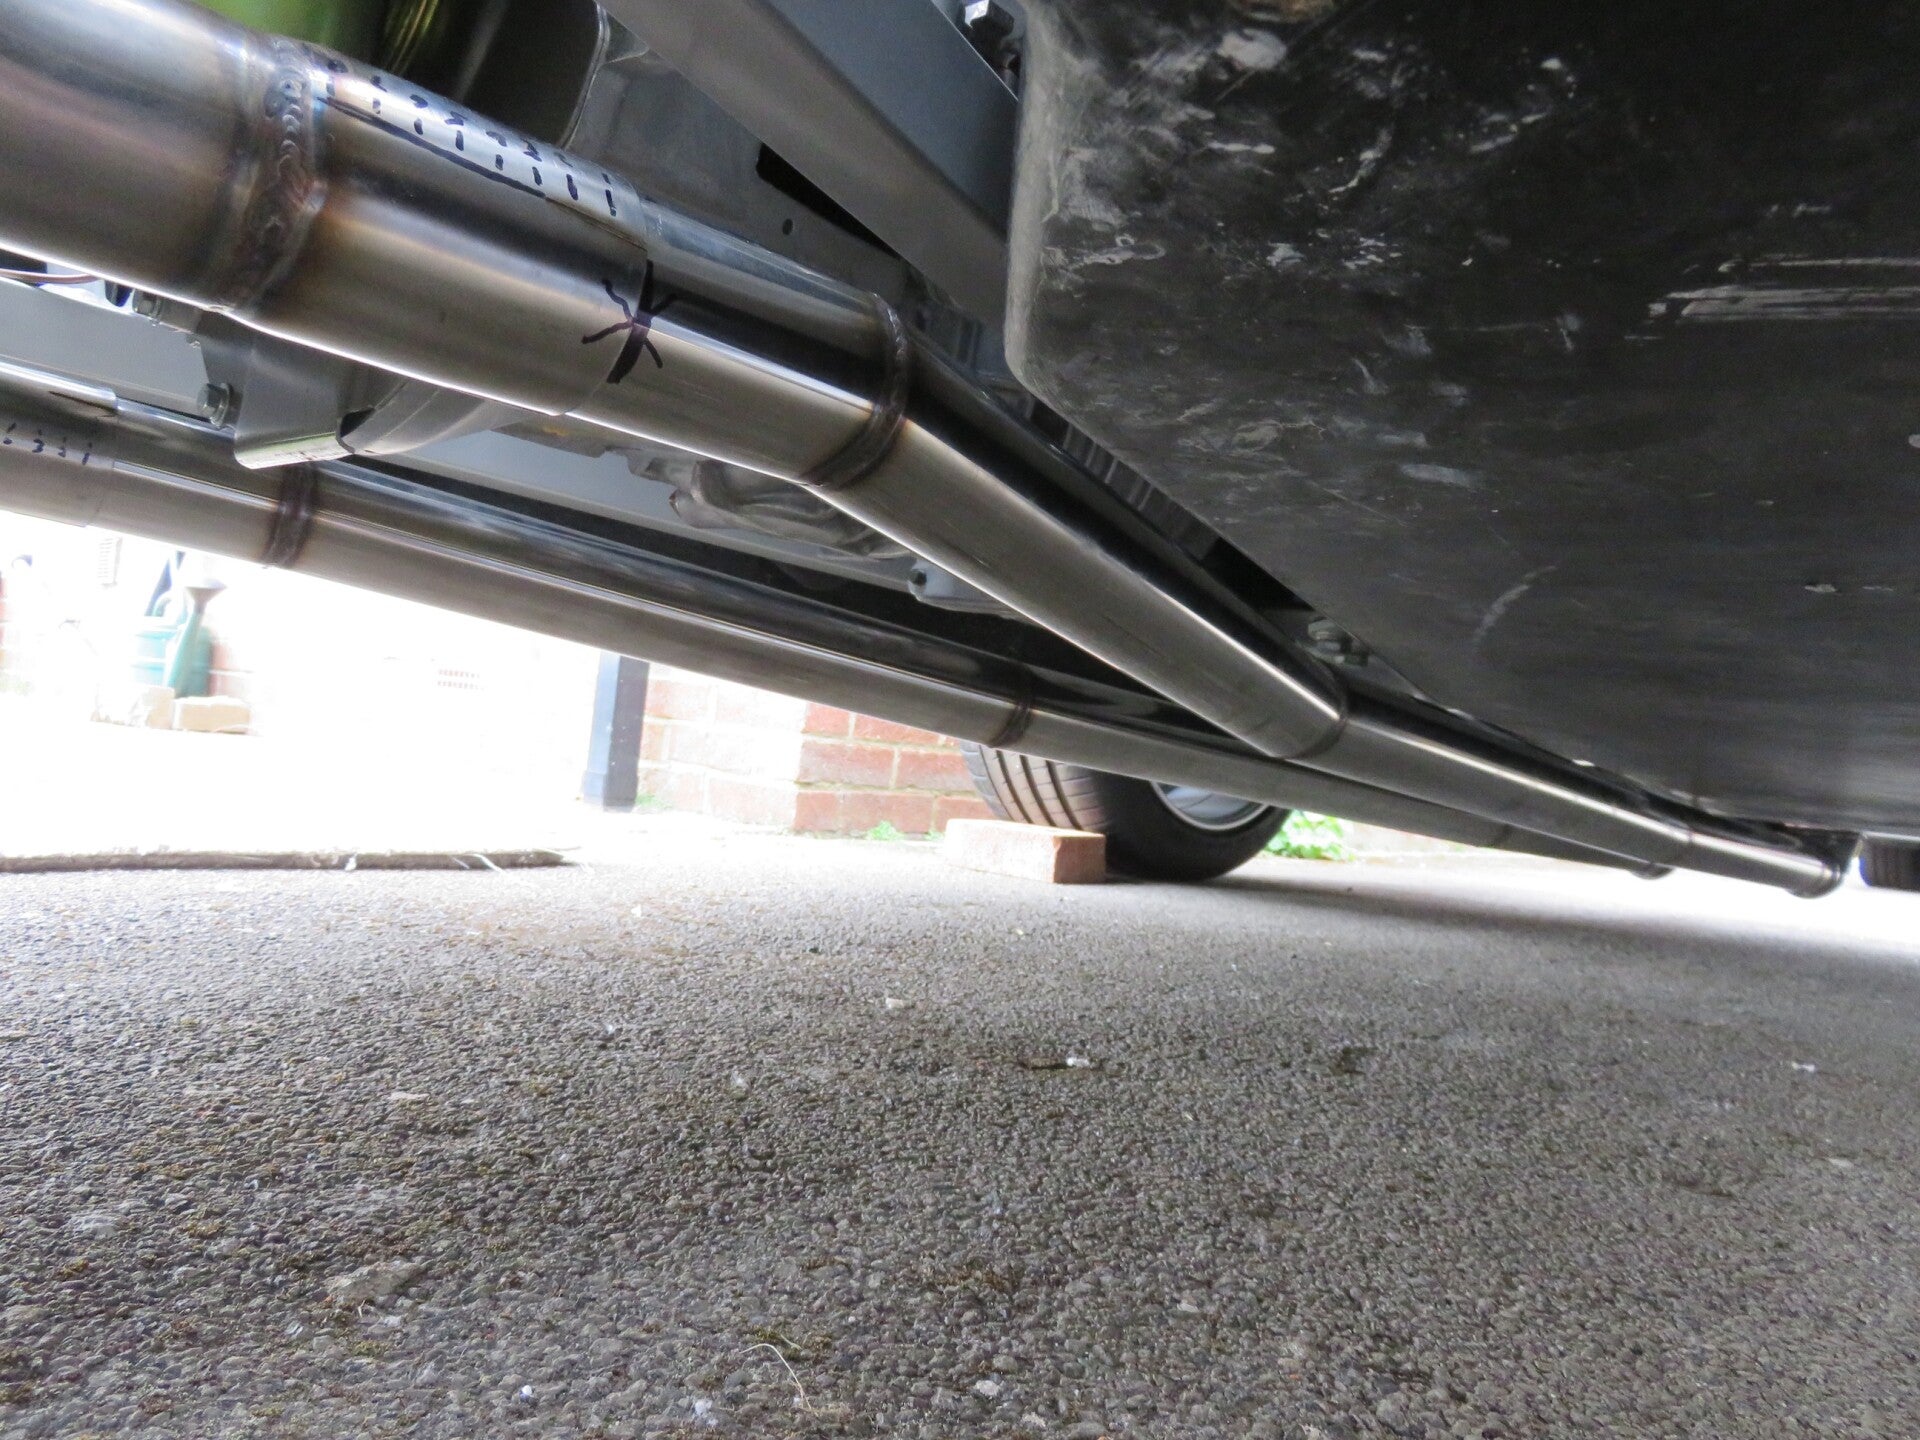
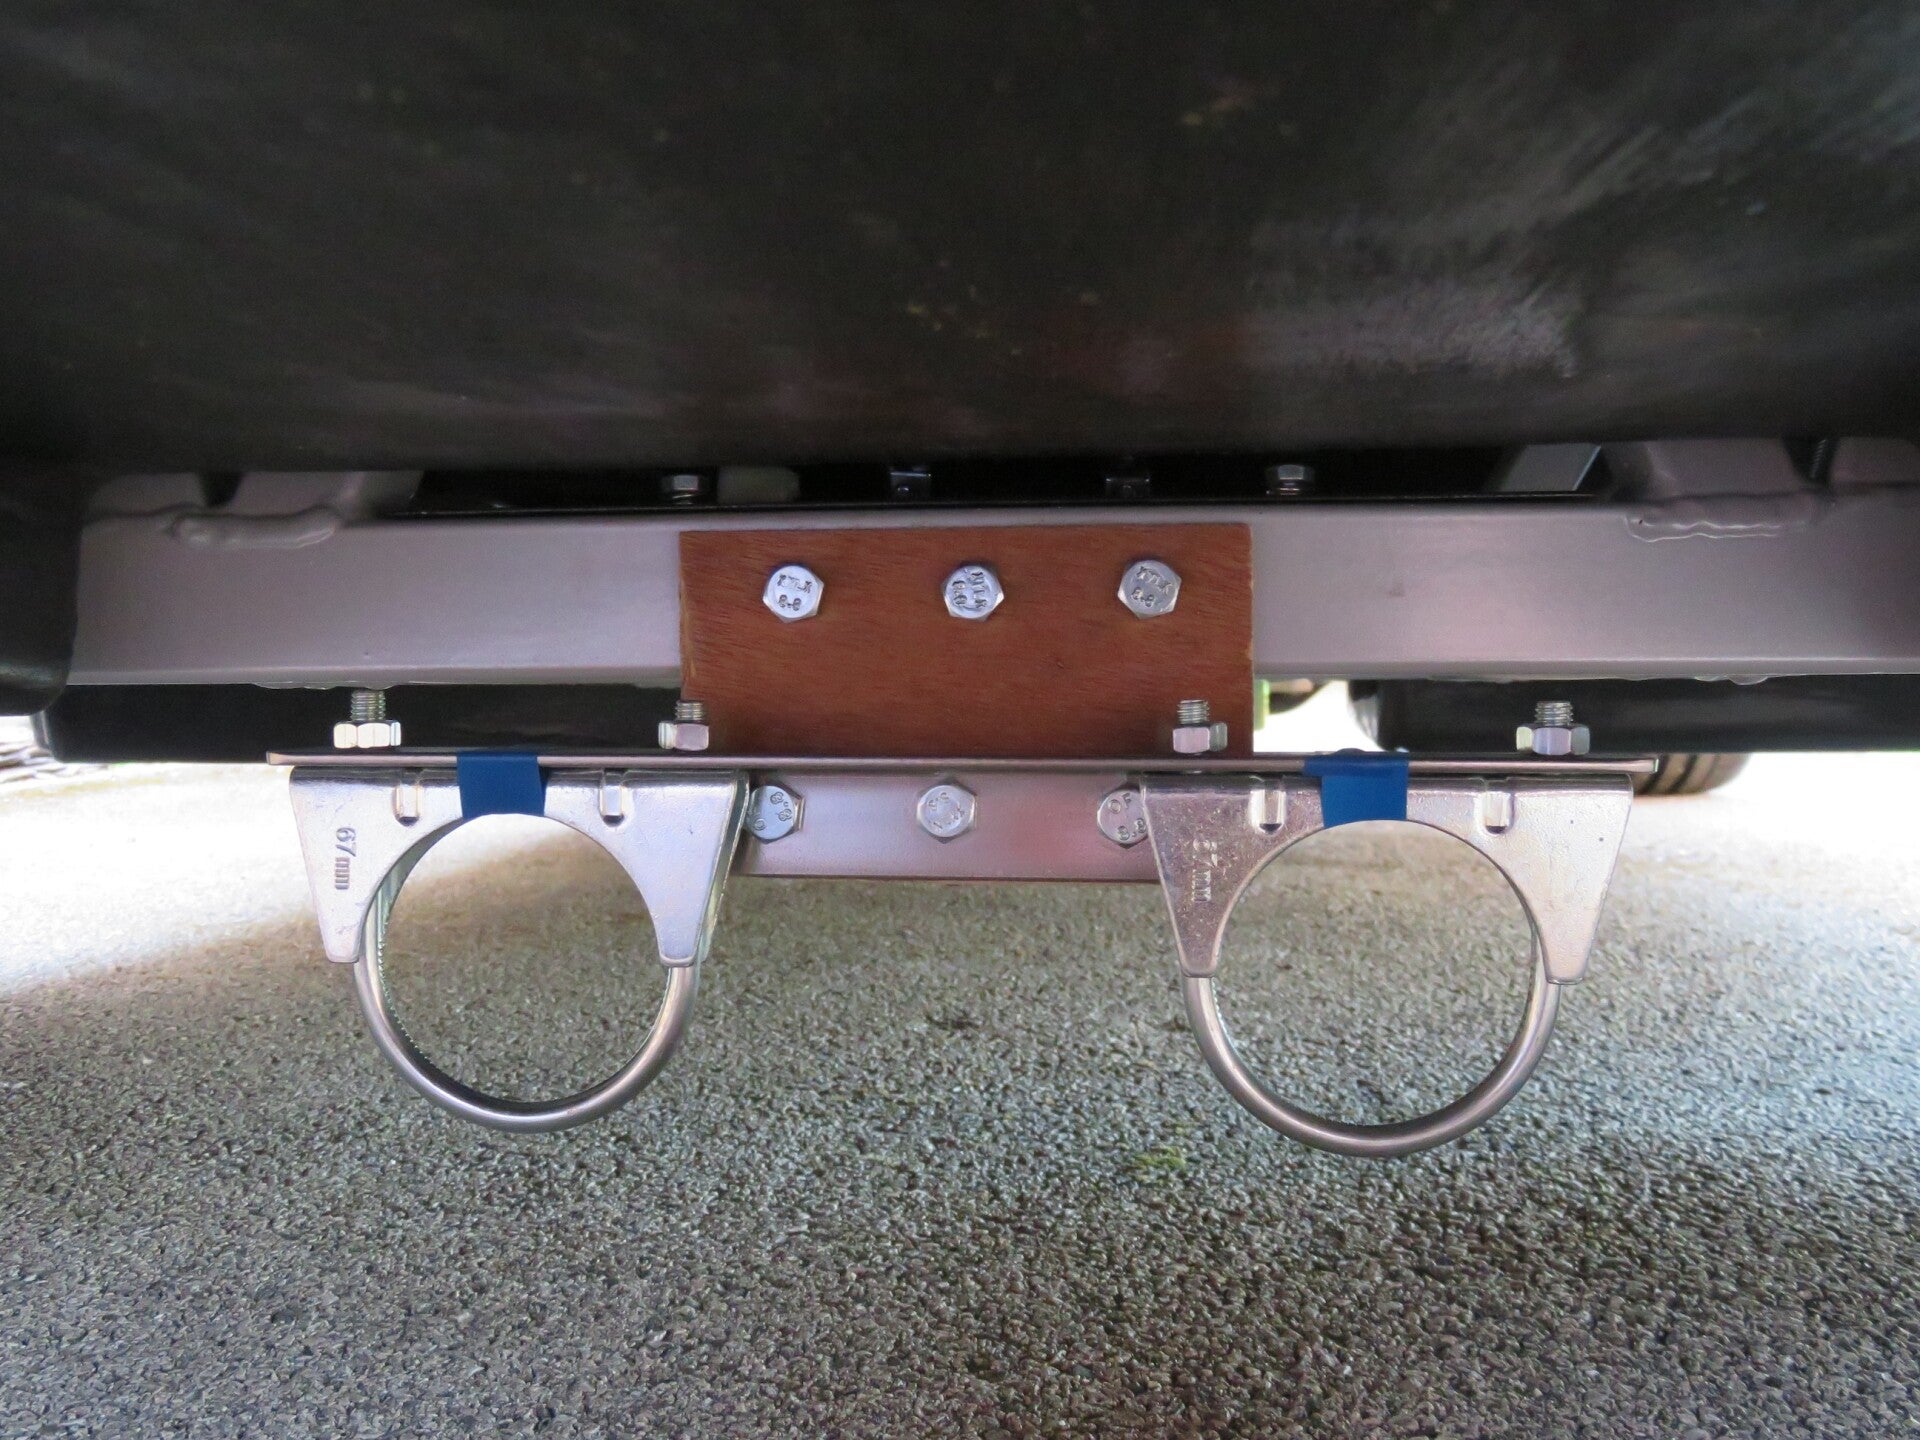
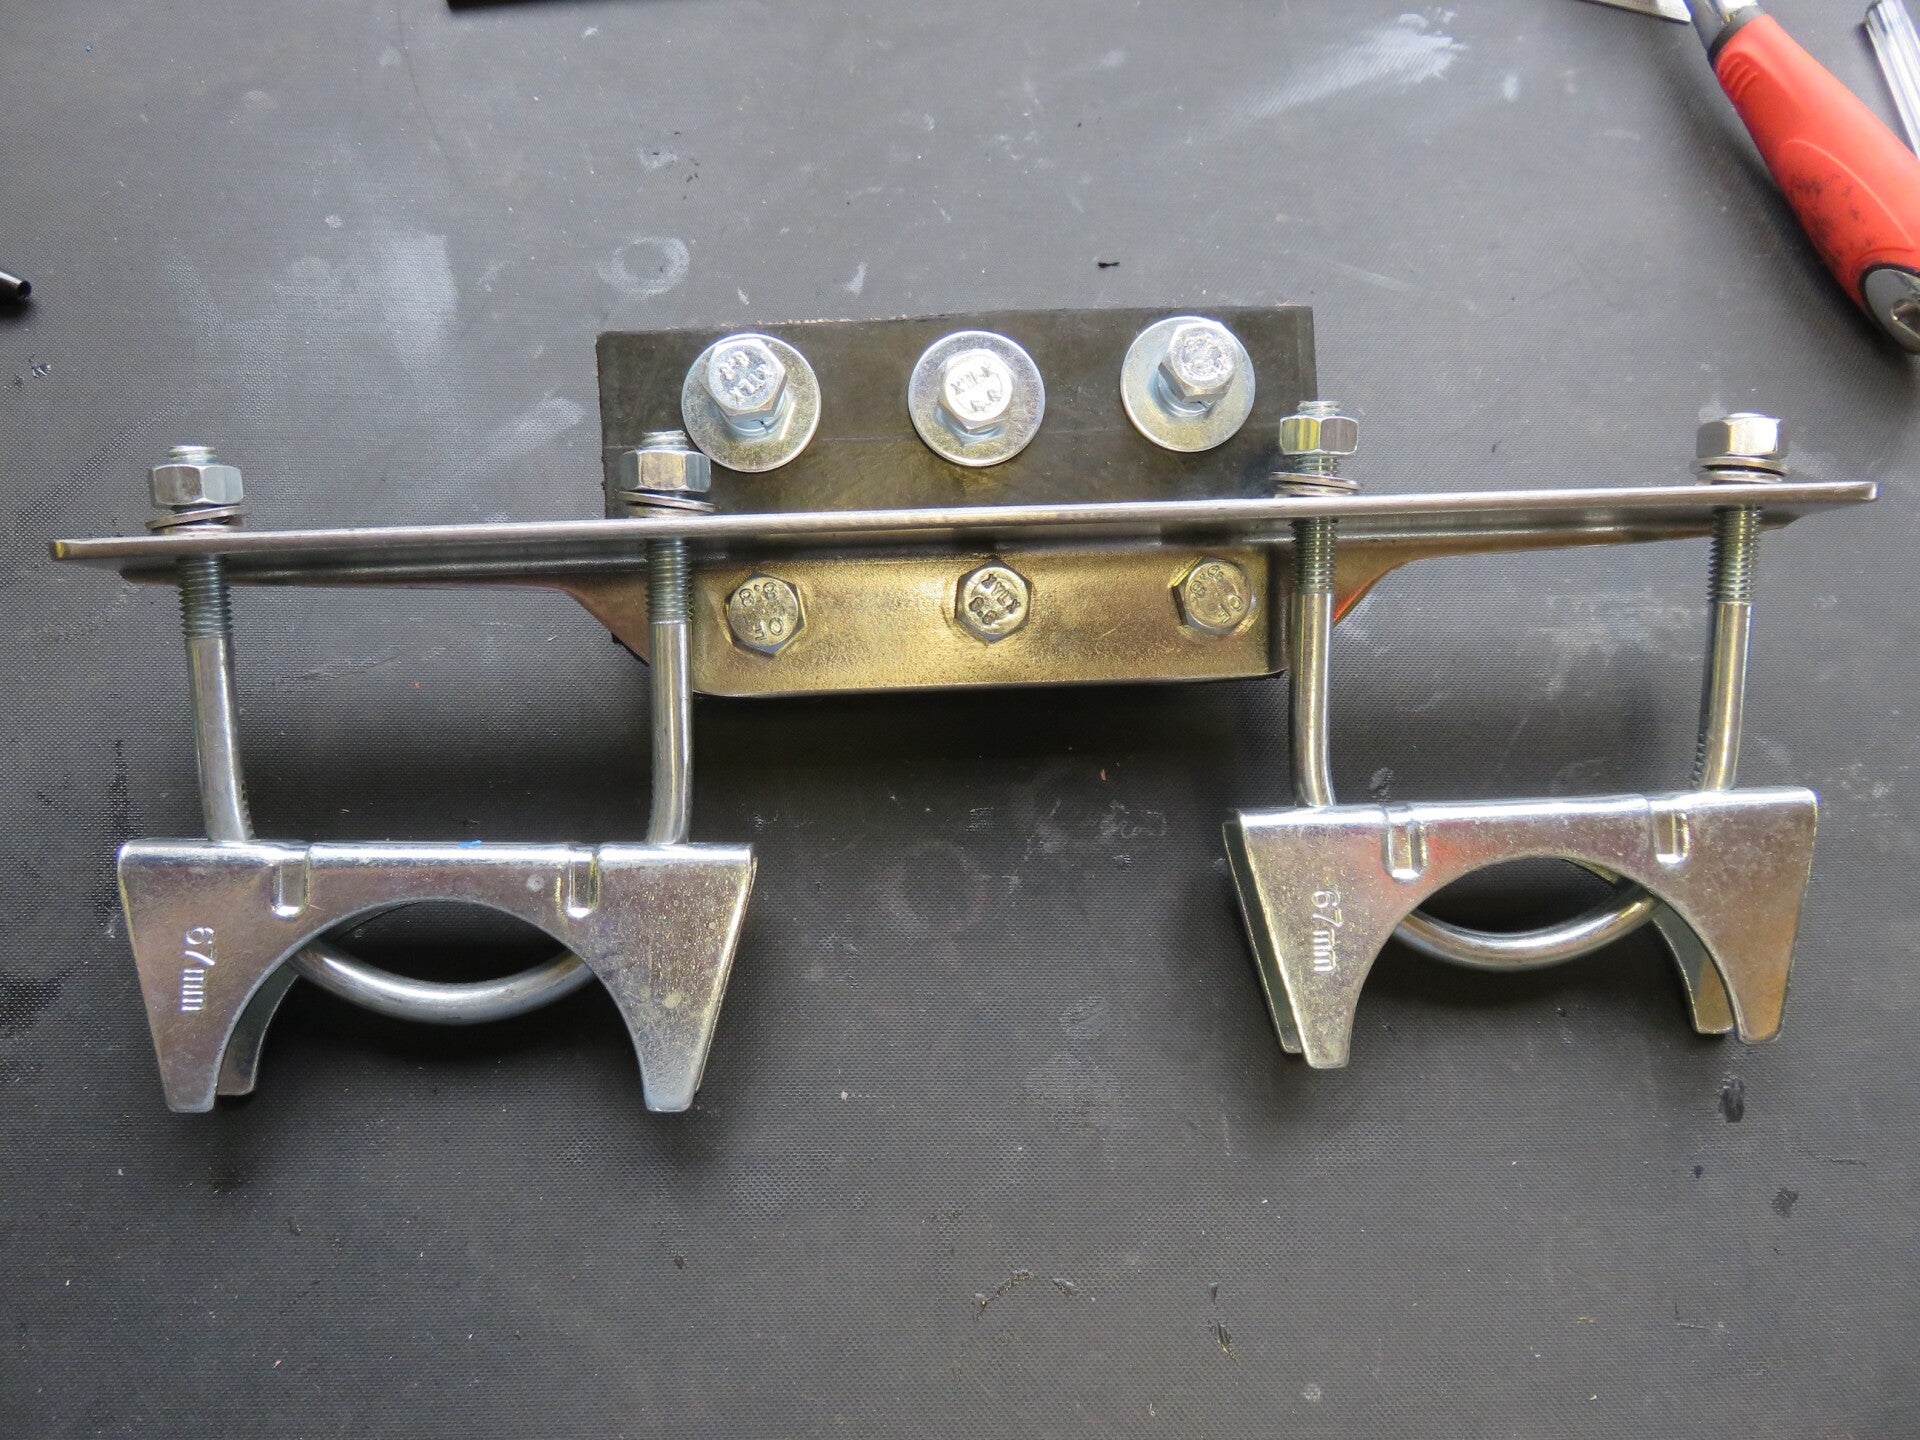
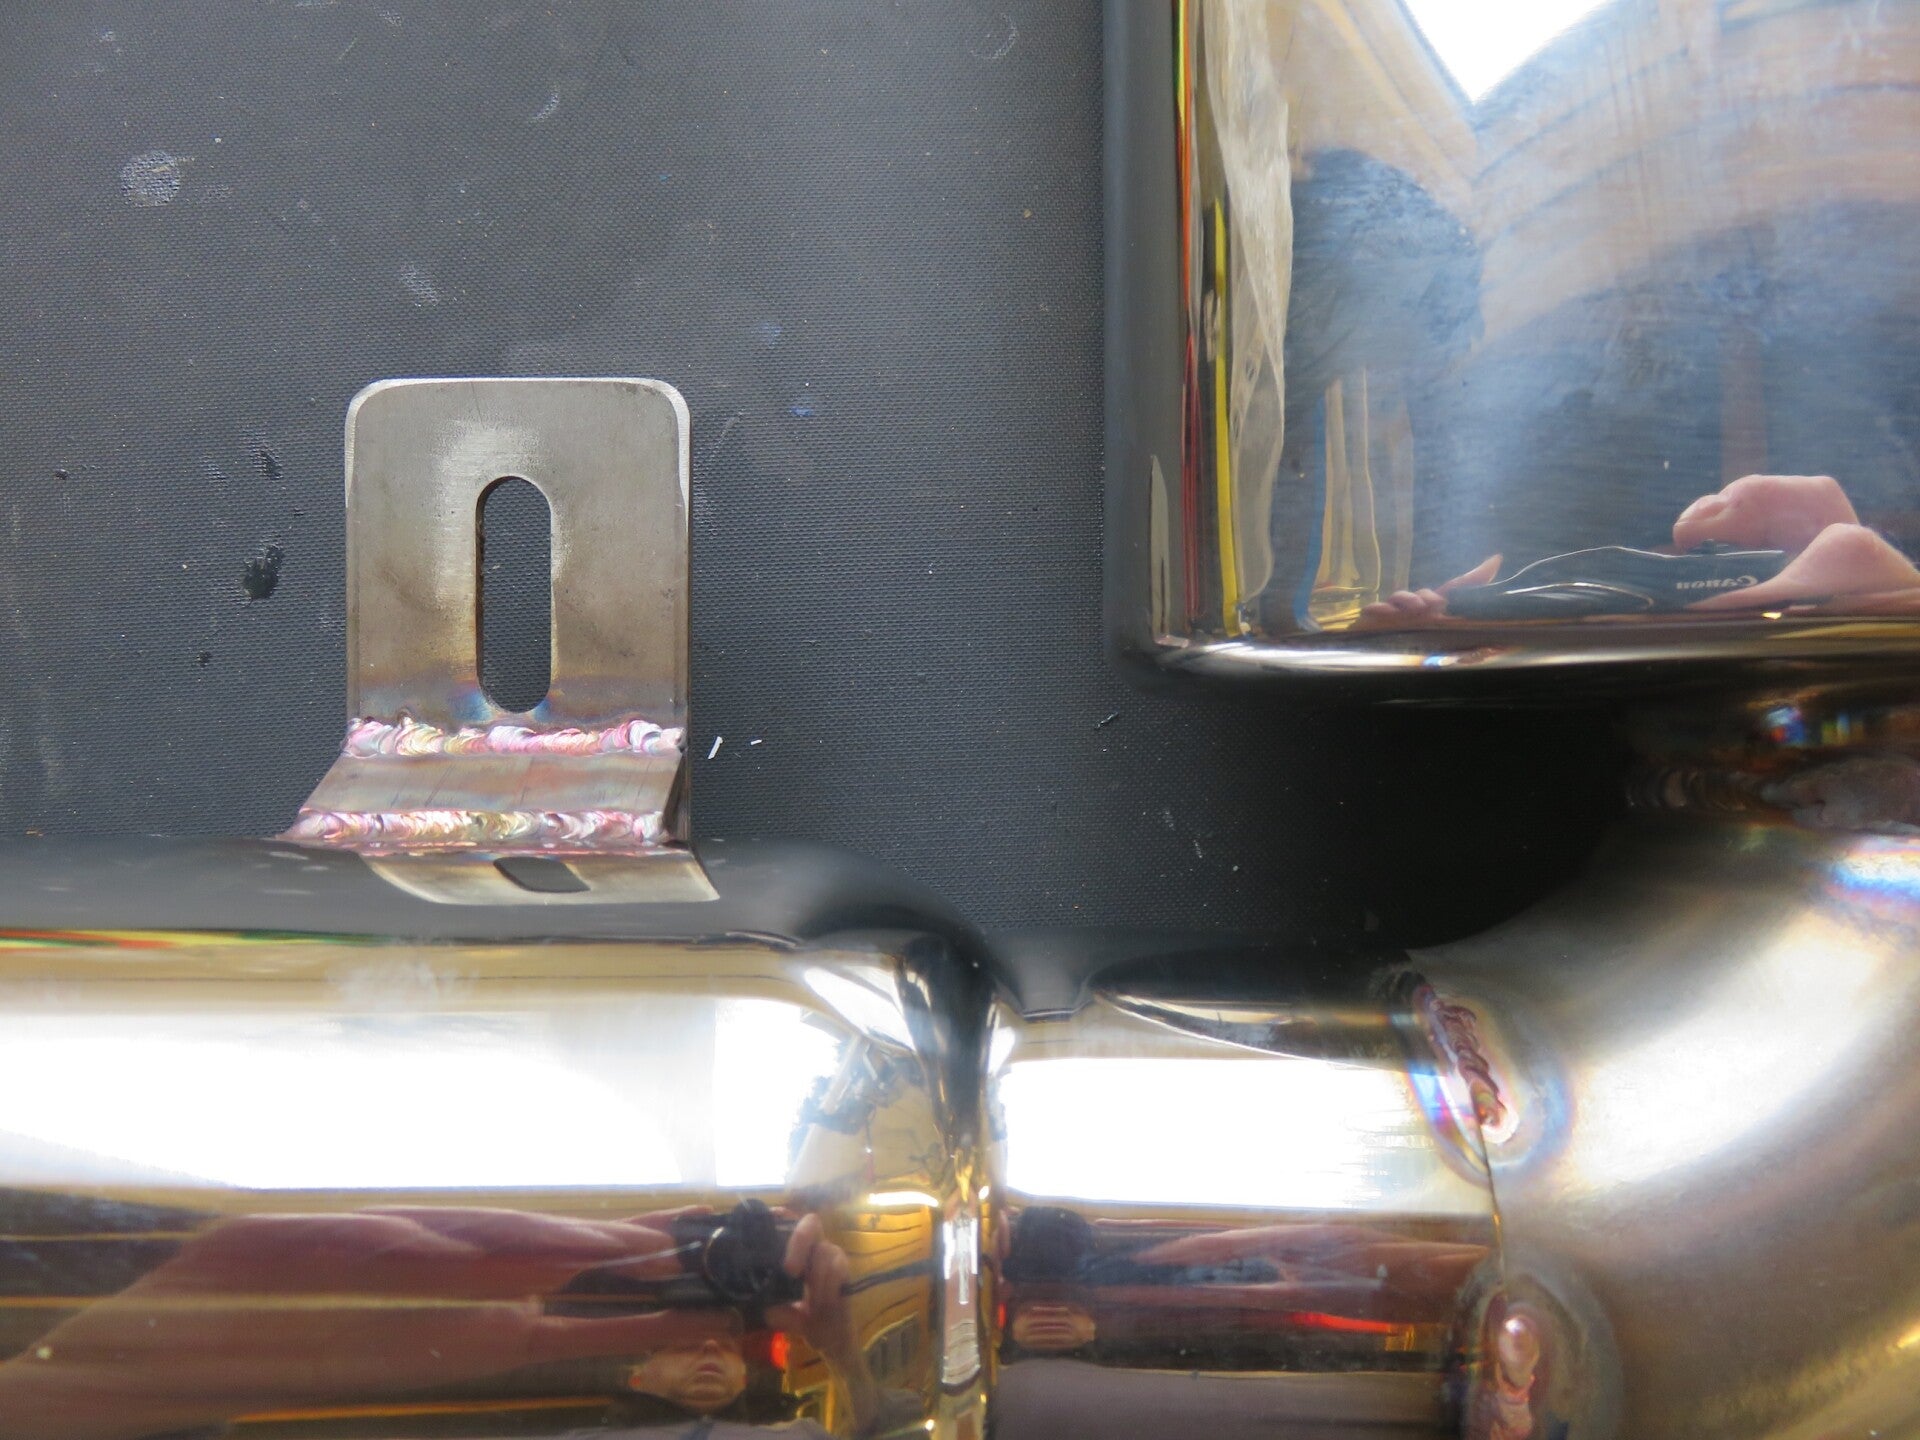
I marked 1 cm increments from the end of each pipe to provide reference markers as to how far things went in. Then I made sure all the pipes fitted together easily on the bench. For the rear hanging bracket, I made a plywood template because I didn't know how things would hang, and I wanted the luxury of not messing up the proper reinforced rubber bracket.
Working from the engine, I fitted the headers, and all was well except I couldn't get a couple of bolts in because the washers were preventing them from locating correctly. I.e. the gas exit tubing was a bit close to the hole. Filed down one edge on each washer, which sorted this. However, I needed a sanity check for this, so I made a quick phone call to Andy at GD, and he informed me that they don't put washers on the Ford headers; they squirt a bit of silicon in each of the header threads to gum them up a bit. Apparently, this is enough to stop them from working loose - and it means the bolts go in more... If it's good enough for Andy, it's good enough for me.
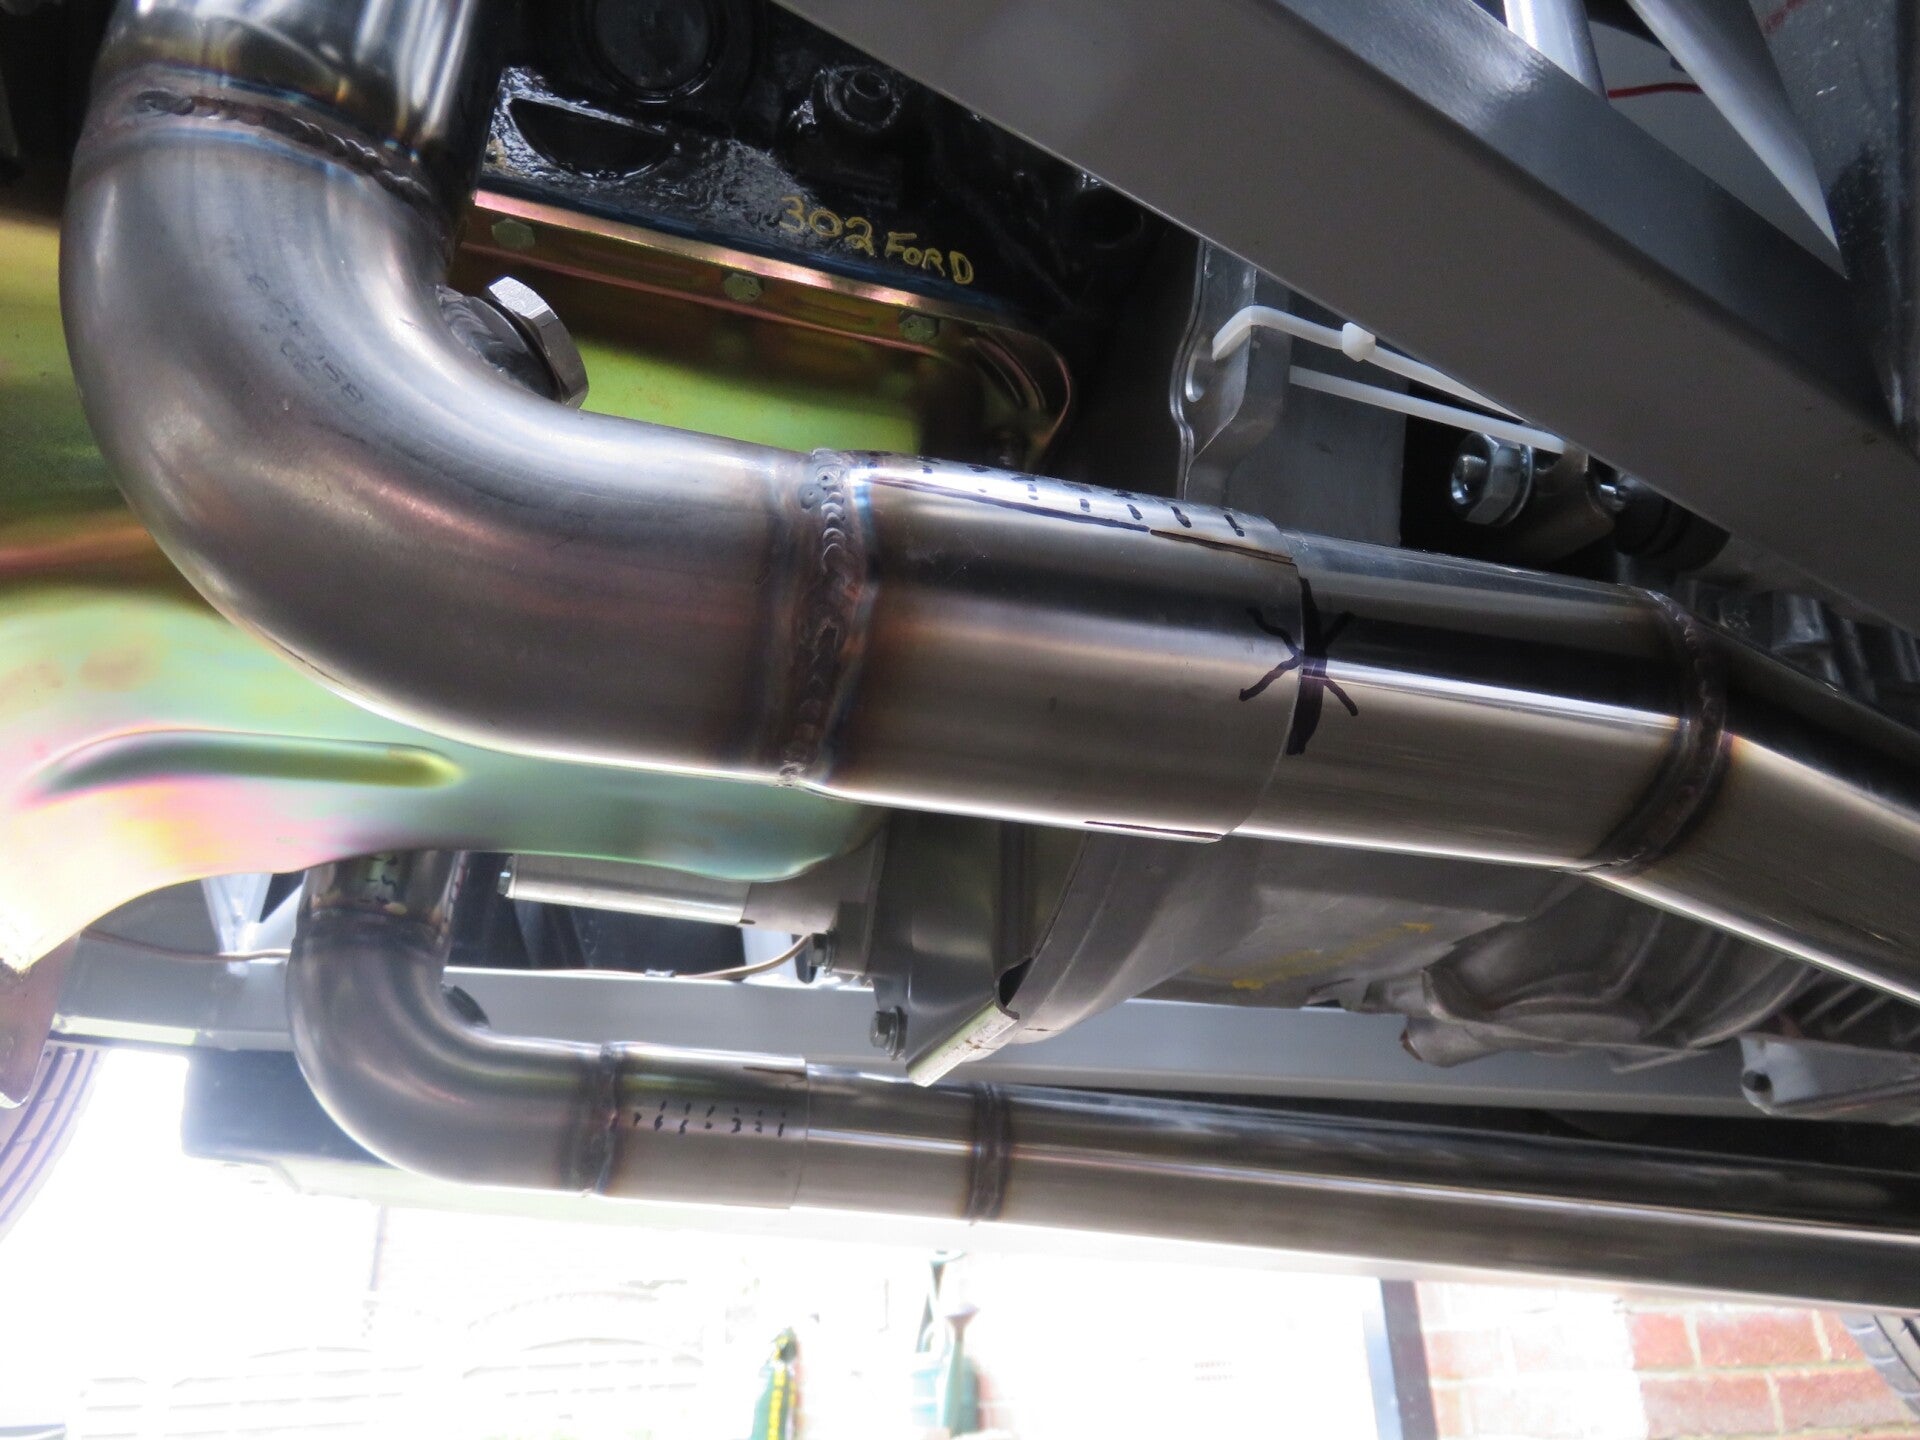
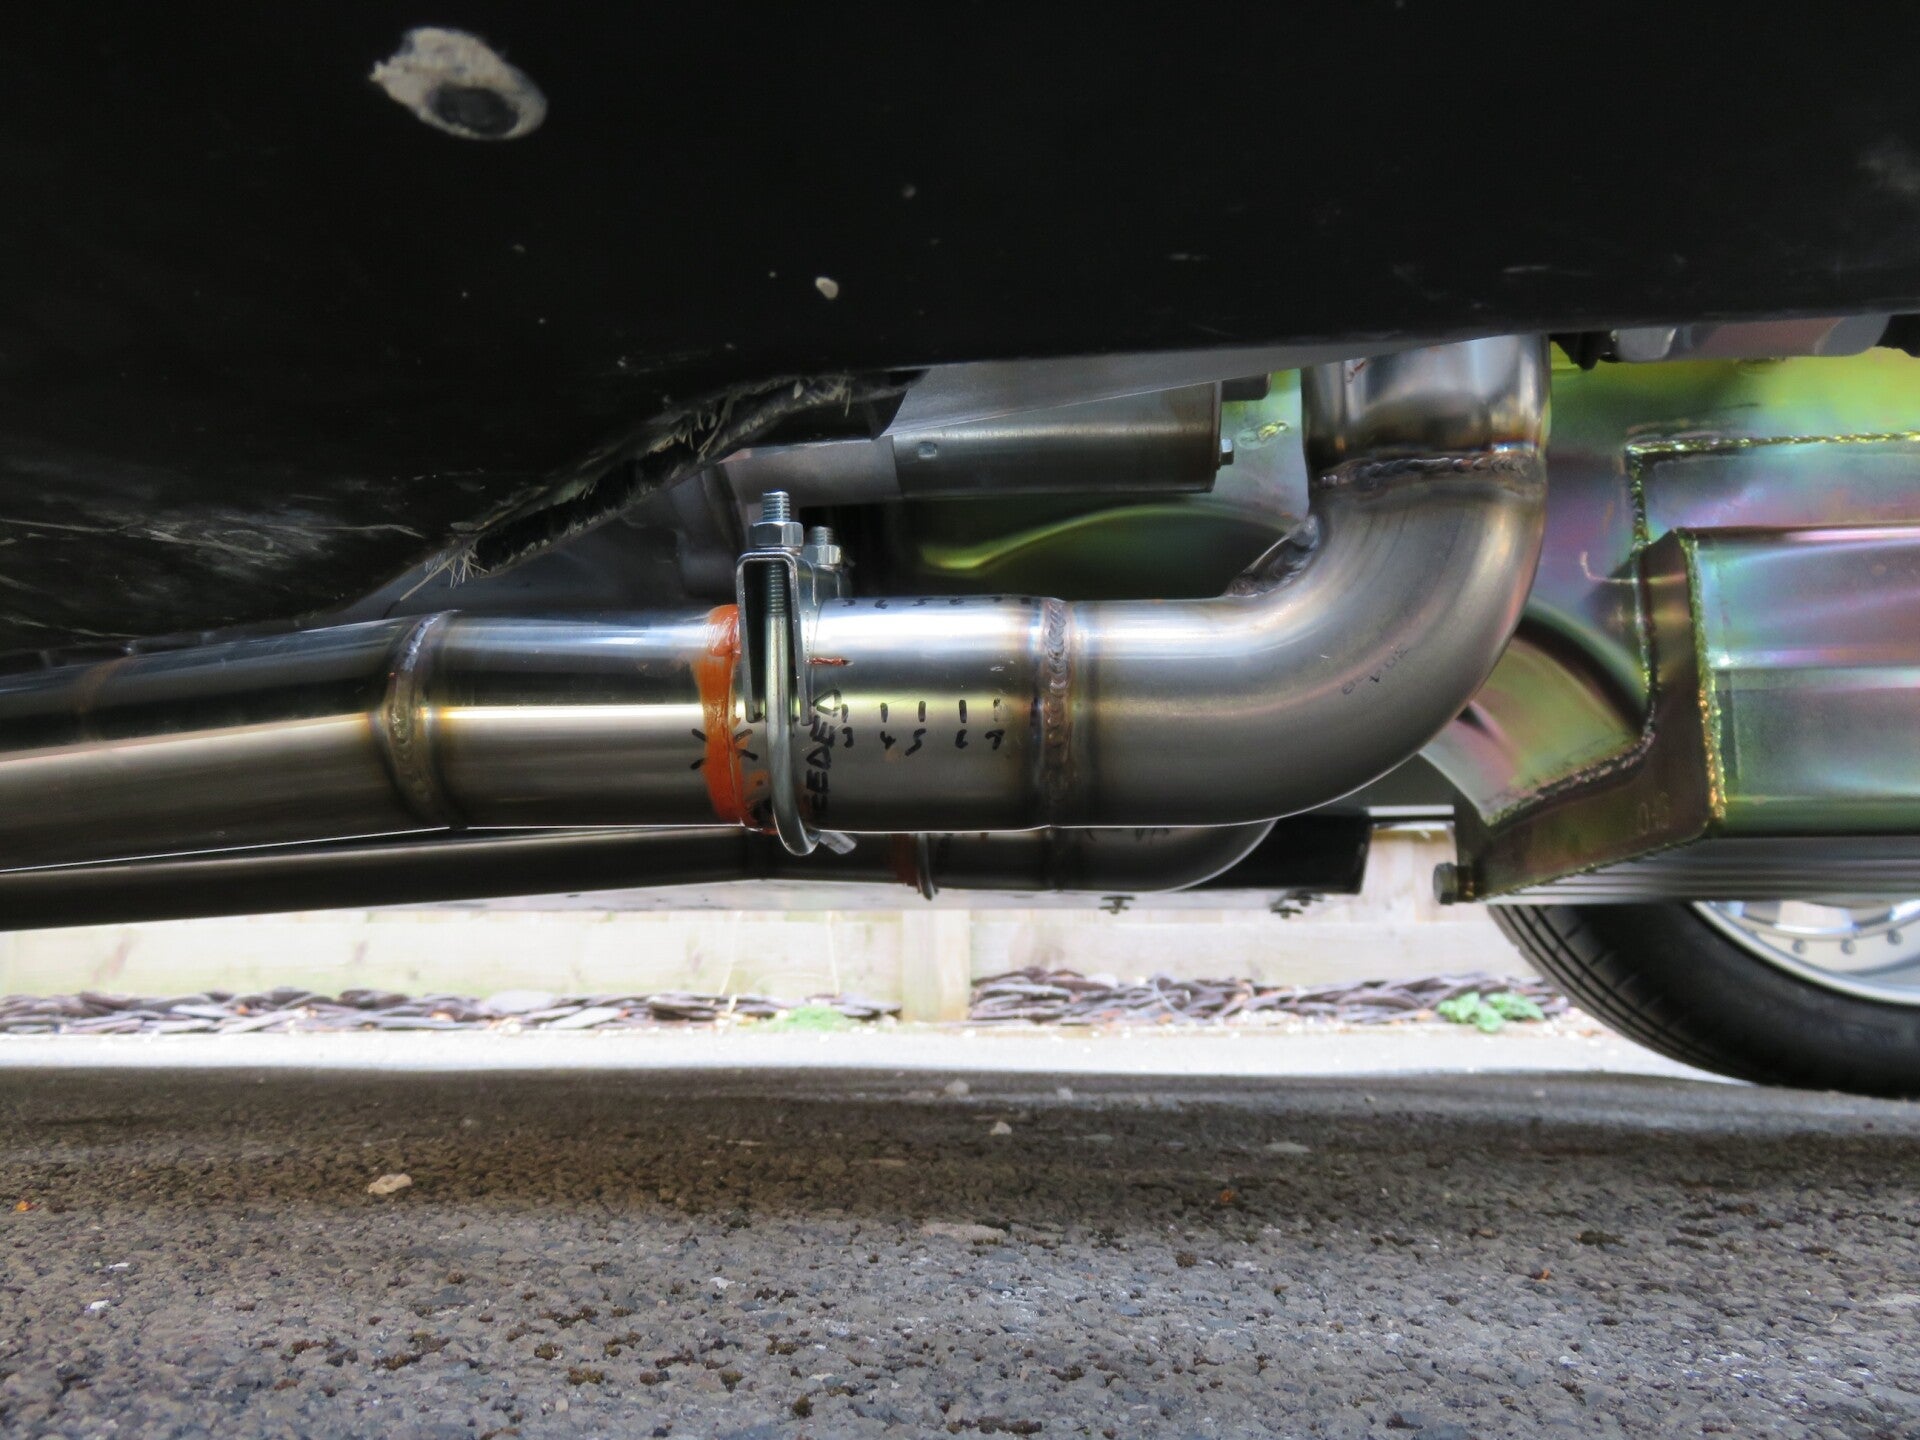
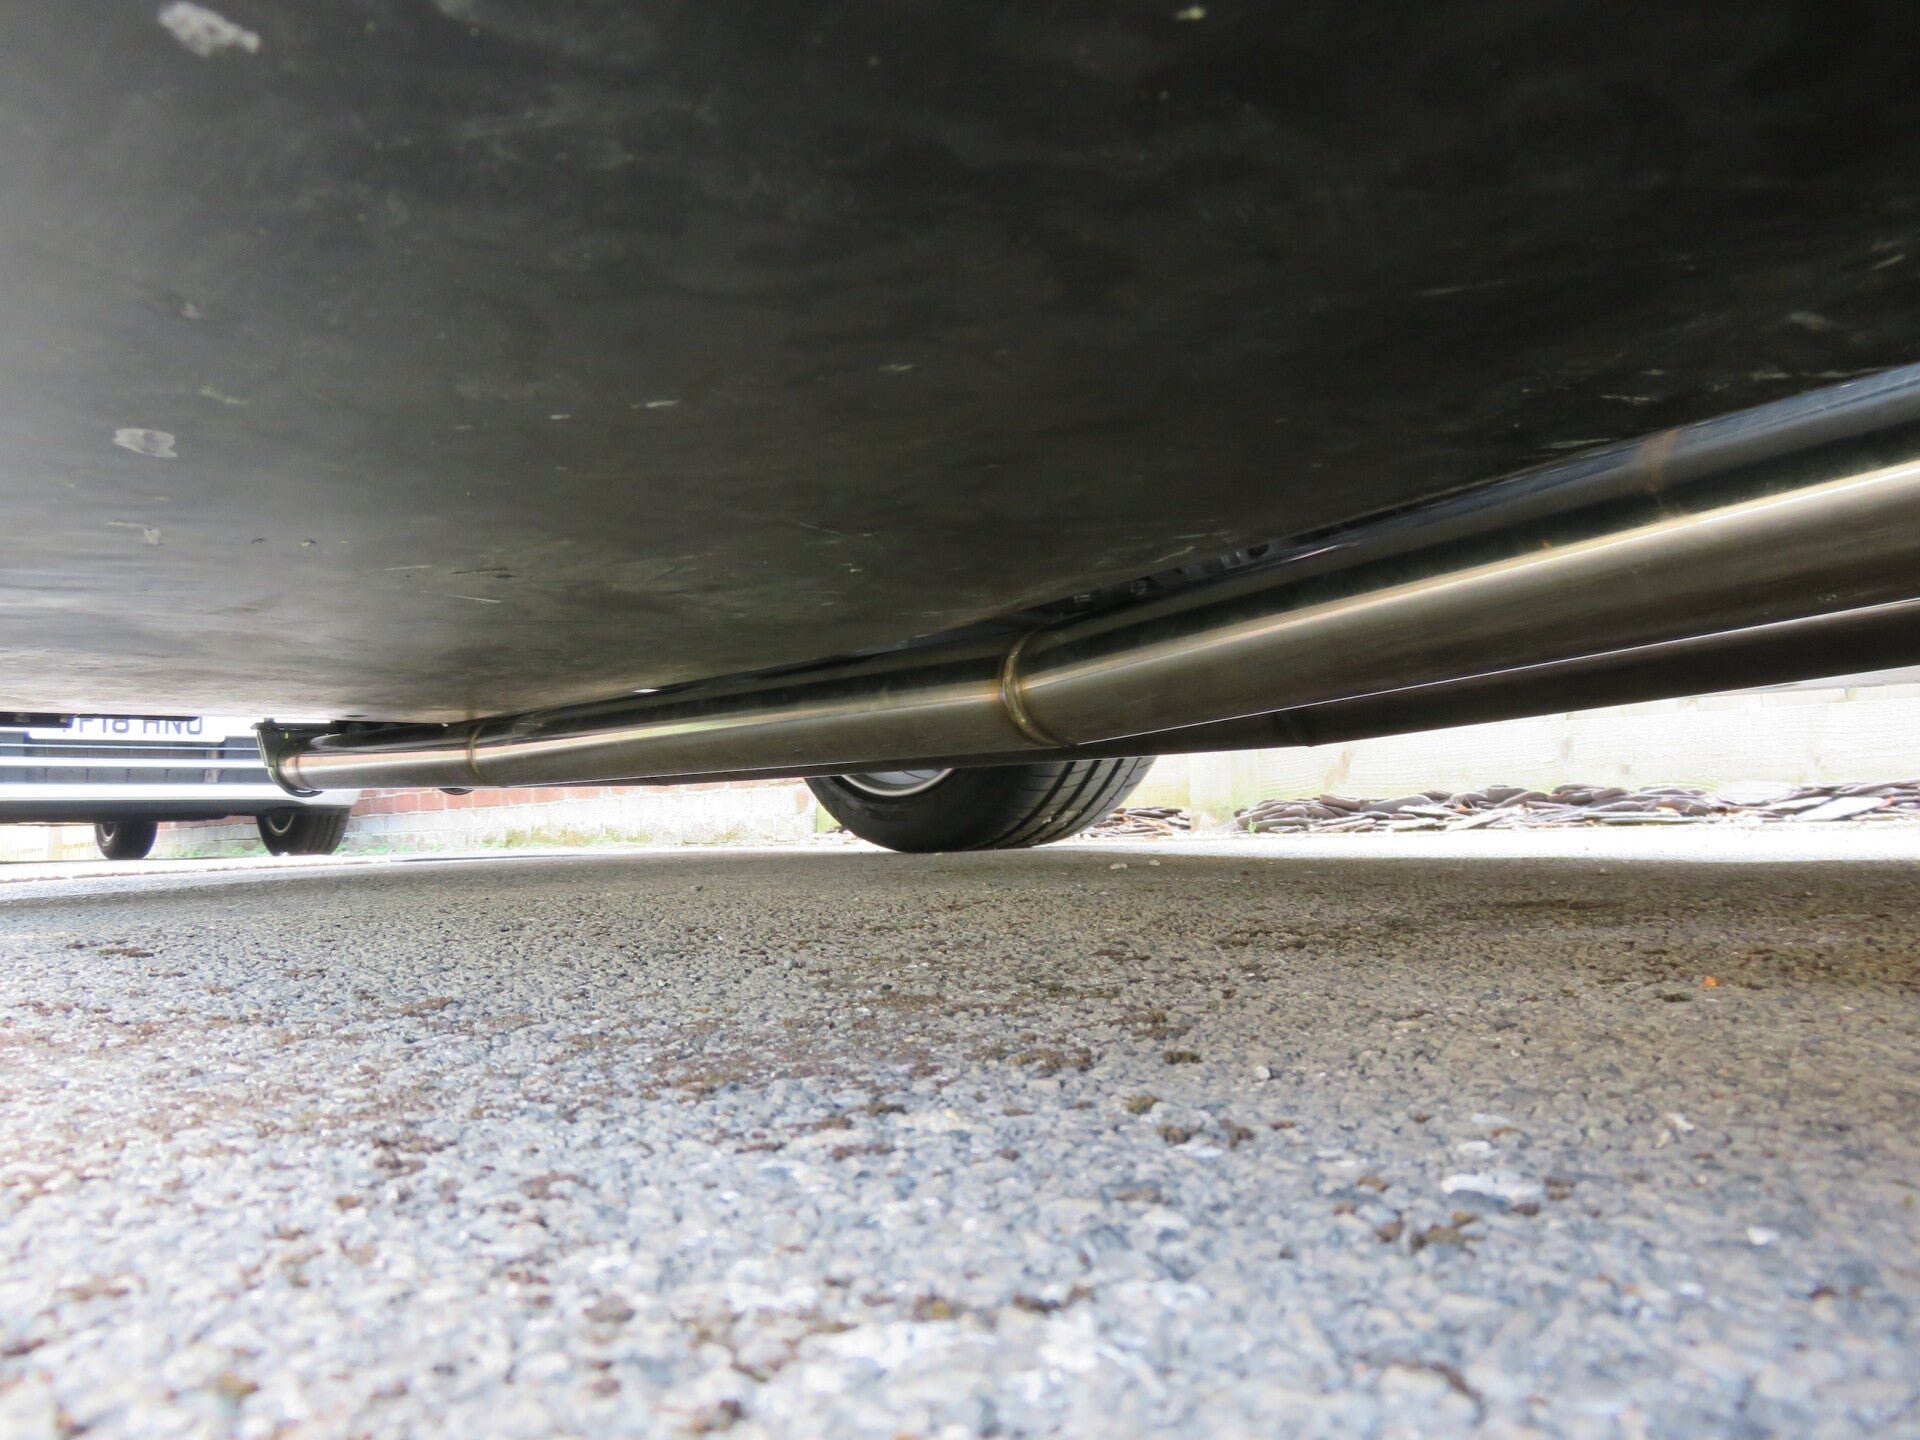
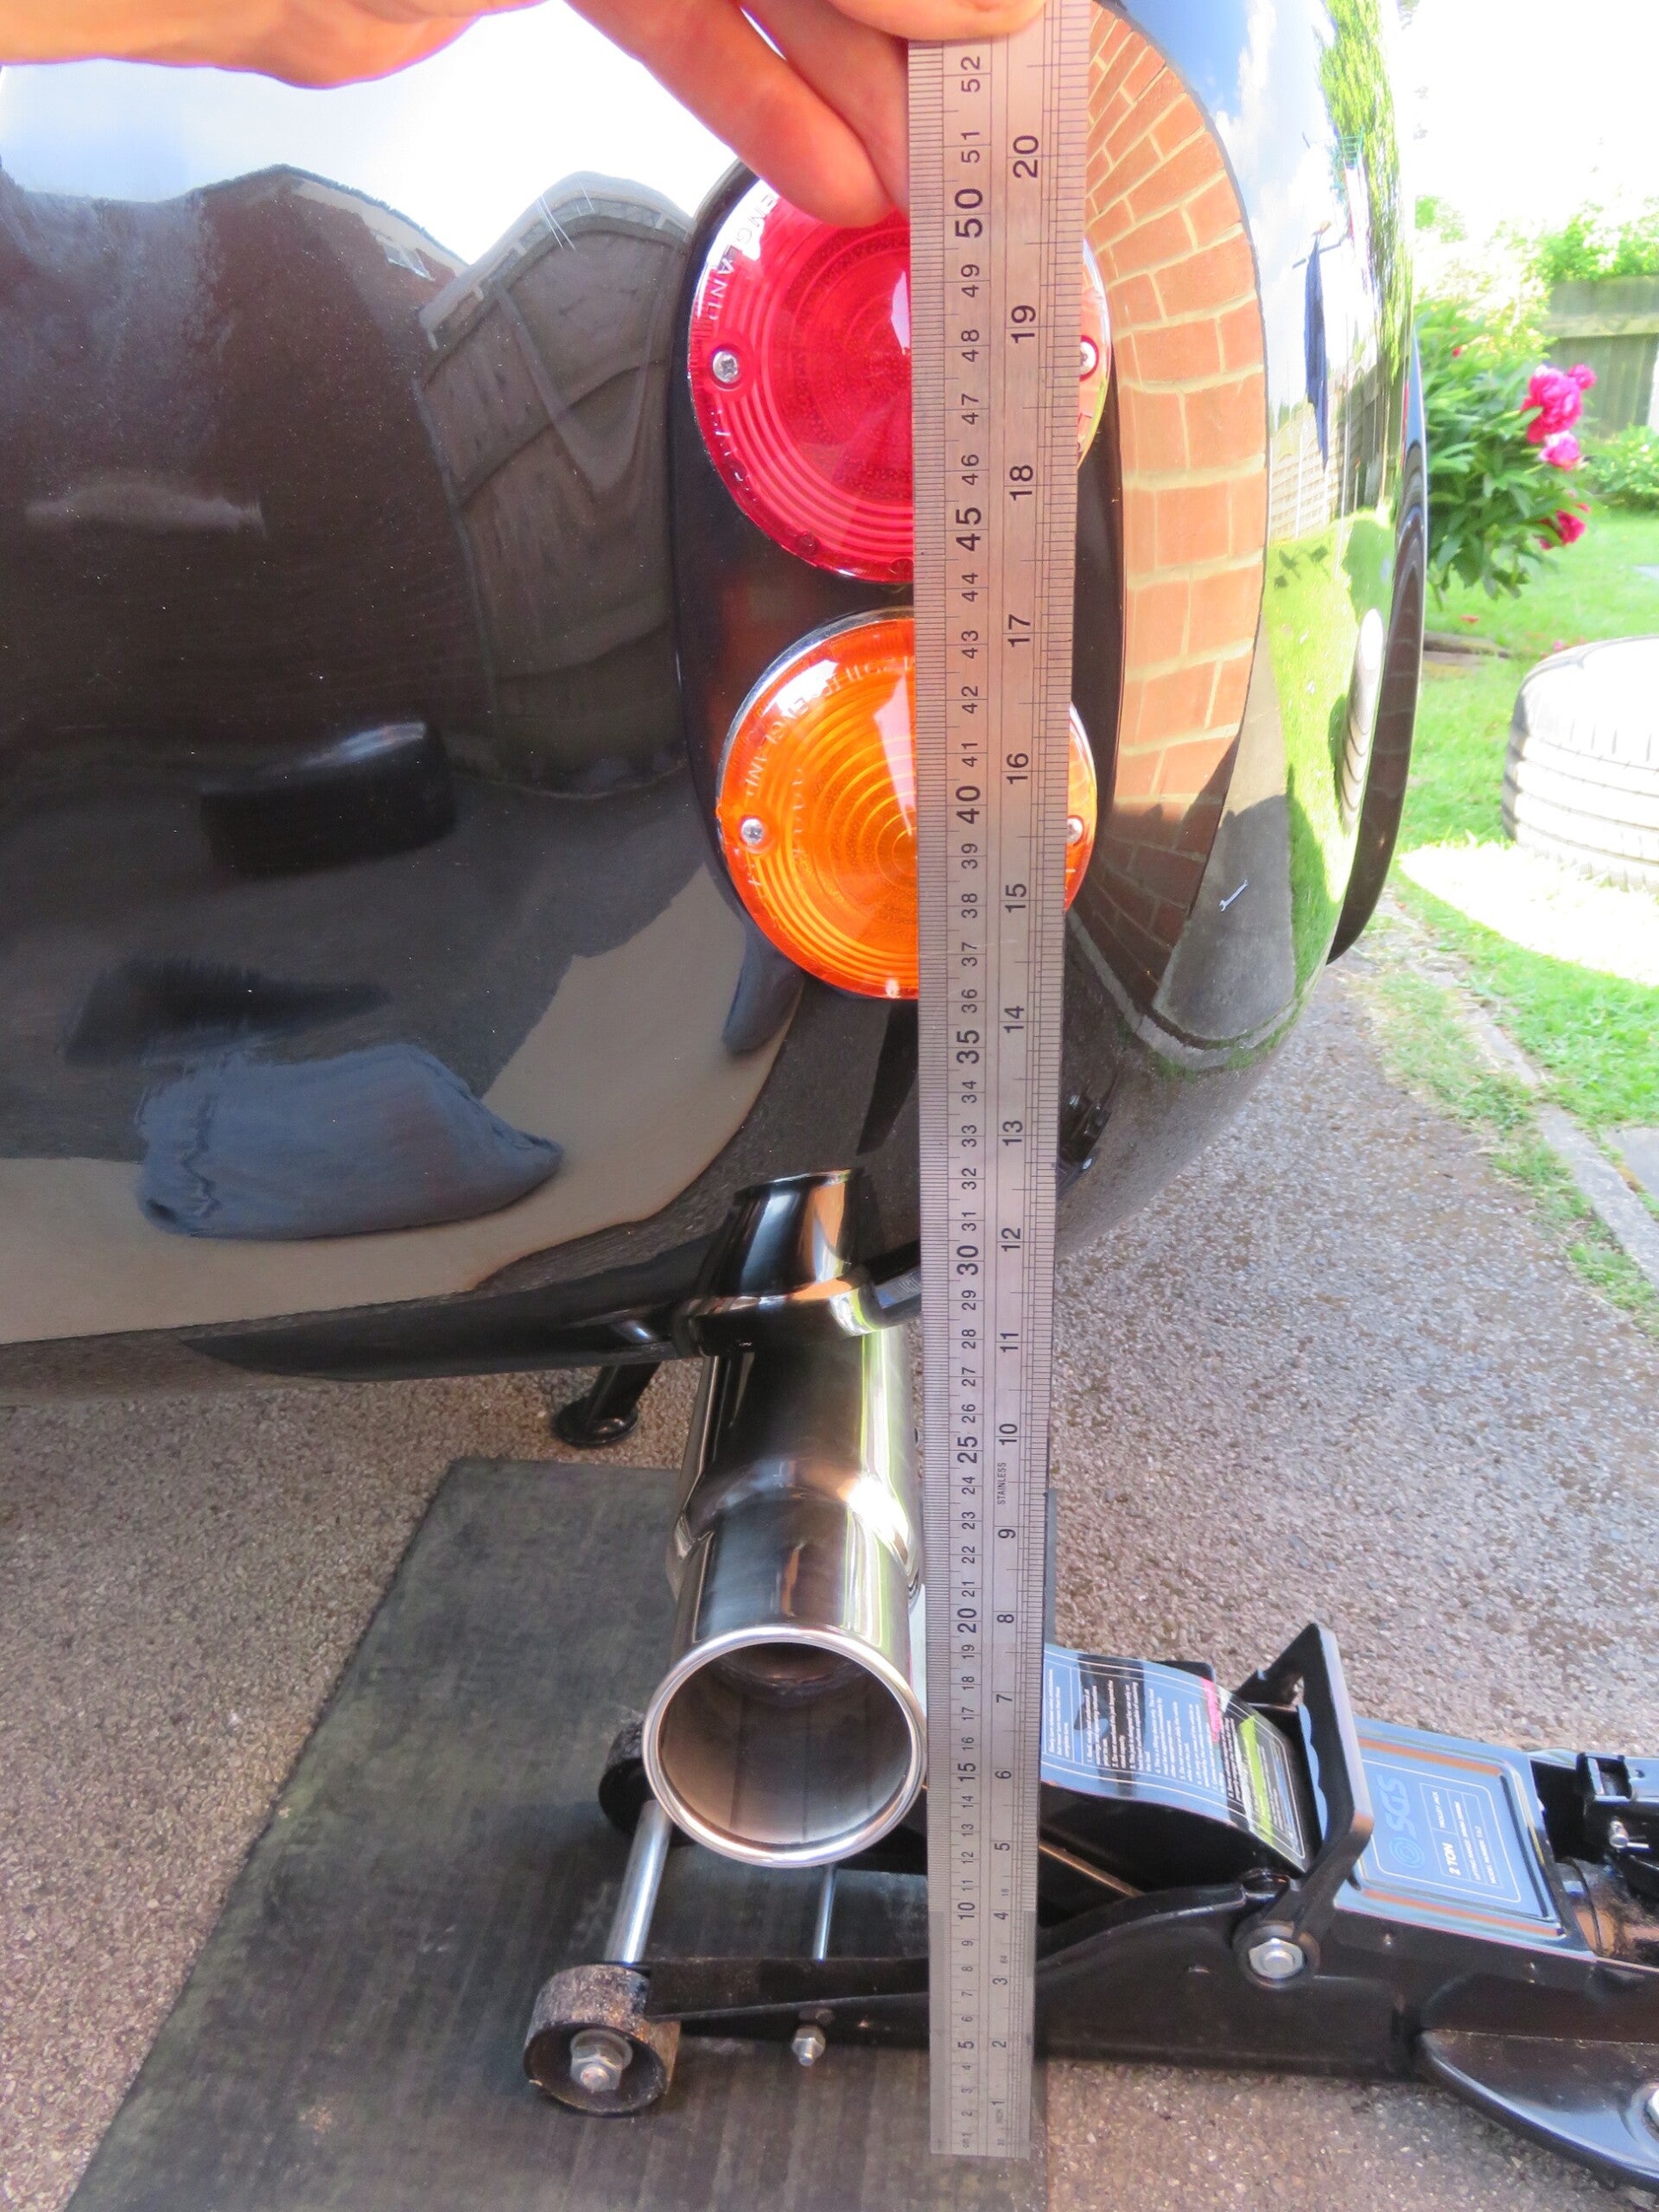
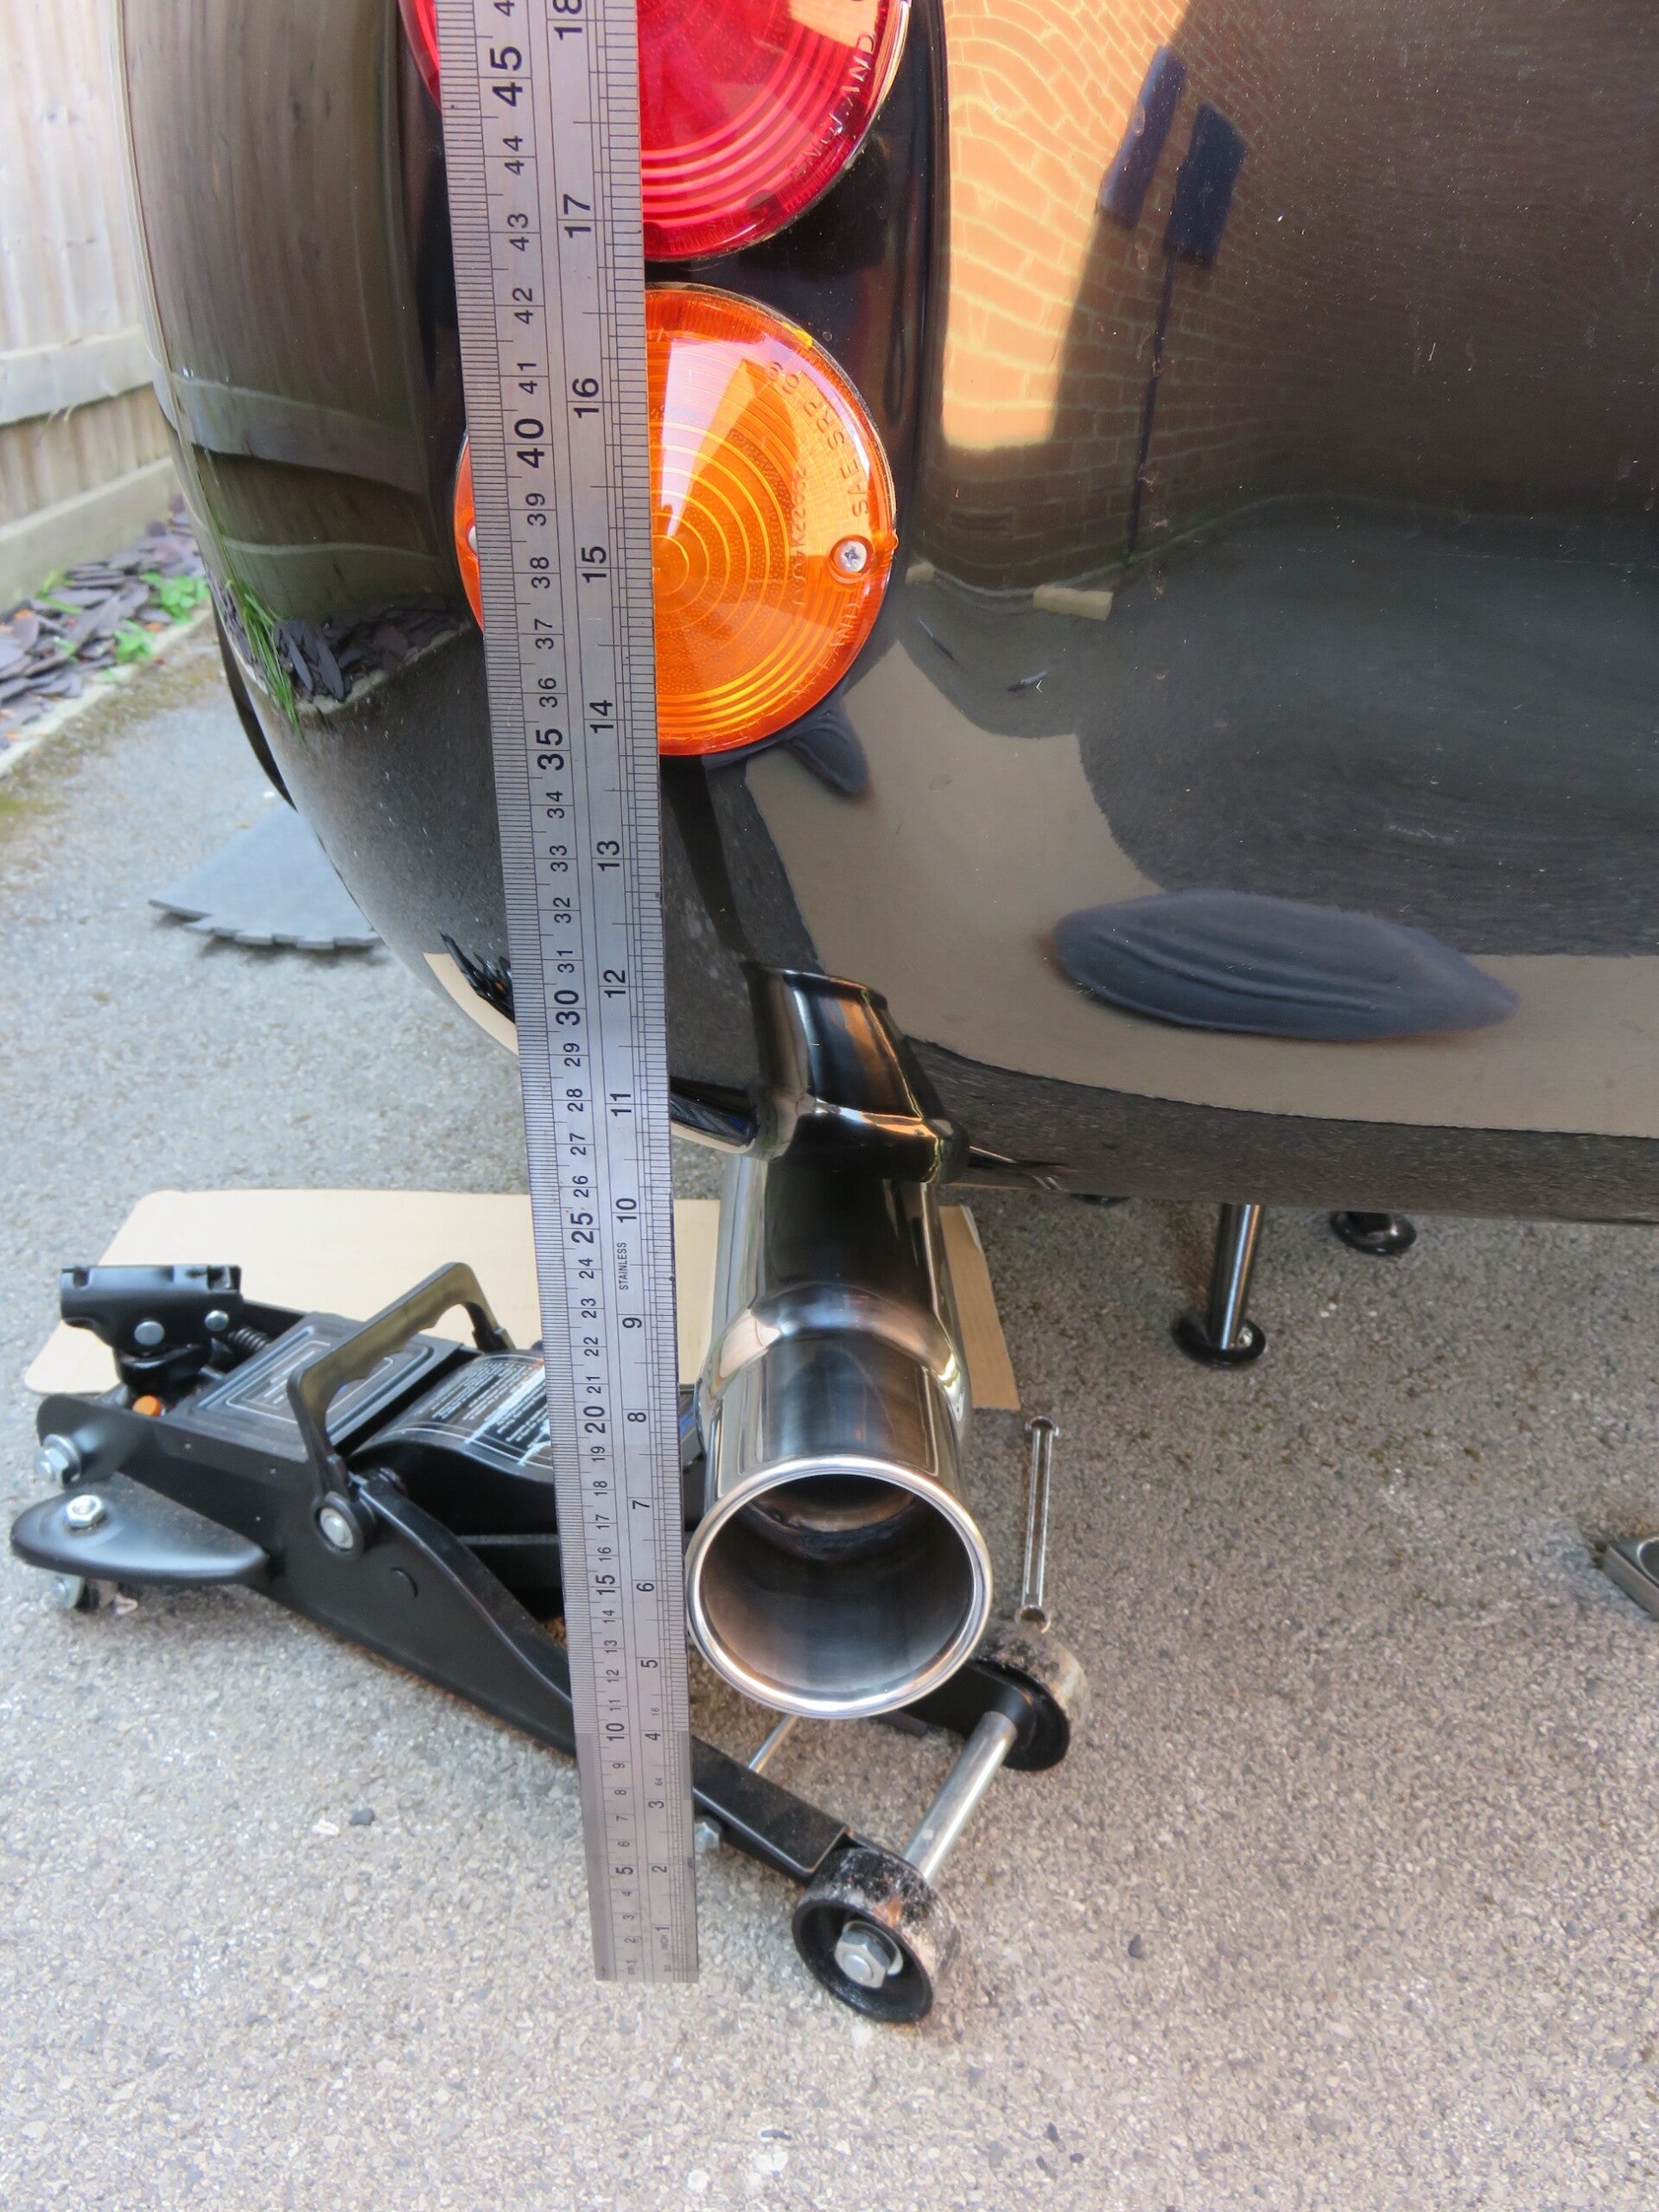
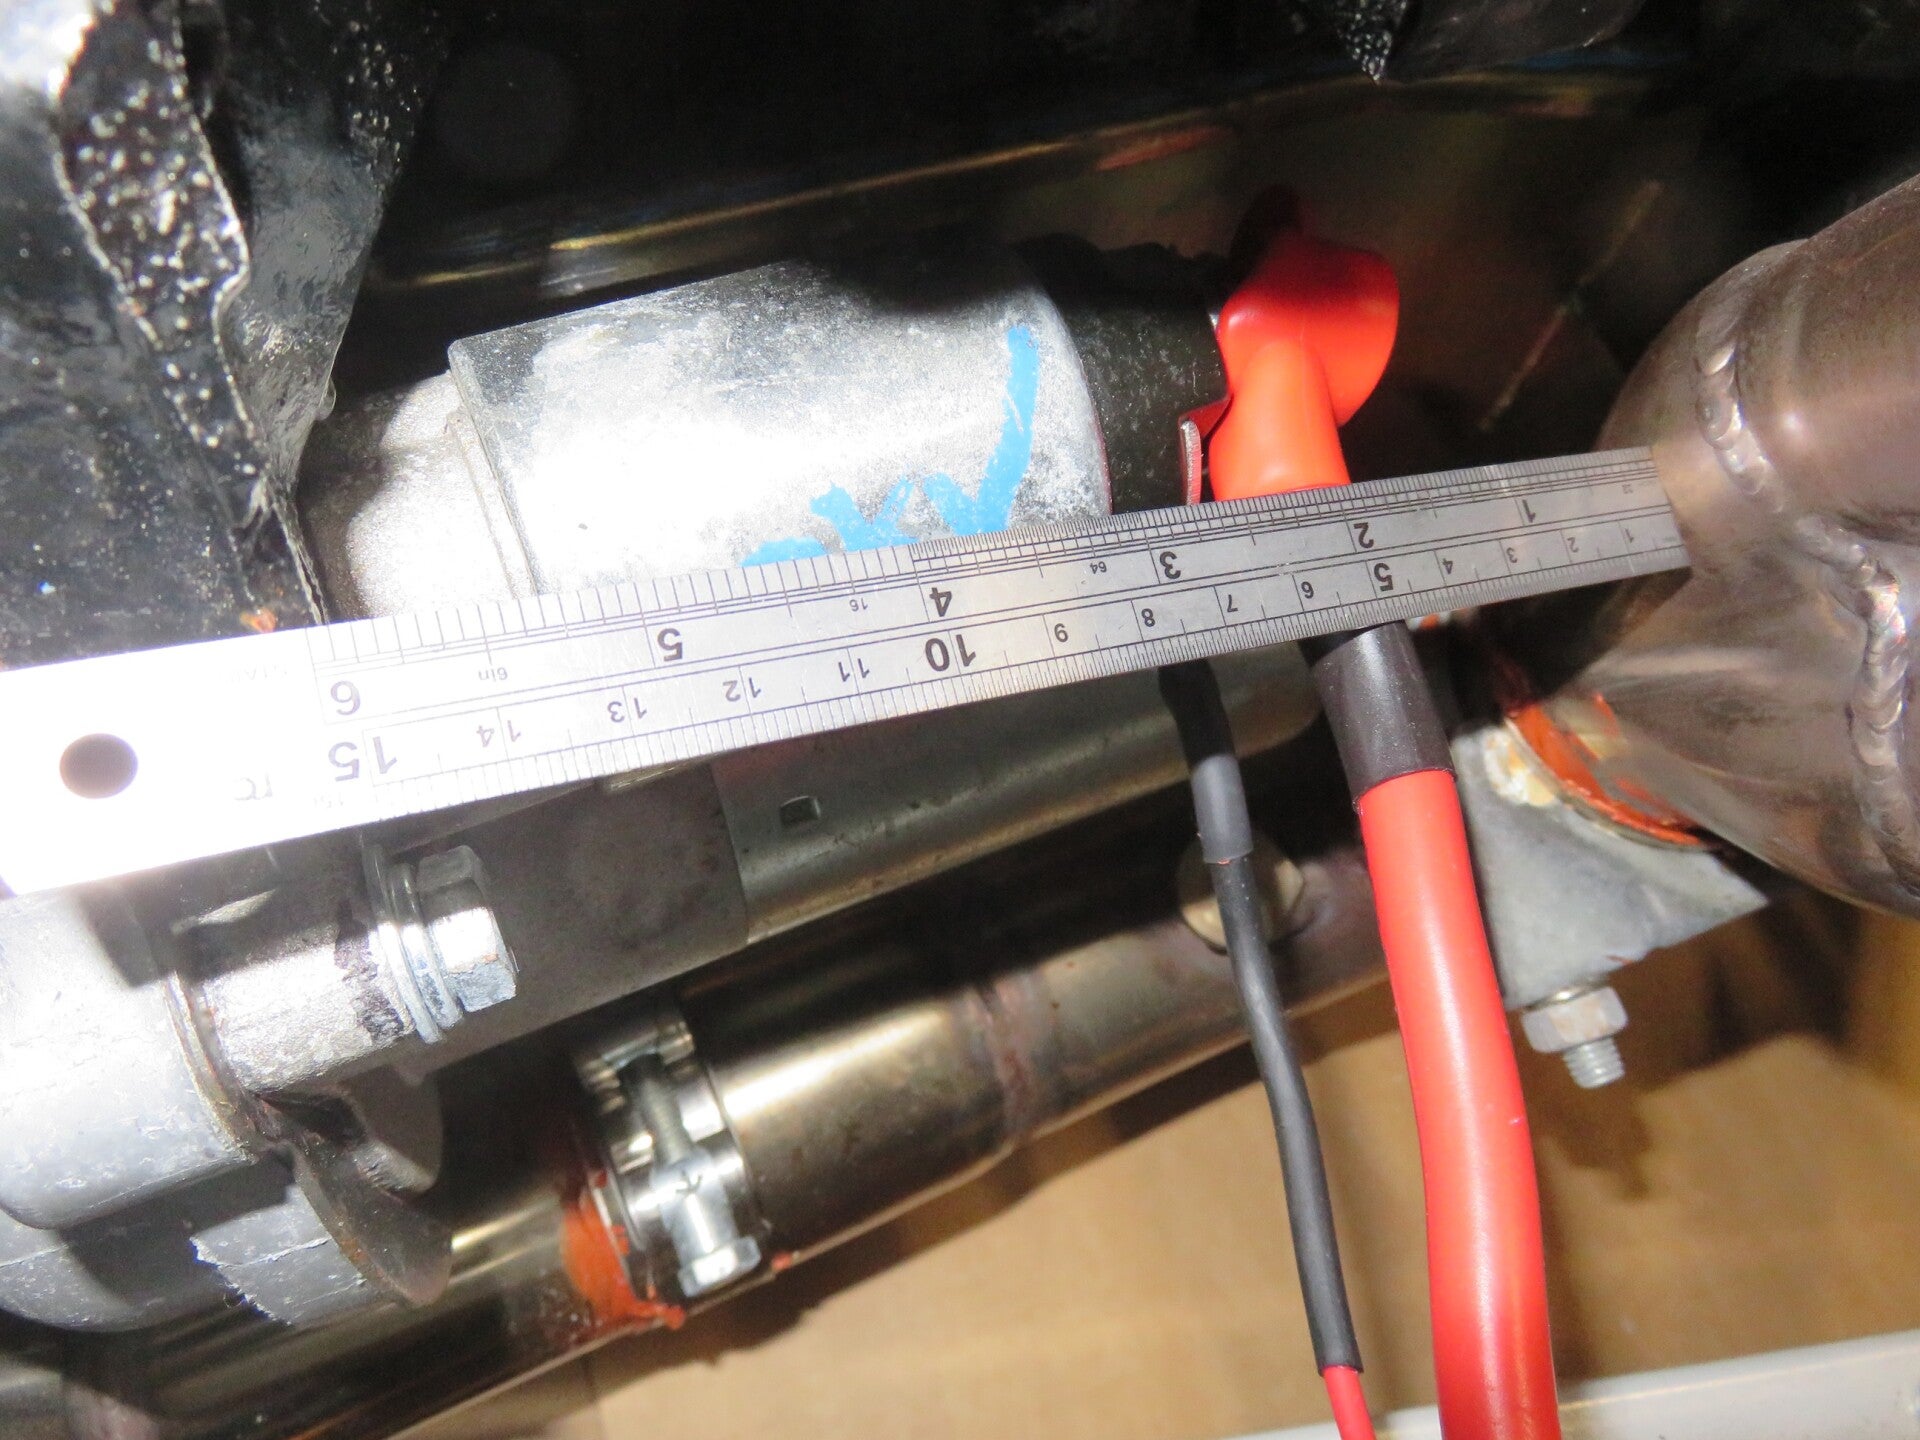
Fitted the angled downpipes and the long pipes, then gave them all a gentle twist, and they kinda' just eased into their natural position (which I marked.) Then I measured the back-end length using the rear silencer hanging bracket as a reference to determine how much I had to trim off, and I measured that I had to cut off a whopping 8 cm. This did concern me at first, but, as the tailpipe and silencer [all one piece] position was set-in-stone, i.e. the hanging/clamping bracket position being 'not' a variable, I measured I had a whopping 6 mm insert at the front, and a [remaining] ~4-5 cm at the rear to play around with. So loads of room for manoeuvre.
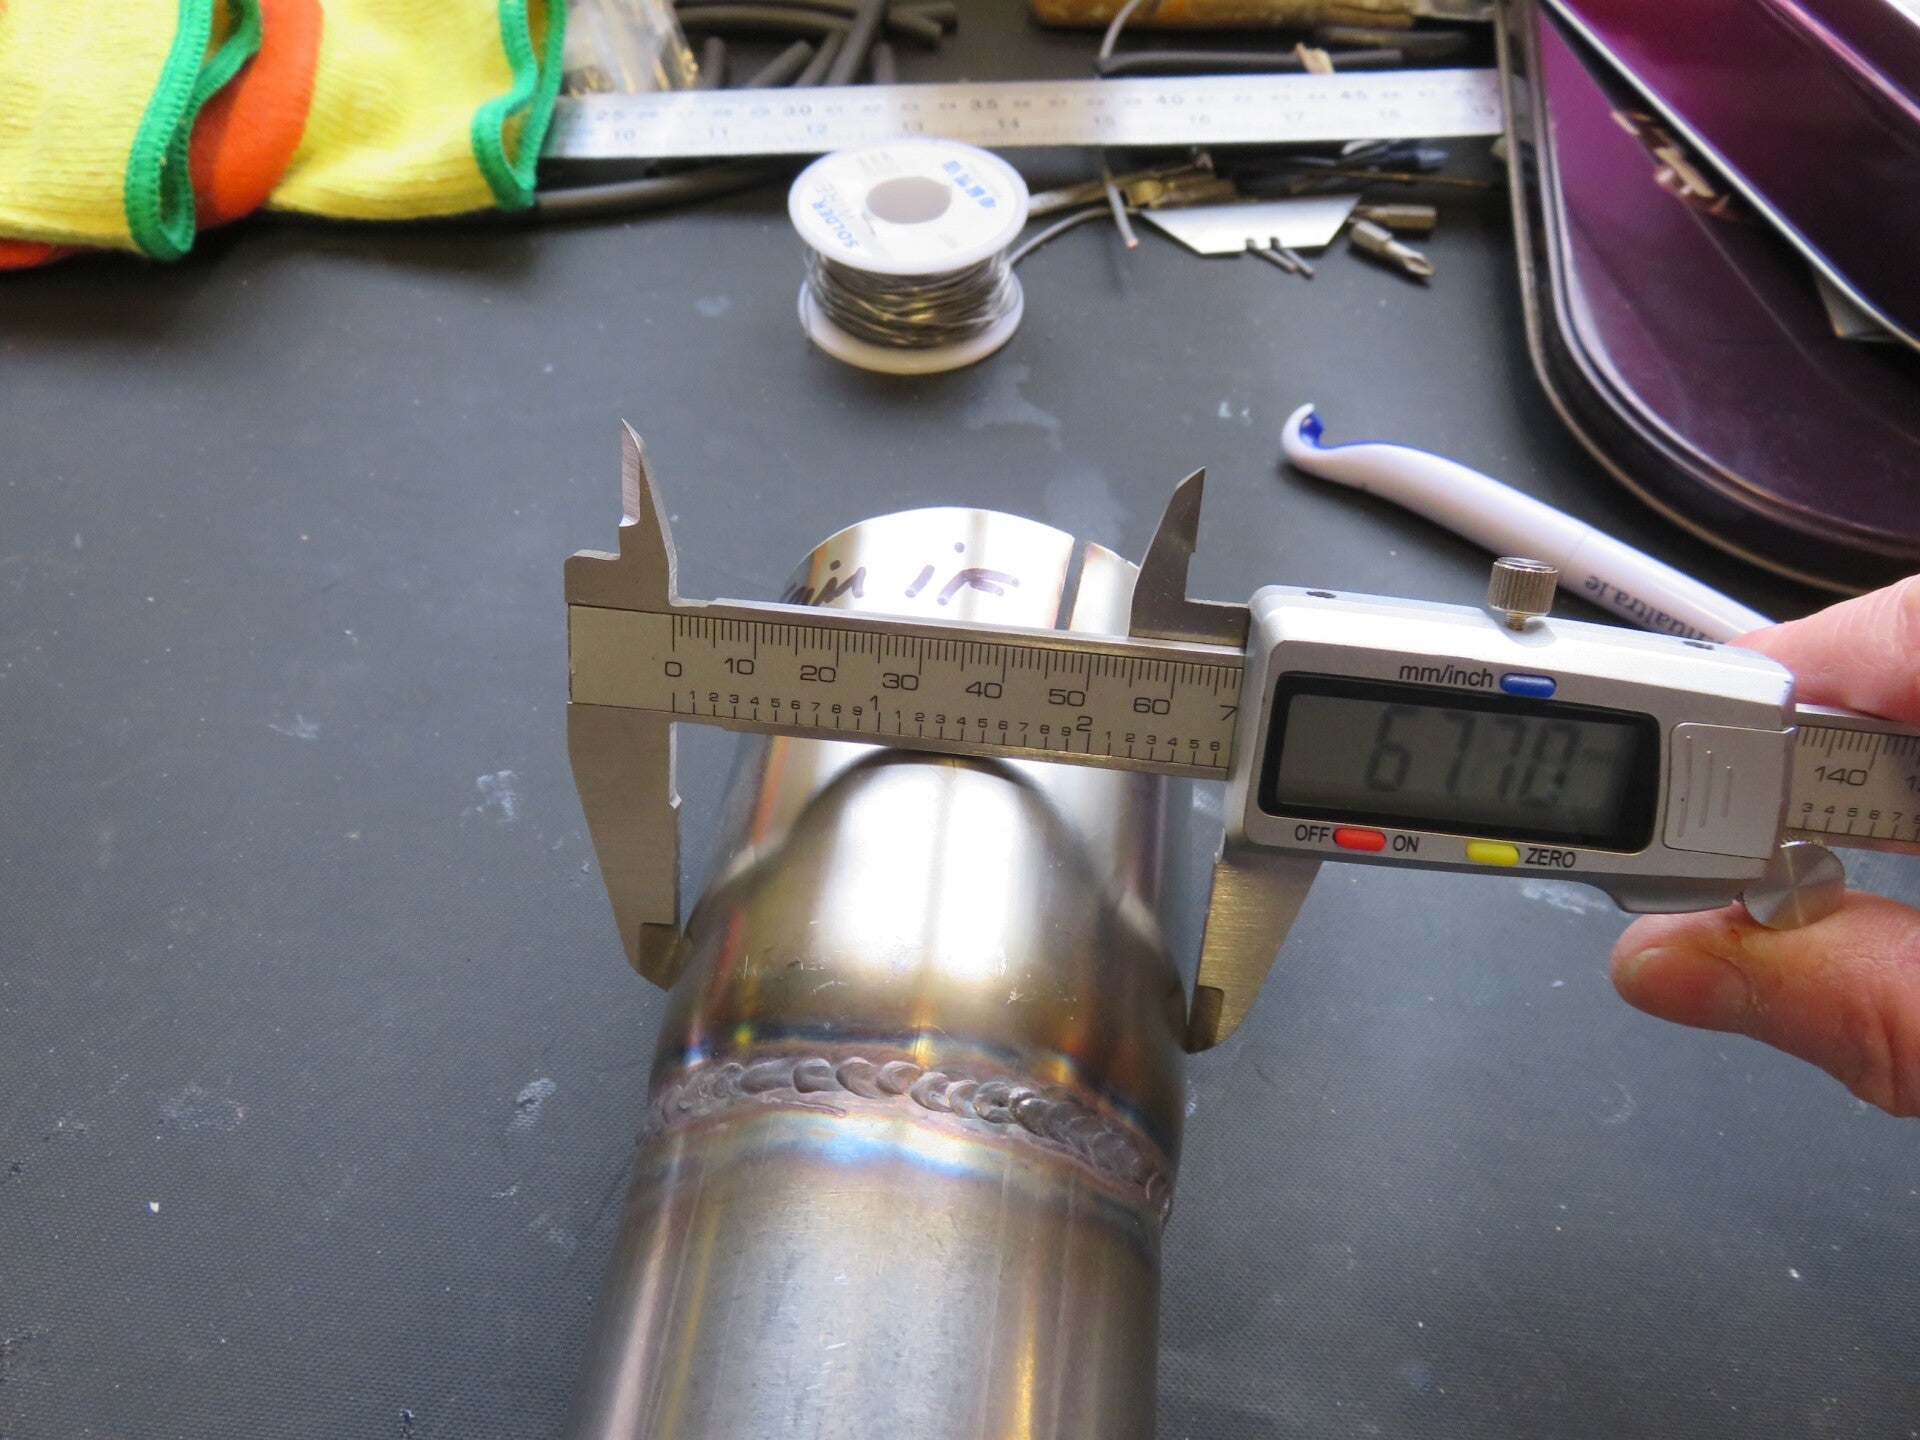
Marked up the pipe insert depths and angles, took them off (yet again) and cut them to the correct length (trimming the backends).